Saturday, December 21, 2013

Christmas cake with walnuts and brandy ... in the Thermomix


Well, I've been experimenting with Christmas cake recipe and I made this a little while ago and had very good results with them. However, my mother asked for Christmas cake with brandy instead of sherry and also with nuts in them, so I experimented a little more and came up with this recipe.

Ingredients:
  • 1kg mixed dried fruit
  • 500ml of milk (any sort)
  • 400ml of brandy
  • 375g of crushed walnuts
  • 300g self raising flour


Instructions:
  • Soak fruit in milk and brandy for at least 4 - 6 hours or overnight
  • Preheat oven to 150°C
  • Line a 25cm cake tin with baking paper and set aside
  • Place fruit mixture, nuts and flour into mixing bowl and mix for  90 sec / Reverse / Speed 3 (for more even distribution of flour, put flour in the middle between layers of fruit and nuts
  • When mixing is done, pour out into a large bowl and hand mix a little to make sure the flour is evenly distributed right through the mixture
  • Pour into prepared tin and bake for 1 hour 10 minutes or until a skewer comes out clean

This turned out very, very well. It was super easy to make and not really all that different from the first recipe. There's a little bit more flour in it and also the walnuts.
The walnuts gave this Christmas cake a very lovely texture.

This is makes up quite a large batch of batter and I was baking them in a muffin tin for single serve Christmas cakes that we could serve on Christmas Day lunch.

For single serve Christmas cakes, they only need to be in the oven for 40 minutes and they are done.

This recipe makes about 14 single serve Christmas cakes.

When you first bite into these, you get a lovely whiff of the brandy escaping from the cake and getting a lovely nose full of the brandy fumes. The cake itself is slightly drunken but not overly so.

If you want to continue to get the cakes even more drunken, you put the cakes in an air tight container, poke a few holes into them and pour more brandy, sherry, rum or any alcoholic beverage of your choice into it, over a few days, weeks or month. This will sufficiently preserve the cake and marinate it at the same time. With copious quantities of the special juice :-) the Christmas cakes will last a long time, even if you don't keep them in the fridge.

I hope you enjoy this recipe and I wish you a very Merry Christmas and Happy New Year.

© This work is copyrighted to Invest-Ex and Destiny's Fortunes Pty Ltd

Find me around SOCIAL MEDIA:
Cooking blog: http://dazinthekitchen.blogspot.com.au/
Facebook: http://www.facebook.com/dazinthekitchen
Twitter: @langshipley https://twitter.com/langshipley
Instagram: @langshipley http://instagram.com/langshipley
Pinterest: https://pinterest.com/langshipley/
Keek: http://www.keek.com/langshipley
Youtube channel: http://www.youtube.com/user/langshipley
Makeup and beauty blog: http://langshipley-deannasworld.blogspot.com.au/

Friday, December 13, 2013

A rather yummy Christmas cake ... in the Thermomix


It's getting around to the festive time of year again and my how quickly the year has zoomed past. This year, like the year before, and the year before that, I am responsible for making the dessert on Christmas Day lunch.

Previously, I've made my famous creme brulee in the Thermomix and that was very well received. In actual fact, my mom had asked for the creme brulee again but since we are traveling 2 hours to get to Christmas Day lunch, the creme brulee is not going to survive in the car for that duration so I had to think of something else to make and I landed upon Christmas cake.

Now, those of you who know me will know that I am no baker by any stretch of the imagination. In fact, I am no baker at all and I like all my baking to be simple and done in the Thermomix, as you can tell from my banana bread and zucchini bread recipe.

I, of course, immediately rang my friend Yanna and asked for a recipe.

This is what she gave me:

Ingredients:
  • 1kg mixed dried fruit
  • 620g full cream milk, white coffee or chocolate milk
  • 280g self raising flour

Instructions:
  • Soak fruit in milk for at least 4 - 6 hours
  • Preheat oven to 150°C
  • Line a 25cm cake tin with baking paper and set aside
  • Place fruit mixture and flour (put the flour in the bottom) into mixing bowl and mix for  60 sec / Reverse / Speed 3
  • Pour into prepared tin and bake for 1 hour 10 minutes or until a skewer comes out clean

Which I varied a little bit, but not by very much, because I know enough to know that baking is a lot more exact than cooking.

I added 250g of sherry and the remainder in fat free soy milk instead of 620g of full cream milk, because (1) I wanted the Christmas cake to be drunken, and (2) I'm lactose intolerant and can't have full cream milk. Plus, I soaked the fruit overnight instead of just for the few hours that the recipe requested.

I also baked them in my customary single serve muffin tin sizes, rather than a full cake tin, since I like my cakes and muffins in single serves. In the single serve sizes, the Christmas cake took 45 minutes to cook.

The cakes turned out very well and very fruity. It's kind of an odd recipe because it's like 95% fruit. It's the sort my mom really likes too cos she likes her cake with lots of fruit and very little "cake". In fact, just enough cake to hold it all together. :-)

The Boy who is not a fan of Christmas cake at all liked it, which says a lot for it since he usually cannot be convinced to eat the stuff. I will take it as a win.

This recipe made exactly 12 single serve mini Christmas cakes.

The next time, I am going to try adding nuts to the recipe and maybe a bit more flour. That would take a little bit more experimenting.

In the meantime, if I do not post again before Christmas, have a very Merry Christmas and may you have a blessed day with family and friends.


© This work is copyrighted to Invest-Ex and Destiny's Fortunes Pty Ltd


Find me around SOCIAL MEDIA:
Cooking blog: http://dazinthekitchen.blogspot.com.au/
Facebook: http://www.facebook.com/dazinthekitchen
Twitter: @langshipley https://twitter.com/langshipley
Instagram: @langshipley http://instagram.com/langshipley
Pinterest: https://pinterest.com/langshipley/
Youtube channel: http://www.youtube.com/user/langshipley
Makeup and beauty blog: http://langshipley-deannasworld.blogspot.com.au/

Sunday, December 1, 2013

Fettuccine Boscaiola ... or in this case, spiral pasta


My beloved Boy is cooking dinner tonight. He has decided that he wants to cook more and become more proficient in the kitchen, so I'm happy for him to take over cooking and meal duties now and then.

The Boy has been talking about being in the mood for a tomato based pasta dish for days, most of this week, actually, but at the last minute decided on a creamy sauce pasta instead.  He said he wanted something with ham so I thought Boscaiola, which yes, I know is made with bacon, but still .... who can complain about bacon, right?

I went onto the interwebs in search of a recipe and came up with this which sounded tasty and easy to make.

I gave it to The Boy to read over and he seems comfortable that he can tackle it without any help from me. Anyway, I'm kicking back while he is cooking, which, let me tell you, is very nice.

Here's the recipe for this particular Boscaiola, which we are making with spiral pasta instead of fettuccine, just because The Boy did not feel like fettuccine.

Ingredients:
  • 400g dried curly fettuccine pasta
  • 250g rindless bacon rashers, thinly sliced
  • 40g butter
  • 400g cup mushrooms, thinly sliced
  • 5 shallots, ends trimmed, thinly sliced
  • 425ml pouring cream
  • 30g (1/3 cup) shredded parmesan
  • 30g (1/3 cup) shredded romano
  • Parmesan (optional), extra, to serve

Instructions:
  • Cook the pasta in a large saucepan of salted boiling water until al dente. Drain.
  • Meanwhile, cook the bacon in a large non-stick frying pan over medium heat, stirring often, for 4 minutes or until golden. Use a slotted spoon to transfer to a plate.
  • Heat the butter in the frying pan. Add the mushroom and cook, stirring often, for 5 minutes or until tender and the liquid has reduced.
  • Add the pale section of the shallot and stir to combine. Stir in the bacon and cream. Simmer for 6-7 minutes or until the mixture thickens slightly. Add the parmesan and romano, and stir until well combined.
  • Add the pasta and green section of the shallot to the sauce. Season with salt and pepper and toss until well combined. Divide the pasta among serving dishes. Top with extra parmesan.

Since it was The Boy cooking, he tends to like to follow the recipe exactly when cooking for the first time ... well, most of the time really. I'm the one who improvises.

Anyway, he did follow the recipe almost exactly, but with the shallots, since we didn't have any fresh ones, just frozen ones, he just put them in towards the end to the mushrooms, bacon and cream and cooked it all together. There was no green section of the shallot to put in at the end. It all just went in with the sauce.

He also used spiral pasta rather than fettuccine. For some reason, he did not feel like fettuccine and decided on spiral pasta instead. The spiral pasta turned out great for the sauce to coat every little spiral on it.

The recipe doesn't say so, but salt and pepper to taste is important. With adding so much pasta to the sauce, it can taste a bit bland if there's not enough salt and pepper. You don't need a lot, but a pinch or two of both really helps.

The dish turned out to be very, very tasty. It made enough for 6 serves so we have plenty of leftovers for The Boy to take some to work over the coming days for lunch too.


© This work is copyrighted to Invest-Ex and Destiny's Fortunes Pty Ltd


Friday, November 22, 2013

Chickpea and goat cheese salad


We've decided on a salad again tonight since (once again) it is going to be a very hot day. I am also coming to quite enjoy those hearty salads that are meal in itself.

Once again I've gone to my "Mmmm ... salad" cookbook and have found a salad that looks like it will be rather hearty and yummy.

Here's the RECIPE for our dinner tonight:

Ingredients:
  • 1 can chickpeas drained
  • 2 spring onions finely chopped
  • 50g red peppers (capsicum) diced
  • 15ml / 1 tablespoon fresh chopped parsley
  • 100g cherry tomatoes sliced in half
  • 50g rocket
  • 30g goat cheese sliced or crumbled to serve

Dressing:
  • 1 teaspoon olive oil
  • 1 teaspoon balsamic vinegar
  • 1/2 teaspoon runny honey
  • 1 clove garlic peeled and crushed or finely chopped

Instructions:
  • Rinse the chickpeas and put into a bowl.
  • Add spring onions, red pepper, parsley and cherry tomatoes, mix well.
  • To make dressing, which together the oil, vinegar, honey and garlic and stir into the chickpeas.
  • Serve on a bed of rocket with the goat cheese sprinkled over.

I forgot to buy parsley when I went to the grocery store, so I just used the leftover coriander paste that I had from the bean and feta cheese that I made the other day.

Instead of cherry tomatoes, I used grape tomatoes just because I think grape tomatoes taste better and I like them better. :-)

Sunday, October 27, 2013

Chicken bacon and wild rice soup ... with a little Thermomix help


Last night I got home from a work week dead tired and I still had dinner to cook, fortunately for me, The Boy wanted nachos for dinner and that was easy to do. On top of that I had to decide what to cook for the weekend since we were going to be home during the weekend and needing meals both nights.

I went through my Pinterest board where I had pinned a whole bunch of stuff and came across a soup recipe that sounded good. Now, it's not exactly the season for soup here since it's supposed to be Summer though the weather has not been terribly warm. (Right now though the apartment is very warm from all the cooking I've been doing!)

Anyway, I asked The Boy what he thought of chicken bacon and wild rice soup and he thought is sounded very good and immediately suggested a lovely chardonnay that would go well with it.

Therefore, tonight, we are having soup for dinner and here's the RECIPE for it:

Ingredients:
  • 8 cups chicken stock
  • ½ cup uncooked wild rice, rinsed
  • ½ cup finely chopped green onions
  • ½ cup margarine or butter
  • ¾ cup all-purpose flour
  • ½ teaspoon salt
  • ¼ teaspoon poultry seasoning
  • ⅛ teaspoon pepper
  • 2 cups milk
  • 1½ cup cubed or shredded cooked chicken or turkey (2 chicken thigh fillets)
  • 8 slices bacon, crisply cooked and crumbled
  • 1 tablespoon chopped red capsicum
  • 2-3 tablespoons dry sherry or white wine, if desired

Instructions:
  • In a large saucepan, put in chicken stock. Add wild rice and onions. Bring to a boil. Reduce heat, cover and simmer 30-45 minutes (or until rice is tender). Once the rice is cooked, there will be some additional broth – do not drain.
  • In a medium saucepan, melt margarine, stir in flour, salt, seasoning, and pepper. Cook 1 minute, stirring constantly, until smooth and bubbly. Gradually stir in milk with the butter/flour mixture and cook until slightly thickened, stirring constantly.
  • Add this creamy mixture back into the saucepan with the rice/broth. Add remaining ingredients (chicken, bacon, capsicum, and sherry). Heat on low, stirring every once in a while, for at least a half an hour. Do not boil. The mixture will look thin, but the longer you heat the soup, the more the flavors merry and the more it will thicken. This soup is best served after gently heating for an extended period of time (even a few hours) or the next day! For extra flavor, add more poultry seasoning and/or bacon.

I was immediately daunted by the bit in the recipe that needed to make a roux and I was quite daunted by it - I'm a complete wuss when it comes to making a roux and I get very intimidated by it so thank goodness for the Thermomix. I went through my Thermomix recipes and decided to look for one that would do the roux and found one which was went something like this:

Thermomix version of creamy mixture:
  • Add margarine, flour, salt, seasoning, pepper, milk into Thermomix. Cook at 90 degrees for 12 minutes on speed 4.

Unfortunately for me, this turned out to be rather a thick roux by following the cooking instructions exactly and I was left with lumpy dough that I somehow had to smooth out into a creamy texture. To the rescue came my trusty hand blender and the whisk attachment. My mistake was putting the hand blender in without covering the pot because EVERYTHING went EVERYWHERE. What a splash it made! I'm sure that I will be cleaning up soup mixture for a long time! but the whisk did the trick and turned my soup back into a lovely, thick, creamy texture.

Now, I just need to adjust the Thermomix recipe for the creamy mixture for the next time I make this soup. I think the trick is to not let it go the whole 12 minutes but to check it for texture about 3 minutes in. (Just a little tip for those of you who have a Thermomix)

I followed the recipe pretty much exactly for the quantities and that made a lot of soup. I went with 8 cups of chicken stock when in fact, I should have gone with 6 cups of chicken stock because there's only the 2 of us eating and there's now enough soup for about 3 or 4 meals for the 2 of us. I am going to have to freeze some of the soup for future consumption, I'm thinking.

Where it said bring to boil and simmer for 30 - 45 minutes for cooking the rice, instead of simmering the soup on the stove, I cooked the soup in a cast iron pot and put the whole thing into the oven for the time recommended at 120dC to cook the rice, which worked out well as a no mess, no fuss way of simmering something. The only thing with doing it this way was there was a lot less evaporation and that also contributed to me having a lot more liquid left in the pot and hence, a lot of soup.

The soup was still a very thick, very creamy texture.

I wanted a slightly smokier flavor and something to enhance the bacon further, so I also added some smoked paprika to the soup to give it more depth and a little additional flavor on top of the chicken and bacon flavor which was the dominant flavors.

I also listened to the recipe and cooked the soup early, so it sat in the oven with the lid on, cooking at a low 90dC for several hours to get the most out of the flavor.

Other than that, the soup turned out to be very, very tasty, though with the bacon and all that chicken stock, I don't think the extra chicken seasoning and the salt was really necessary and next time I will leave it out - this means that next time I will go with 6 cups of chicken stock and no extra chicken seasoning and no salt.

© This work is copyrighted to Invest-Ex and Destiny's Fortunes Pty Ltd

Find me around SOCIAL MEDIA:
Facebook: http://www.facebook.com/dazinthekitchen
Twitter: https://twitter.com/langshipley
Instagram: langshipley
Pinterest: https://pinterest.com/langshipley/

Tuesday, August 27, 2013

Buffalo wings ... with blue cheese dressing in the Thermomix and celery sticks


I have a cousin in the US who is always bragging about his wife's buffalo wings and I love buffalo wings, so I've asked for the recipe a number of times but never got it.

Since I had a hankering for buffalo wings one night, I decided to search the interwebz and consult with some American friends to see what I could come up with for a recipe for buffalo wings.

I found a recipe that I thought would work and looked simple enough to make and decided to have at it.

Here's the RECIPE that I used:

Ingredients:
  • 36 chicken wing pieces (one wing makes 2 pieces - the "flat" and the "drum")
  • 1 tablespoon vegetable oil
  • 1 tsp salt
  • 1 cup all-purpose flour
  • 1 1/2 tablespoons white vinegar
  • 1/4 teaspoon cayenne pepper
  • 1/8 teaspoon garlic powder
  • 1/4 teaspoon Worcestershire sauce
  • 1 teaspoon Tabasco sauce
  • 1/4 teaspoon salt
  • 6 tablespoons Louisiana hot sauce (Frank's is the brand used in Buffalo)
  • 6 tablespoons unsalted butter or margarine
  • celery sticks
  • blue cheese dressing

Instructions:
  • Preheat oven to 425 degrees F.
  • If necessary, cut whole wings into two pieces. In a bowl toss the wings with the oil, and salt. Place into a large plastic shopping bag, and add the flour. Shake to coat evenly. Remove wings from the bag, shaking off excess flour, and spread out evenly on oiled foil-lined baking pan(s). Do not crowd. Bake for about 20 minutes, turn the wings over, and cook another 20 minutes, or until the wings are cooked through and browned.
  • While the wings are baking, mix all the ingredients for the sauce in a pan, and over low heat bring to a simmer, stirring occasionally, and then turn off.
  • After the wings are cooked, transfer to a large mixing bowl. Pour the sauce over the hot wings and toss with a spoon or spatula to completely coat.
  • These are always served with celery sticks and blue cheese dressing on the side.

Since I don't live in the US, getting the Frank's brand of hot sauce was a bit of a challenge even though I have now found out that it's possible to get the Frank's hot sauce from an online store that specializes in American foods. For my next batch of buffalo wings, I will make sure that I have the right hot sauce because I do think it makes a difference.

I ended up using a bottle of hot sauce that I found in the pantry that worked pretty well.

The buffalo wings turned out tasting pretty good, and my blue cheese dressing was incredible, but to me, it just seemed like I had used a whole lot of butter. When I chatted to a friend about it later, she said that she only uses 1 or 2 tablespoons of butter and me following the recipe with 6 tablespoons of butter was a heart attack just waiting to happen. Next time I will use a lot less butter!!

There were only the two of us, so I only used 10 chicken wings (but full wings, including tips) and I cut them up with the little drummettes in one piece and the wing and tip in another piece. The Boy likes the little drummettes and I like the wings and the tips. Works out well for the both of us - just like Jack Sprat and his wife! :-)

As for my blue cheese dressing, the stuff was so dang good that I wanted to eat it all up on it's own with the celery sticks. I ended up with a lot more blue cheese dressing than I needed for the meal that night, so I saved what was left for another night.

Here's the RECIPE for the blue cheese dressing, and I'm telling you - even without buffalo wings, just make the dressing to eat with salad or as a dip. It's delicious!!

Ingredients:
  • 1 cup regular mayonnaise
  • 1 cup sour cream
  • 180g blue cheese
  • 1 Tablespoon apple cide or wine vinegar
  • 1/2 teaspoon pepper
  • (optional) 2 teaspoons Worcestershire sauce
  • (optional) 1/2 teaspoon garlic powder

Instructions:
  • Crumble the blue cheese, and mix together with all other ingredients. Thin with water if desired.

Thermomix instructions:
  • Put all the ingredients in the Thermomix and blend on speed 7 until smooth. This may take between 7 and 15 seconds.

I made my blue cheese dressing in the Thermomix, but really, it's not necessary if you don't have one. A regular old blender or food processor would do the trick too. Or if you didn't have any of those, just crumble the blue cheese like it says in the recipe and just mash it all around with the fork or whisk with the other ingredients. That works just as well too.

Happy munching!!


© This work is copyrighted to Invest-Ex and Destiny's Fortunes Pty Ltd

Find me around SOCIAL MEDIA:
Cooking blog: http://dazinthekitchen.blogspot.com.au/
Facebook: http://www.facebook.com/dazinthekitchen
Twitter: @langshipley https://twitter.com/langshipley
Instagram: @langshipley http://instagram.com/langshipley
Pinterest: https://pinterest.com/langshipley/
Keek: http://www.keek.com/langshipley
Youtube channel: http://www.youtube.com/user/langshipley
Makeup and beauty blog: http://langshipley-deannasworld.blogspot.com.au/

Monday, August 12, 2013

A simple but delicious chicken Caesar salad


Small aside: I wrote this post in the Summer, but I'm just posting it now. Somehow, I failed to post it when it was written. It's Winter here right now!!

I'm a huge fan of the chicken Caesar salad. When I am not sure what I want to eat when I'm out for lunch and it's a warm day, this salad is always a tasty option. Of course, the quality and taste varies from place to place, but for the most part, I enjoy it a great deal.

Last night was hot, hot, hot, a nasty 37 degrees C and The House was sizzling. We had the AC on but couldn't bring ourselves to do much cooking that involved heat, either from the stove or the oven.

We decided on a chicken Caesar salad since it was quick and easy.

Here's my RECIPE for this delicious and simple salad:

Ingredients:
  • 2 chicken thigh fillets of cooked chicken cut into bite size pieces, seasoned with Masterfoods Season All
  • 4 tablespoons Caesar salad dressing (we use Cardini's)
  • 120g Lettuce salad mix or cos lettuce
  • Garlic salt (my not-so-secret ingredient)
  • 1 handful shredded cheese (I just use the Coles Pizza cheese mix)
  • 1 hard boiled egg quartered
  • Croutons (optional)

Instructions:
  • Place a layer of salad mix in the bottom of a large salad or mixing bowl, then sprinkle a small amount of garlic salt over the top of the lettuce.
  • Repeat until all the salad mix is in the bowl.
  • Drizzle some of the Caesar dressing on top of the salad mix - I use about 4 tablespoons for the two of us, but you can use whatever amount you like, depending on how much dressing you want in your salad.
  • Sprinkle the shredded cheese on top of the dressing and mixed everything together.
  • Top the mixed salad with the chicken pieces and serve up salad onto plates
  • Once the Caesar salad is in the plates you are serving with, place the quartered hard boiled eggs on top of the salad.
  • Enjoy!

This recipe serves two people for dinner with nothing else to accompany, so it's quite large and filling.

When I am more inclined, I cook my own chicken thigh fillets but last night, The Boy decided that we just buy a roast BBQ chicken from Coles so that we could have the chicken for the salad and then also for sandwiches and eating as cold meats to accompany an antipasto dish. I actually really do enjoy the Coles BBQ chicken since they are quite tasty and still fresh and hot when you buy them. Usually, when we buy them, I bring them home and take the meat off the bones - breast, drumstick and thigh. I also take all the other meat around the chicken carcass off and put them together for the salad and anything else I want to use them for. Then I enjoy nibbling on the bones, the chicken wings and the stuffing as a small snack.

I have in the past made my own salad dressing but last night we decided to just run to the store and get a pre-made salad dressing. Cardini's is The Boy's favorite even though it also has the most calories, but really, it's the tastiest. The other one that we like is the Paul Newman Caesar dressing, either the Newman's Own Caesar Dressing or the creamy version.

The garlic salt makes a huge difference to the taste of the salad. Don't use a lot, but just a little sprinkle between the layers of lettuce as you place it into the bowl for mixing adds a lot of depth to the flavor of the salad.

An alternative to the shredded cheese is also just straight shredded Parmesan cheese - something like this, though it doesn't need to be this exact brand. Just make sure it is shredded so you get texture and not the powdered or finely grated stuff for pasta.

Since there are the two of us, we each got two quarters each for the hard boiled egg but you can decide how much egg you like.

Notice I don't have croutons in my recipe, but that's entirely up to you. I don't like croutons, so for me, I leave them out. If you like them, of course, include them.

I hope you enjoy this very simple salad recipe. It's one of my favorites.


© This work is copyrighted to Invest-Ex and Destiny's Fortunes Pty Ltd


Find me around SOCIAL MEDIA:
Cooking blog: http://dazinthekitchen.blogspot.com.au/
Facebook: http://www.facebook.com/dazinthekitchen
Twitter: @langshipley https://twitter.com/langshipley
Instagram: @langshipley http://instagram.com/langshipley
Pinterest: https://pinterest.com/langshipley/
Keek: http://www.keek.com/langshipley
Youtube channel: http://www.youtube.com/user/langshipley
Makeup and beauty blog: http://langshipley-deannasworld.blogspot.com.au/


Sunday, July 28, 2013

Slow cooker beef with mushrooms and barley


On Sundays, I like to cook a nice meal for dinner and have leftovers for the week, so the dish needs to be something which leftovers will work. Some dishes just don't lend itself well to leftovers.

Anyway, this Sunday, I really, really wanted to do a slow cook meal and I thought beef would be nice, since The Boy likes beef and because I don't eat much red meat, he doesn't get much beef at home.

I pulled out my slow cooker cookbook, Essentials of Slow Cooking. I actually was looking for a different cookbook but couldn't find it. I think we may have taken it up to The House and left it there accidentally, but now we won't know till we get up there again and check.

I flipped through the beef section of the cookbook and found the Beef with Mushrooms and Barley recipe and decided that that was what I wanted to make for tonight's dinner. I like mushrooms and I like barley.

Here's the recipe:

Ingredients:
  • 30g dried mushrooms such as porcini
  • 2 tablespoons of unsalted butter
  • 1kg beed chuck, cut into 2 inch / 5cm pieces
  • 2 yellow onions, finely chopped
  • 2 cloves of garlic, minced
  • 500g fresh mushrooms, preferably cremini, brushed clean, stems removed and caps thinly sliced
  • 2 cups beef broth / stock
  • 1/2 cup pearl barley
  • 3 carrots, finely chopped
  • 2 parsnips, peeled and finely chopped
  • salt and pepper to taste
  • 2 tablespoons chopped fresh dill

Instructions:
  • Put the dried mushrooms in a bowl and add 2 cups boiling water. Let soak for 20 minutes. Strain through a fine mesh sieve lined with a double layer of cheesecloth (muslin) placed over a bowl. Rinse the mushrooms under cold running water and finely chop. Set the mushrooms and soaking liquid aside.
  • In a large frying pan over medium-high heat, melt the butter. Working in batches if necessary, add the beef and cook, turning frequently, until browned on all sides, about 10 minutes. Remove from the pan and set aside.
  • Add the onion to the pan and saute over medium-high heat until softened, 3 - 5 minutes. Add the garlic and cook for 1 minute. Stir in the rehydrated mushrooms. Add the fresh mushrooms and saute over medium heat until they start to brown and release their liquid, about 5 minutes. Stir in the mushrom soaking liquid and broth.
  • OVEN: preheat oven to 300°F (150°C). Transfer the beef to a Dutch oven. Add the mushroom mixture and stir to combine. Cover and cook until the beef is tender, about 2 hours. Uncover and stir in the barley and 1 cup of water. Cover and cook for 1 hour. Uncover and stir in carrots and parsnips. Cover and cook until the beef and barley are tender, about 30 minutes longer. Season to taste with salt and pepper.
  • SLOW COOKER: Transfer the beef to a slow cooker. Add the mushroom mixture and stir to combine with the rest of the ingredients. Cover and cook for 3 hours on low heat setting. Uncover and stir in barley and 1/2 cup water. Cover and cook for 2 hours. Uncover and stir in carrots and parsnips. Cover and book until the beef and barley are tender, about 1 hour longer. Season to taste with salt and pepper.
  • Spoon the stew into warmed bowls, garnish with the dill and serve at once.

Well, for starters, as usual, I did a few of things differently here, just because I didn't have some things and didn't want to get them.

I did not have any dried mushrooms, so I skipped that. And because of that, I didn't have the 2 cups of mushroom water, so I used 4 cups of beef stock instead.

I bought two parsnips like the recipe said, but the parsnips I got were HUGE, so I'm going to have a lot of parsnips in the stew. :-)

Additionally, the recipe said finely chop the carrots and parsnips, but I didn't want it too fine and look like mush after it cooked down, so I went with little chunks that were just a touch larger than a pea in size. That worked out really well.

I also used a ton of garlic, just because I love garlic. I think I must have used 6 or 8 cloves of garlic instead of the recommended 2. Don't feel you need to do that at all.

With the beef, I coated them in some salt, pepper and flour, before I browned them, because I wanted the flour in the stock to thicken up the stock a bit into a nice sauce.

When I put everything into the pot, before going into the oven, I had the pot on the stove and brought it to a boil before putting it into the oven. I used the oven to slow cook as I do not have a slow cooker (nor do I have the room in my tiny kitchen for one!!)

Once I put the parsnips and carrots in, that took up a lot of space in the pot, but it also meant that there was not enough sauce / juice left and the sauce got quite thick while slow cooking, so I added another 2 more cups of beef stock (or just enough to cover the vegetables) and brought it back to a boil on the stove before putting it back into the oven to cook again.

On the last round of cooking while the vegetables where still in the pot, I cooked it in the oven for another hour, so in total, I cooked it for 2 hours, then 1 hour and then another hour. I always brought the pot back to the boil on the stove before putting it back in the oven each time.

The apartment smelled amazing the whole time that the stew was cooking!!

This stew turned out to be very delicious. The Boy loved it. In fact, he had been sneaking tastes in between each time I took the pot out of the oven. :-)

This is a fabulous winter dish. I served it with a side of quinoa and a side salad. The quinoa soaked up the sauce from the stew and was just delicious!!

© This work is copyrighted to Invest-Ex and Destiny's Fortunes Pty Ltd

Find me around SOCIAL MEDIA:
Cooking blog: http://dazinthekitchen.blogspot.com.au/
Facebook: http://www.facebook.com/dazinthekitchen
Twitter: @langshipley https://twitter.com/langshipley
Instagram: @langshipley http://instagram.com/langshipley
Pinterest: https://pinterest.com/langshipley/
Keek: http://www.keek.com/langshipley
Youtube channel: http://www.youtube.com/user/langshipley
Makeup and beauty blog: http://langshipley-deannasworld.blogspot.com.au/

Tuesday, July 9, 2013

Turkish-style scrambled eggs


I don't know if I've ever mentioned but The Boy is an absolute wiz when it comes to breakfast foods. He makes amazing pancakes, waffles and this incredible potato and chorizo dish for breakfast.


He's decided that he is going to try this new recipe he found in "A Gluten Free Taste of Turkey" by Sibel Hodge, which was Turkish-style scrambled eggs.

I love scrambled eggs. When I have plain scrambled eggs, I usually just load it up with ketchup and I love that combination of scrambled eggs and ketchup though The Boy things it's revolting. Heh! I like it!


Anyhow, here's the RECIPE for these scrambled eggs:

Ingredients:
  • 2 spring onion (shallots) - diced
  • 1 green pepper (capsicum) - diced
  • 2 tomatoes - peeled and diced
  • 4 eggs beaten with salt and pepper to taste
  • 1/2 cup of Turkish beyaz peynir cheese or feta cheese
  • 1 teaspoon dried chili flakes (optional)
  • 1 tablespoon olive oil for frying
  • Oregano and paprika for garnish

Instructions:
  • Fry onion and pepper in frying pan until soft and golden. Then add tomato into pan and cook for a few more minutes.
  • Pour in egg mixture and feta and stir continuously until it becomes a nice firm scrambled egg consistency.
  • Garnish and serve hot!

This serves two people but seriously, I could double the recipe and still eat it all. It's so good!!!

We only used 1 tomato because that was all that we had in the fridge and that was already plenty of tomato. I think from now on 1 tomato is enough.


We, of course, used the optional chili flakes because we like our chili and on top of that, we seasoned liberally with Tabasco sauce. I was experimenting on a new Habanero Tabasco sauce that we just got, so I had half my eggs with regular Tabasco sauce and half with the Habanero Tabasco sauce. I think the regular Tabasco sauce worked better.

Anyway, I highly, highly recommend this recipe for an alternative to regular scrambled eggs. Incredibly tasty!

© This work is copyrighted to Invest-Ex and Destiny's Fortunes Pty Ltd

Find me around SOCIAL MEDIA:
Facebook: http://www.facebook.com/dazinthekitchen
Twitter: https://twitter.com/langshipley
Instagram: langshipley
Pinterest: https://pinterest.com/langshipley/

Tuesday, June 11, 2013

Turkish prawn and chili pasta


The Boy has decided that he would like to learn how to cook pasta and tonight he's picked this recipe out of "A Gluten Free Taste of Turkey" by Sibel Hodge. Of course, this also means that he is the one doing the cooking with a few helpful hints from me.

He's never cooked pasta before so he doesn't actually know how to cook al dente pasta, which is super easy really - boil water, add salt and oil (some people say the oil isn't necessary but I like to add it only because it means that the pasta doesn't stick together as much) and then when the water is boiled put in pasta and cover the pot with a small gap to let steam out. Boil the pasta for EXACTLY 8 minutes and there you have it, al dente pasta every time.

Tonight, he's picked a prawn and chili pasta dish which is somewhat different from my garlic prawns with spaghetti dish. In Turkish, this dish is called "Aci biberli Sarimsakli Karides Makarna" to which the pronunciation, I'm certain that I would butcher if I had to say it out loud. I'm looking forward to trying it.

This would be our 3rd recipe out of this cookbook and the recipe looks simple yet delicious.

Here's the RECIPE for the dish:

Ingredients:
  • 115g gluten free pasta
  • 4 cloves of garlic - crushed and chopped
  • 1 cup of small prawns or approx 12 king prawns
  • 2 - 4 spring onions - sliced
  • 1/2 to 1 teaspoon fresh chili or dried chili flakes
  • 3 - 4 tablespoons olive oil
  • Salt to taste

Instructions:
  • Cook the pasta until it's soft (see above for al dente instructions!).
  • In the meantime, fry the garlic and spring onions in olive oil until cooked and soft.
  • Add chili flakes and prawns and continue cooking. Turn prawns over to make sure both sides are cooked.
  • Turn down to a low heat and cover with a lid to infuse the flavors for a few minutes.
  • Drain the pasta, add into prawn mixture in frying pan and add more olive oil and salt to flavor.
  • Toss the pasta with the prawn mixture until evenly mixed.
  • Serve!

This recipe will serve 2 people.

© This work is copyrighted to Invest-Ex and Destiny's Fortunes Pty Ltd

Find me around SOCIAL MEDIA:
Facebook: http://www.facebook.com/dazinthekitchen
Twitter: https://twitter.com/langshipley
Instagram: langshipley
Pinterest: https://pinterest.com/langshipley/

Saturday, May 25, 2013

Zucchini soup ... in the Thermomix


Continuing my adventures of the ginormous zucchini, I used the remained of the zucchini after the zucchini bread to make zucchini soup for dinner. Basically, it's just a large pot of creamy vegetable soup - very healthy, if you leave out the butter in the recipe, which I did not. :-)


This was a super easy recipe and I found it here.

Here's what the RECIPE looks like:

Ingredients:
  • 1kg zucchini sliced
  • 2 medium onions, chopped
  • 2 medium potatoes, cubed
  • 2 large carrots, diced
  • 50g butter
  • 4 cups chicken stock
  • 1 teaspoon salt
  • 1 teaspoon pepper

Instructions:
  • Melt butter in large stock pot
  • Add all vegetables. Coat vegetables with butter stirring constantly
  • Add salt and pepper, stir to combine
  • Add chicken stock. Simmer until vegetables are soft
  • Cool slightly. Blend until smooth

Note:
  • Blend with a stick blender until smooth and then add a dollop of cream or sour cream to serve. The cream is optional.

I did change up the vegetables a little bit, just based on what I had in the fridge. I had part of a green capsicum left that I used up and instead of 2 medium potatoes, I used 4 small potatoes instead, also because that was what I had.

I decided to simplify my job even more by doing all my chopping in the Thermomix. I just put each vegetable into the Thermomix and cut it at speed 5 for about 3 seconds. I wanted them chunky, so I didn't cut for too long, I didn't want it to turn into mush.

After chopping everything in the Thermomix, I just followed the recipe and cooked it the way the recipe said, but added a step or two.

I coated the vegetables (and there were a LOT of vegetables) with the butter in the pot, and then added an additional step - I covered the vegetables and sweated them in the spot, stirring ocassionally for about 15 minutes. This browned the base a little and really got the flavor out of the vegetables. It smelled so good.

After I sweated the vegetables, I added the stock and brought it to a boil. Once boiling, I put the whole pot into the oven at 120 degrees C to simmer for 15 minutes.

Once that was done, I took the soup out and blended it with the stick blender until it was creamy and smooth.

The soup turned out to be very tasty and very very good.


© This work is copyrighted to Invest-Ex and Destiny's Fortunes Pty Ltd

Find me around SOCIAL MEDIA:
Facebook: http://www.facebook.com/dazinthekitchen
Twitter: https://twitter.com/langshipley
Instagram: langshipley
Pinterest: https://pinterest.com/langshipley/

Sunday, April 21, 2013

Zucchini bread ... in the Thermomix


I was given a HUGE zucchini by my boss recently and decided that I would make some zucchini bread and zucchini soup out of it. There was so much zucchini that it really was a several recipe thing to get through it all. The zucchini bread, I could take in to work and let the boys have some as well.


I have never made zucchini bread before, so I decided to look up the interwebs for a recipe that was easy to follow and "Deanna proof" meaning "easy for dumb people who can't bake to make". :-)


I found this recipe and thought it looked straightforward enough to follow. And to make it even simpler for myself, I had my friend convert it to a Thermomix recipe for me.

Here is what the RECIPE that I used looked like:


Ingredients:
  • 3 eggs
  • 235 ml vegetable oil
  • 400g white sugar (if you like it sweet)
  • 225g grated zucchini
  • 2 teaspoons vanilla essence
  • 375g plain flour
  • 1 heaped teaspoon ground cinnamon
  • 1 teaspoon baking powder
  • 1 teaspoon salt
  • 1/3rd cup chopped walnuts

Instructions:
  • Preheat oven to 165 degrees . Grease two 20x10cm loaf tins with butter.
  • Chop up walnuts in Thermomix, spped 6, 3 - 5 seconds, remove
  • Chop up zucchini in Thermomix, speed 5, 2 seconds, remove
  • In Thermomix, beat eggs until light and frothy, speed 6, 3 - 5 seconds
  • Mix in oil and sugar. Stir in zucchini and vanilla. Reverse speed 6, 3 - 5 seconds
  • Combine flour, cinnamon, soda, baking powder, salt and nuts. Reverse speed 6, 3 - 5 seconds
  • Make sure everything is mixed properly, if not go again, reverse speed 6, 3 - 5 seconds
  • Divide batter into prepared tins.
  • Bake for 60 to 70 minutes, or until done.

My measurement of the walnuts were a little less accurate and I used 1/2 cup of walnuts instead of 1/3 cup of walnuts. Other than that, I pretty much followed the recipe exactly. (I have learned that with baking, exactness is a virtue!)

I also cooked mine in a muffin tray so that they were individual zucchini bread muffins. I find those easier to store and eat. I cooked them in the oven at 160 degrees C for 40 minutes instead of the recommended 60 - 70 minutes for the loaf.

And the verdict?? OMG!!! The zucchini bread was delicious. I'm definitely making this again, even more often than the banana bread muffins that I make, which we love. The Boy even said that this was better than the banana bread muffins.

© This work is copyrighted to Invest-Ex and Destiny's Fortunes Pty Ltd

Find me around SOCIAL MEDIA:
Facebook: http://www.facebook.com/dazinthekitchen
Twitter: https://twitter.com/langshipley
Instagram: langshipley
Pinterest: https://pinterest.com/langshipley/


Sunday, April 14, 2013

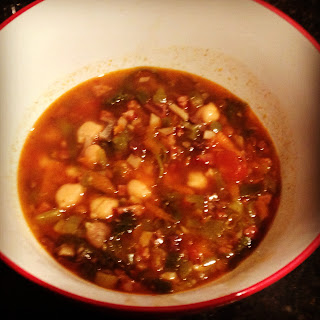
Spanish chorizo and chickpea soup


It's getting into the cooler weather for us now and so I'm thinking that we will do a lot more soups for meals.

The Boy likes thick, hearty soups with lots of stuff in it or thick, creamy soups. I made one recently which was a huge hit, the wild rice and mushroom soup, which is just delicious beyond words.

Tonight, The Boy decided that he would cook and he picked a soup recipe out of the A Gluten Free Soup Opera by Sibel Hodge. He picked out the Spanish chorizo and chickpea soup. I didn't really help much at all besides helping him prep the stock and turning on the oven (he still hasn't figured that one out yet! :-) ). I'm so proud of The Boy for doing all of this himself.


So here's the RECIPE for the soup:

Ingredients:
  • 100 gr of gluten free chorizo – chopped
  • 1 x 400 gr can of chickpeas – drained and rinsed
  • 3 large spring onions – sliced
  • 2 cloves of garlic – crushed and chopped
  • 1 ½ pints (approx. 3 ¾ cups) of gluten free chicken stock/vegetable stock/water
  • 1 large carrot – grated
  • 3 – 4 mushrooms – diced
  • 1 green cubranelle pepper (or regular bell pepper) – diced
  • 2 cups of rocket (arugula) – chopped
  • 3 tablespoons of red lentils
  • 2 large tomatoes – peeled and diced
  • ¼ – ½ teaspoon of chilli flakes (optional)
  • 2 tablespoons of paprika
  • 1 teaspoon of smoked paprika (optional)
  • 2 tablespoons of black olives – deseeded and chopped (optional)
  • Salt and pepper to taste
  • Olive oil for frying

Garnish:
  • Hard boiled egg – chopped

Instructions:
  • Fry the onions, peppers, and mushrooms until soft
  • Add the other ingredients and bring to the boil, then simmer for 35 – 45 minutes
  • Top with the chopped egg and serve

Serves 4 – 6

The recipe asks for gluten free ingredients, but we did not use any. We just used regular old ingredients since neither of us need to be gluten free.

The Boy used all the ingredients, even the optional ones, except with the red lentils, he just used regular (I think, yellow) lentils, since the store did not have any red lentils in a can.

The only thing that we didn't do was the hard boiled egg for garnish. The Boy didn't get round to boiling the egg and since it was for garnish, we decided that we could live without it.

For the simmering for 35 - 45 minutes part, rather than have it simmer on the stove, which can be a bit dicey if not watched carefully, I turned the oven to 120dC and brought the soup to a full boil. Once it was boiling, I had The Boy put the whole pot of soup (make sure your pot is oven-proof!!) into the oven and let it simmer that way for the time. This is an excellent way of simmering or slow cooking anything. Very controlled, no mess, no fuss.

The soup turned out to be very, very tasty. It is a brothy soup with lots and lots of bits and pieces in it, so it makes for quite a filling and hearty soup. Because of the chili and the smoked paprika, the flavor it very full and slightly spicy. If you don't like your soup to be very spicy, ease off on the chili.

For us, this made exactly 4 serves. 2 for dinner and 2 to be saved for later in the week.

Definitely something that we will make again.


© This work is copyrighted to Invest-Ex and Destiny's Fortunes Pty Ltd

Find me around SOCIAL MEDIA:
Facebook: http://www.facebook.com/dazinthekitchen
Twitter: https://twitter.com/langshipley
Instagram: langshipley
Pinterest: https://pinterest.com/langshipley/

Sunday, March 24, 2013

Strawberry and raspberry sorbet ... in the Thermomix


It's been particularly warm the last few days and the day before yesterday was downright sizzling with temps reaching about 38dC (over 100dF).

We are keeping cool by having salads and cold treats from the fridge and freezer.

We decided to make some sorbet so that we could enjoy a cold, cold treat in the evening.

This is my strawberry and raspberry sorbet RECIPE, which I've lifted from the standard Thermomix Everyday Cookbook and then modified to suit my taste.

Ingredients:
  • 150g sugar
  • 500g strawberries
  • 500g frozen raspberries
  • 200g ice
  • 1 egg white

Instructions:
  • Put sugar into Thermomix and mill for 10 seconds on speed 9.
  • Add strawberries, half the frozen raspberries and egg white into bowl. Slowly turn the speed dial to speed 10 and blend for up to 30 seconds until everything is smooth.
  • Add the remaining frozen raspberries and the ice. Use the spatula to assist in incorporating the ice into the first batch of sorbet. Slowly turn the speed dial to speed 10 and blend for 30 seconds.
  • Use a spatula to mix the sorbet around and blend at speed 10 for another 30 seconds until the sorbet is smooth and the consistency you like it to be.

When blending the second time with the ice, sometimes the blades can get stuck as air pockets get created in the bowl. If this happens, stop blending, open the top and use the spatula to mix the sorbet and ice around till it settles and the air pockets are not there anymore, then continue blending as usual.

This makes enough for 2 large takeaway containers of sorbet.

This tastes absolutely delicious and very berry-ish but not too tart.

It's also a great dessert when served on a bed of dark chocolate ganache.

© This work is copyrighted to Invest-Ex and Destiny's Fortunes Pty Ltd

Find me around SOCIAL MEDIA:
Facebook: http://www.facebook.com/dazinthekitchen
Twitter: https://twitter.com/langshipley
Instagram: langshipley
Pinterest: https://pinterest.com/langshipley/

Sunday, March 17, 2013

Mushroom and wild rice soup


Last weekend, we went out walking - The Boy and I, and we decided ... okay, well, I decided that I wanted to stop at the fresh food markets. We went through and bought a whole heap of fresh fruit and vegetables. Among the stuff we bought were some amazing fresh mushrooms. The guy at the mushroom stall said that the mushrooms would keep up to 2 weeks refrigerated but we decided to use most of it the first night and made a lovely mushroom risotto. There was still plenty of mushrooms left, and The Boy said he wanted a mushroom and wild rice soup.

This weekend, we headed up to The House and brought the mushrooms with us and tonight I'm making mushroom and wild rice soup. The recipe which I found here, called for 1/2 a pound of mushrooms, so I bought another small package of fresh Swiss Brown mushrooms to add to the mix that I already had.

Here's the RECIPE I used for the soup, which I found on the interwebs. (However did we manage before Google?):

Ingredients: Makes about 6 servings
  • 1 cup wild rice
  • 1 large onion, diced
  • 4 celery stalks, diced
  • 1 pound mushrooms, diced
  • 2 cloves garlic, minced
  • 1 teaspoon oregano
  • 3 tablespoons all-purpose flour
  • 1 cup white wine
  • 1 bay leaf
  • 1-2 cheese rinds (optional)
  • 4 cups vegetable or chicken stock
  • 2 teaspoons rosemary
  • 1 cup whole milk or cream
  • 1 tablespoon cider vinegar
  • 2 teaspoons salt, divided
Instructions:
  • Bring a pot of water to a boil. Add the wild rice and one teaspoon of salt, and reduce to a simmer. Cook for 40-50 minutes, until the rice has burst open and tastes tender. Drain, reserving the cooking liquid to use as stock if desired.
  • While the rice cooks, prepare the rest of the soup. Warm a teaspoon of oil in a dutch oven or stock pot over medium-high heat. Add the onions and celery with a half teaspoon of salt, and cook until the onions have softened and turned translucent, 3-5 minutes. Turn the heat down to medium and stir in the mushrooms and another half teaspoon of salt. Cook until the mushrooms have released all their liquid and turned dark brown, 15-20 minutes. Don't skimp on this step! This is where the soup gets its deep, rich flavor.
  • Add the garlic and oregano, and cook until fragrant, about 30 seconds. Sprinkle the flour over the veggies and stir until the vegetables become sticky and there is no more visible dry flour. Increase the heat again to medium-high and pour in the wine. Stir and scrape the brown bits from the bottom of the pan. Continue simmering until the wine has reduced and thickened a bit.
  • Add the bay leaf, cheese rinds, and stock. Bring to a boil, then reduce to a simmer. Simmer for 20 minutes to meld the flavors. Add the rosemary, milk, and wild rice. Simmer for another 10-15 minutes, until the soup has thickened to your liking. Stir in the cider vinegar. Taste and add more salt or vinegar to taste.
  • Leftovers will keep refrigerated for up to a week.

I didn't have cider vinegar, so I used white wine vinegar instead, but other than that, I pretty much followed the recipe exactly ... except for the fact that I used maybe 5 cloves of garlic rather than the 2 it asked for.

I also used the water that boiled the rice for the soup rather than throwing it out.

Oh! and I didn't have any cheese rind, so I left that out and I also used chicken stock rather than vegetable stock since I didn't have any of that, so that is what I used instead.

... So maybe I should take back the bit where I say I pretty much followed the recipe exactly ... because ... um, I didn't. :-)

The soup turned out to be very rich and creamy. Simply delicious.

© This work is copyrighted to Invest-Ex and Destiny's Fortunes Pty Ltd

Find me around SOCIAL MEDIA:
Facebook: http://www.facebook.com/dazinthekitchen
Twitter: https://twitter.com/langshipley
Instagram: langshipley
Pinterest: https://pinterest.com/langshipley/

Saturday, March 9, 2013

Mango and banana sorbet ... in the Thermomix


Mangoes are in season right now and we have been buying them by the boxful because we love them. Usually, I slice them up and freeze them and then it's like eating a frozen mango popsicle which is very yummy on a hot day as a snack.

I bought some mangoes about a week ago but decided that I would make some mango sorbet instead.

Today, I finally dragged the mangoes out of the fridge and with The Boy's help cut them up for making sorbet. We also had an overripe banana sitting around and decided to throw that into the mix as well. It's not an exact science!

The Boy has been wanting to learn how to use the Thermomix for a while and we thought that making the sorbet would be a good start for him. It is a fairly easy and straight forward process.


Here's the RECIPE for our mango and banana sorbet:

Ingredients:

Instructions:
  • Place the mangoes, ripe banana, icing sugar and egg white into the Thermomix bowl. Add 1 package of the Creative Gourmet Smoothie Cubes in mango and banana into the bowl as well.
  • Blend on speed 10 for 30 seconds.
  • Put the other package of the Creative Gourmet Smoothie Cubes in mango and banana into the bowl as well as the ice cubes and blend again on speed 10 for 30 seconds.
  • Check the sorbet and smooth any sorbet that has puffed up above the blade and created an air pocket back into the bowl.
  • Then blend again on speed 10 for another 30 seconds. This will ensure that that ice cubes are completely gone and the sorbet is super smooth.

This made a really creamy and tasty sorbet. The banana really smoothed out the texture of the sorbet and made it very delicious. I wanted to just eat the whole tub there and then. As it were, I took a few spoonfuls after we put them into containers to go into the freezer. In fact, it was so good that The Boy while licking out the Thermomix bowl forgot to offer me some and I had to ask if he was going to share. :-)

It's a pity that mangoes are only in season in the summer time, but for sure, whenever it's summer, we will be making this dessert.

I definitely recommend this recipe.


© This work is copyrighted to Invest-Ex and Destiny's Fortunes Pty Ltd

Find me around SOCIAL MEDIA:
Facebook: http://www.facebook.com/dazinthekitchen
Twitter: https://twitter.com/langshipley
Instagram: langshipley
Pinterest: https://pinterest.com/langshipley/