Monday, January 27, 2014

Chicken, tarragon and mushroom pie


The Boy has decided that he would do all the cooking for tonight's dinner again and has picked a pie recipe. He's going to have me on stand by to help with any questions but has decided that he will try as much as possible to do it all himself. He's very, very excited about it.


He has found a recipe for a chicken, tarragon and mushroom pie from the cook book The Chef behind the bar by Scott Thomas.


Here's the RECIPE for the pie(s):

Ingredients:
Chicken, tarragon and mushroom filling:
  • 500g boned and skinless chicken thigh meat, diced
  • Salt and pepper to taste
  • Plain flour
  • 1 onion, diced
  • 1 carrot, diced
  • 1 stick of celery, diced
  • 1 bay leaf
  • 3 sprigs of thyme
  • 100g button mushrooms, cut in quarters
  • 100ml dry white wine
  • Chicken stock
  • Double cream
  • Small bunch of tarragon, picked and chopped

Pie crust:
  • 1 egg
  • Splash of milk
  • Puff pastry*

* Making puff pastry is satisfying but time-consuming. For home cooking, buy from a local baker or the best quality from a supermarket.
Instructions:
Chicken, tarragon and mushroom filling:
  • Season the chicken with salt and pepper. Toss in the flour, shaking off any excess.
  • Fry chicken in small batches until well colored (turned brown).
  • Saute the onion, carrot and celery until soft. Add the mushrooms and cook for another 5 minutes. Add the bay leaf, thyme and white wine and cook until reduced.
  • Add the chicken and enough chicken stock to just cover. (about 500ml of chicken stock).
  • Cook at a gentle simmer for around an hour, stirring occasionally, until the chicken is cooked and tender. Finish with a splash of cream.
  • Adjust the seasoning, add tarragon and set aside.

Pie crust:
  • Lightly grease individual pie moulds and line with pastry, leaving a little overhang.
  • Fill with the pie mix and brush some of the eff wash around the edge.
  • Place a lid on top and squeeze down the edges to create a seal.
  • Refridgerate before trimming the excess overhand. Brush the top with the remaining egg wash before baking.
  • Preheat an oven to 180 degrees C and bake the pies for about 16 - 18 minutes.
  • If the tops start becoming too dark, cover with aluminum foil and continue baking.
  • Before turning out the pies, check the bases are cooked and golden.

To serve:
  • Serve with a side of mash or handcut chips.
The cooking process went very well. The Boy didn't have too many questions and managed most things on his own. I think I only butted in about 4 or 5 times. :-)

The recipe didn't say how much flour to use, but we ended up using about 4 tablespoons.

It also didn't say how much chicken stock to use, but we ended up using about 500ml of stock to just cover the filling.

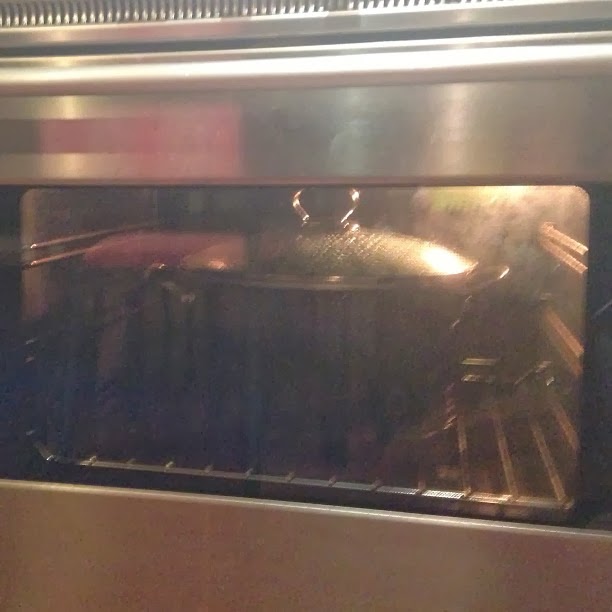
We put the mixture into the oven to simmer at 110 degrees C for 1 hour rather than do it on the stove top. I just like doing it that way better because the heat is more consistent and it is a lot safer. Plus, you don't end up burning the filling, which can happen if you do not watch it closely.

Simmering in the oven

After we took the filling out of the oven, it looked to still be quite watery, so I put it back on the stove and did a high simmer for about 7 minutes to reduce the liquid so that it was thicker. That worked out very well as it needed constant watching and stirring to make sure it didn't burn.


We did not have pie dishes, so we used soup bowls instead. We lined the bottom of the soup bowls and then filled in the filling and covered it following the instructions and then crossed our fingers and hoped for the best. :-) We'll need to invest in some pie dishes if we plan on making more pies, which we will, because I love pie.


By the way, the filling is so gosh darned tasty!!!

Well, the pies turned out to be amazing. The soup bowls worked out very well.


© This work is copyrighted to Invest-Ex and Destiny's Fortunes Pty Ltd

Find me around SOCIAL MEDIA:
Cooking blog: http://dazinthekitchen.blogspot.com.au/
Facebook: http://www.facebook.com/dazinthekitchen
Twitter: @langshipley https://twitter.com/langshipley
Instagram: @langshipley http://instagram.com/langshipley
Pinterest: https://pinterest.com/langshipley/
Youtube channel: http://www.youtube.com/user/langshipley
Makeup and beauty blog: http://langshipley-deannasworld.blogspot.com.au/


Sunday, January 19, 2014

Slow cooker braised beef with horseradish


This blog post was written a while ago. I'm just posting it now.

Tonight we are celebrating our 12th wedding anniversary with a dinner and while usually we head out to some favorite restaurant this year we have decided to cook at home and pop open a really nice bottle of wine with a few episodes of our favorite TV show. Tomorrow night, as the second part of our celebration ... well, actually third part, as we have already started last night with a fabulous bottle of wine which The Boy blogged about here, we are going to watch the new Star Trek movie at the cinemas as a special treat to me.

We were talking this morning about what to cook for dinner and I had The Boy hand over a cook book that was lying on top of the dining table.


We recently went to our favorite discount book store, that has a ton of cook books on sale and I picked up a slow cooker and casserole cook book. This one is called Best Ever Slow Cooker One Pot and Casserole Cookbook by Catherine Atkinson and Jenni Fleetwood.

I went to the "slow cooker meat" section and flipped through a few pages. I eat with my eyes and love my cook books with lots of pretty pictures. One caught my eye and also sounded good, so I asked if The Boy would like it for dinner. I knew that I wanted a slow cooker dish.

This is Braised Beef with Horseradish, slow cooked.


Here's the RECIPE for it:

Ingredients:
  • 2 tablespoon plain flour
  • 4 x 175g braising steaks (I used what we call chuck casserole steaks from the grocery store)
  • 2 tablespoon sunflower oil
  • 12 small shallots, peeled and halved
  • 1 garlic clove, crushed
  • 1/4 teaspoon ground ginger
  • 1 teaspoon curry powder
  • 2 teaspoon dark muscovado (molasses) sugar (I used Golden Syrup)
  • 2 cups near boiling beef stock
  • 1 tablespoon Worchestershire sauce
  • 2 tablespoon creamed horseradish
  • 225g trimmed baby carrots, trimmed
  • 1 bay leaf
  • salt and ground black pepper to taste
  • 2 tablespoon chopped fresh chives to garnish
  • roast vegetables to serve

Instructions:
  • Place the flour in a large flat dish and season with salt and pepper. Toss the steaks in the flour and coat.
  • Heat the oil in a pan and quickly brown the steaks on both sides. Transfer them to the ceramic cooking pot.
  • Add the halved shallots to the pan and cook gently for 10 minutes or until golden and beginning to soften. Stir in garlic, ginger and curry powder and cook for 1 minute more, then remove the pan from the heat.
  • Tip the shallot mixture into the ceramic cooking pot, spreading it over the meat, and sprinkle with the sugar.
  • Pour the beef stock over the shallots and meat, then add the Worchestershire sauce, horseradish, baby carrots and bay leaf. Stir to combine then season with salt and pepper. Cover the lid and cook on high or auto for 1 hour.
  • Reduce the slow cooker to low or leave on author and continue to cook the stew for a fruther 5 - 6 hours or until the beef and vegetables are very tender.
  • Remove the bay leaf from the stew and sprinkle with the chopped chives before serving with roast vegetables.

So, I don't have a slow cooker / crock pot and ended up using a cast iron enamel pot instead. I put the whole pot with the ingredients in it into the oven at 120°C for high and at 90°C for low. The temperatures suggested ranges between 120° to 90° C for high and between 90° to 70° C for low.

I thought it would be hard to stir and combine everything, so I mixed the stock, horseradish, sugar, Worchestershire sauce, salt and pepper together and just poured it into the pot.

I'm relatively new to slow cooking since it's not something The Boy is very fond of - he claims slow cooked food is mushy and tasteless. I'm trying to stay patient and not go poking and prodding at the food while it cooks, especially when it is to cook on low for 5 to 6 hours. We'll see how well I fare on that.

Oh yes, The Boy helped me to prep, and I had him peeling the onion shallots. I forgot to ask him to halve them, so they went in whole. I'm hoping that might be okay. The only thing I can think of that it would do to the onions is that it will not fall apart into the different layers in the cooking and will stay whole.

So this turned out to be very, very tasty. It has a slightly sweet flavor to it, but still very savory. I think the sweet comes from the sugar. I might try it without the sugar next time.

We loved this dish. It is a perfect winter dish, for a cold winter's night. We will probably serve it with mash potatoes next time. There was plenty of gravy to soak up which was just delish.

© This work is copyrighted to Invest-Ex and Destiny's Fortunes Pty Ltd

Find me around SOCIAL MEDIA:
Facebook: http://www.facebook.com/dazinthekitchen
Twitter: https://twitter.com/langshipley
Instagram: langshipley
Pinterest: https://pinterest.com/langshipley/


Friday, January 3, 2014

Salmon mousse tarts ... in the Thermomix


It's Summer here and the weather has been hot, hot, hot. We were having guests over for dinner and since the weather was so uncooperative, I decided on a cold starter / entree dish, rather than a hot one.

I went looking for something and found this salmon mousse recipe which could be used as a dip, if blended really smooth, or as a filling for a tart, if kept slightly chunky. I decided to go with chunky and went with salmon mousse tarts.

Note: if you don't have a Thermomix, you can do this in a blender or a food processor. The result would be the same.

Ingredients:
  • 1/2 small red onion, , halved
  • 1 tbsp dill leaves
  • 250 g cream cheese
  • 120 g pouring cream
  • 1 tbsp lemon juice
  • 0.5-1 tbsp capers, salted
  • 250 g smoked salmon
  • chopped chives or dill to garnish
  • salt and pepper to taste

Instructions:
  • Place onion and dill into mixing bowl and chop for 3 sec/speed 5
  • Add cream cheese, cream, lemon juice and Tabasco and mix for 20sec/speed 4-5. Scrap down sides of bowl.
  • Add capers and salmon and mix for 30 sec/speed 5 for a smooth mousse. For a coarser texture, pulse for 1 sec / bowl lid shut / Turbo or until desired consistency is achieved.
  • Garnish with chopped chives and dill.
  • Serve in little tartlets as an entree or as a dip

To keep them chunky, I kept a close watch on the texture of the mousse and went with the pulse option in the instructions, rather than the smooth mousse option. It's important to really watch that carefully.

I had a few chunks of large smoked salmon still in the bowl when I checked the second time, after being really conservative with my blending, which pulsing once on turbo took care of.

I made these early in the day and just kept them refrigerated until it was time to serve them.

We served these in little vol-au-vent cases instead of small tartlet cases, as it held more mousse and I did not like the options I found of the tartlet shells that were on offer at the grocery store. The vol-au-vent cases worked really well.

These were delicious and this recipe is definitely a keeper. I will be serving these again for sure.


© This work is copyrighted to Invest-Ex and Destiny's Fortunes Pty Ltd

Find me around SOCIAL MEDIA:
Cooking blog: http://dazinthekitchen.blogspot.com.au/
Facebook: http://www.facebook.com/dazinthekitchen
Twitter: @langshipley https://twitter.com/langshipley
Instagram: @langshipley http://instagram.com/langshipley
Pinterest: https://pinterest.com/langshipley/
Youtube channel: http://www.youtube.com/user/langshipley
Makeup and beauty blog: http://langshipley-deannasworld.blogspot.com.au/


Saturday, December 21, 2013

Christmas cake with walnuts and brandy ... in the Thermomix


Well, I've been experimenting with Christmas cake recipe and I made this a little while ago and had very good results with them. However, my mother asked for Christmas cake with brandy instead of sherry and also with nuts in them, so I experimented a little more and came up with this recipe.

Ingredients:
  • 1kg mixed dried fruit
  • 500ml of milk (any sort)
  • 400ml of brandy
  • 375g of crushed walnuts
  • 300g self raising flour


Instructions:
  • Soak fruit in milk and brandy for at least 4 - 6 hours or overnight
  • Preheat oven to 150°C
  • Line a 25cm cake tin with baking paper and set aside
  • Place fruit mixture, nuts and flour into mixing bowl and mix for  90 sec / Reverse / Speed 3 (for more even distribution of flour, put flour in the middle between layers of fruit and nuts
  • When mixing is done, pour out into a large bowl and hand mix a little to make sure the flour is evenly distributed right through the mixture
  • Pour into prepared tin and bake for 1 hour 10 minutes or until a skewer comes out clean

This turned out very, very well. It was super easy to make and not really all that different from the first recipe. There's a little bit more flour in it and also the walnuts.
The walnuts gave this Christmas cake a very lovely texture.

This is makes up quite a large batch of batter and I was baking them in a muffin tin for single serve Christmas cakes that we could serve on Christmas Day lunch.

For single serve Christmas cakes, they only need to be in the oven for 40 minutes and they are done.

This recipe makes about 14 single serve Christmas cakes.

When you first bite into these, you get a lovely whiff of the brandy escaping from the cake and getting a lovely nose full of the brandy fumes. The cake itself is slightly drunken but not overly so.

If you want to continue to get the cakes even more drunken, you put the cakes in an air tight container, poke a few holes into them and pour more brandy, sherry, rum or any alcoholic beverage of your choice into it, over a few days, weeks or month. This will sufficiently preserve the cake and marinate it at the same time. With copious quantities of the special juice :-) the Christmas cakes will last a long time, even if you don't keep them in the fridge.

I hope you enjoy this recipe and I wish you a very Merry Christmas and Happy New Year.

© This work is copyrighted to Invest-Ex and Destiny's Fortunes Pty Ltd

Find me around SOCIAL MEDIA:
Cooking blog: http://dazinthekitchen.blogspot.com.au/
Facebook: http://www.facebook.com/dazinthekitchen
Twitter: @langshipley https://twitter.com/langshipley
Instagram: @langshipley http://instagram.com/langshipley
Pinterest: https://pinterest.com/langshipley/
Keek: http://www.keek.com/langshipley
Youtube channel: http://www.youtube.com/user/langshipley
Makeup and beauty blog: http://langshipley-deannasworld.blogspot.com.au/

Friday, December 13, 2013

A rather yummy Christmas cake ... in the Thermomix


It's getting around to the festive time of year again and my how quickly the year has zoomed past. This year, like the year before, and the year before that, I am responsible for making the dessert on Christmas Day lunch.

Previously, I've made my famous creme brulee in the Thermomix and that was very well received. In actual fact, my mom had asked for the creme brulee again but since we are traveling 2 hours to get to Christmas Day lunch, the creme brulee is not going to survive in the car for that duration so I had to think of something else to make and I landed upon Christmas cake.

Now, those of you who know me will know that I am no baker by any stretch of the imagination. In fact, I am no baker at all and I like all my baking to be simple and done in the Thermomix, as you can tell from my banana bread and zucchini bread recipe.

I, of course, immediately rang my friend Yanna and asked for a recipe.

This is what she gave me:

Ingredients:
  • 1kg mixed dried fruit
  • 620g full cream milk, white coffee or chocolate milk
  • 280g self raising flour

Instructions:
  • Soak fruit in milk for at least 4 - 6 hours
  • Preheat oven to 150°C
  • Line a 25cm cake tin with baking paper and set aside
  • Place fruit mixture and flour (put the flour in the bottom) into mixing bowl and mix for  60 sec / Reverse / Speed 3
  • Pour into prepared tin and bake for 1 hour 10 minutes or until a skewer comes out clean

Which I varied a little bit, but not by very much, because I know enough to know that baking is a lot more exact than cooking.

I added 250g of sherry and the remainder in fat free soy milk instead of 620g of full cream milk, because (1) I wanted the Christmas cake to be drunken, and (2) I'm lactose intolerant and can't have full cream milk. Plus, I soaked the fruit overnight instead of just for the few hours that the recipe requested.

I also baked them in my customary single serve muffin tin sizes, rather than a full cake tin, since I like my cakes and muffins in single serves. In the single serve sizes, the Christmas cake took 45 minutes to cook.

The cakes turned out very well and very fruity. It's kind of an odd recipe because it's like 95% fruit. It's the sort my mom really likes too cos she likes her cake with lots of fruit and very little "cake". In fact, just enough cake to hold it all together. :-)

The Boy who is not a fan of Christmas cake at all liked it, which says a lot for it since he usually cannot be convinced to eat the stuff. I will take it as a win.

This recipe made exactly 12 single serve mini Christmas cakes.

The next time, I am going to try adding nuts to the recipe and maybe a bit more flour. That would take a little bit more experimenting.

In the meantime, if I do not post again before Christmas, have a very Merry Christmas and may you have a blessed day with family and friends.


© This work is copyrighted to Invest-Ex and Destiny's Fortunes Pty Ltd


Find me around SOCIAL MEDIA:
Cooking blog: http://dazinthekitchen.blogspot.com.au/
Facebook: http://www.facebook.com/dazinthekitchen
Twitter: @langshipley https://twitter.com/langshipley
Instagram: @langshipley http://instagram.com/langshipley
Pinterest: https://pinterest.com/langshipley/
Youtube channel: http://www.youtube.com/user/langshipley
Makeup and beauty blog: http://langshipley-deannasworld.blogspot.com.au/

Sunday, December 1, 2013

Fettuccine Boscaiola ... or in this case, spiral pasta


My beloved Boy is cooking dinner tonight. He has decided that he wants to cook more and become more proficient in the kitchen, so I'm happy for him to take over cooking and meal duties now and then.

The Boy has been talking about being in the mood for a tomato based pasta dish for days, most of this week, actually, but at the last minute decided on a creamy sauce pasta instead.  He said he wanted something with ham so I thought Boscaiola, which yes, I know is made with bacon, but still .... who can complain about bacon, right?

I went onto the interwebs in search of a recipe and came up with this which sounded tasty and easy to make.

I gave it to The Boy to read over and he seems comfortable that he can tackle it without any help from me. Anyway, I'm kicking back while he is cooking, which, let me tell you, is very nice.

Here's the recipe for this particular Boscaiola, which we are making with spiral pasta instead of fettuccine, just because The Boy did not feel like fettuccine.

Ingredients:
  • 400g dried curly fettuccine pasta
  • 250g rindless bacon rashers, thinly sliced
  • 40g butter
  • 400g cup mushrooms, thinly sliced
  • 5 shallots, ends trimmed, thinly sliced
  • 425ml pouring cream
  • 30g (1/3 cup) shredded parmesan
  • 30g (1/3 cup) shredded romano
  • Parmesan (optional), extra, to serve

Instructions:
  • Cook the pasta in a large saucepan of salted boiling water until al dente. Drain.
  • Meanwhile, cook the bacon in a large non-stick frying pan over medium heat, stirring often, for 4 minutes or until golden. Use a slotted spoon to transfer to a plate.
  • Heat the butter in the frying pan. Add the mushroom and cook, stirring often, for 5 minutes or until tender and the liquid has reduced.
  • Add the pale section of the shallot and stir to combine. Stir in the bacon and cream. Simmer for 6-7 minutes or until the mixture thickens slightly. Add the parmesan and romano, and stir until well combined.
  • Add the pasta and green section of the shallot to the sauce. Season with salt and pepper and toss until well combined. Divide the pasta among serving dishes. Top with extra parmesan.

Since it was The Boy cooking, he tends to like to follow the recipe exactly when cooking for the first time ... well, most of the time really. I'm the one who improvises.

Anyway, he did follow the recipe almost exactly, but with the shallots, since we didn't have any fresh ones, just frozen ones, he just put them in towards the end to the mushrooms, bacon and cream and cooked it all together. There was no green section of the shallot to put in at the end. It all just went in with the sauce.

He also used spiral pasta rather than fettuccine. For some reason, he did not feel like fettuccine and decided on spiral pasta instead. The spiral pasta turned out great for the sauce to coat every little spiral on it.

The recipe doesn't say so, but salt and pepper to taste is important. With adding so much pasta to the sauce, it can taste a bit bland if there's not enough salt and pepper. You don't need a lot, but a pinch or two of both really helps.

The dish turned out to be very, very tasty. It made enough for 6 serves so we have plenty of leftovers for The Boy to take some to work over the coming days for lunch too.


© This work is copyrighted to Invest-Ex and Destiny's Fortunes Pty Ltd


Friday, November 22, 2013

Chickpea and goat cheese salad


We've decided on a salad again tonight since (once again) it is going to be a very hot day. I am also coming to quite enjoy those hearty salads that are meal in itself.

Once again I've gone to my "Mmmm ... salad" cookbook and have found a salad that looks like it will be rather hearty and yummy.

Here's the RECIPE for our dinner tonight:

Ingredients:
  • 1 can chickpeas drained
  • 2 spring onions finely chopped
  • 50g red peppers (capsicum) diced
  • 15ml / 1 tablespoon fresh chopped parsley
  • 100g cherry tomatoes sliced in half
  • 50g rocket
  • 30g goat cheese sliced or crumbled to serve

Dressing:
  • 1 teaspoon olive oil
  • 1 teaspoon balsamic vinegar
  • 1/2 teaspoon runny honey
  • 1 clove garlic peeled and crushed or finely chopped

Instructions:
  • Rinse the chickpeas and put into a bowl.
  • Add spring onions, red pepper, parsley and cherry tomatoes, mix well.
  • To make dressing, which together the oil, vinegar, honey and garlic and stir into the chickpeas.
  • Serve on a bed of rocket with the goat cheese sprinkled over.

I forgot to buy parsley when I went to the grocery store, so I just used the leftover coriander paste that I had from the bean and feta cheese that I made the other day.

Instead of cherry tomatoes, I used grape tomatoes just because I think grape tomatoes taste better and I like them better. :-)