I have a friend who is gluten-free. An inherited genetic immune disorder that hits when she reached her early 20s. She said to me that she'd never tried Vietnamese banh mi when she visited Vietnam because she couldn't find gluten-free baguettes there. I told her I'd experiment with some gluten-free baguette recipes and make her banh mi. For those of you who don't know, Banh mi is a Vietnamese sandwich on a crisp baguette filled with savory ingredients like pâté, meats, pickled vegetables, and fresh herbs. It's delicious.
So I embarked on
this journey of experimentation. The first one turned out more cornbread
or cake-like in texture. Tasty, but not ideal. I wanted it to feel like
bread and taste like bread. The texture needed to be like bread. That was
important to me. I refused to believe that there was no way to make
gluten-free bread closer to real bread. People should not have to put up
with that inedible stuff that's like tasteless cardboard from the stores
and accept that it's their only alternative. Absolutely refuse to believe
it. And I'm stubborn. Plus like a challenge in the kitchen. Oh, and I
refuse to let bread defeat me. Refuse!!
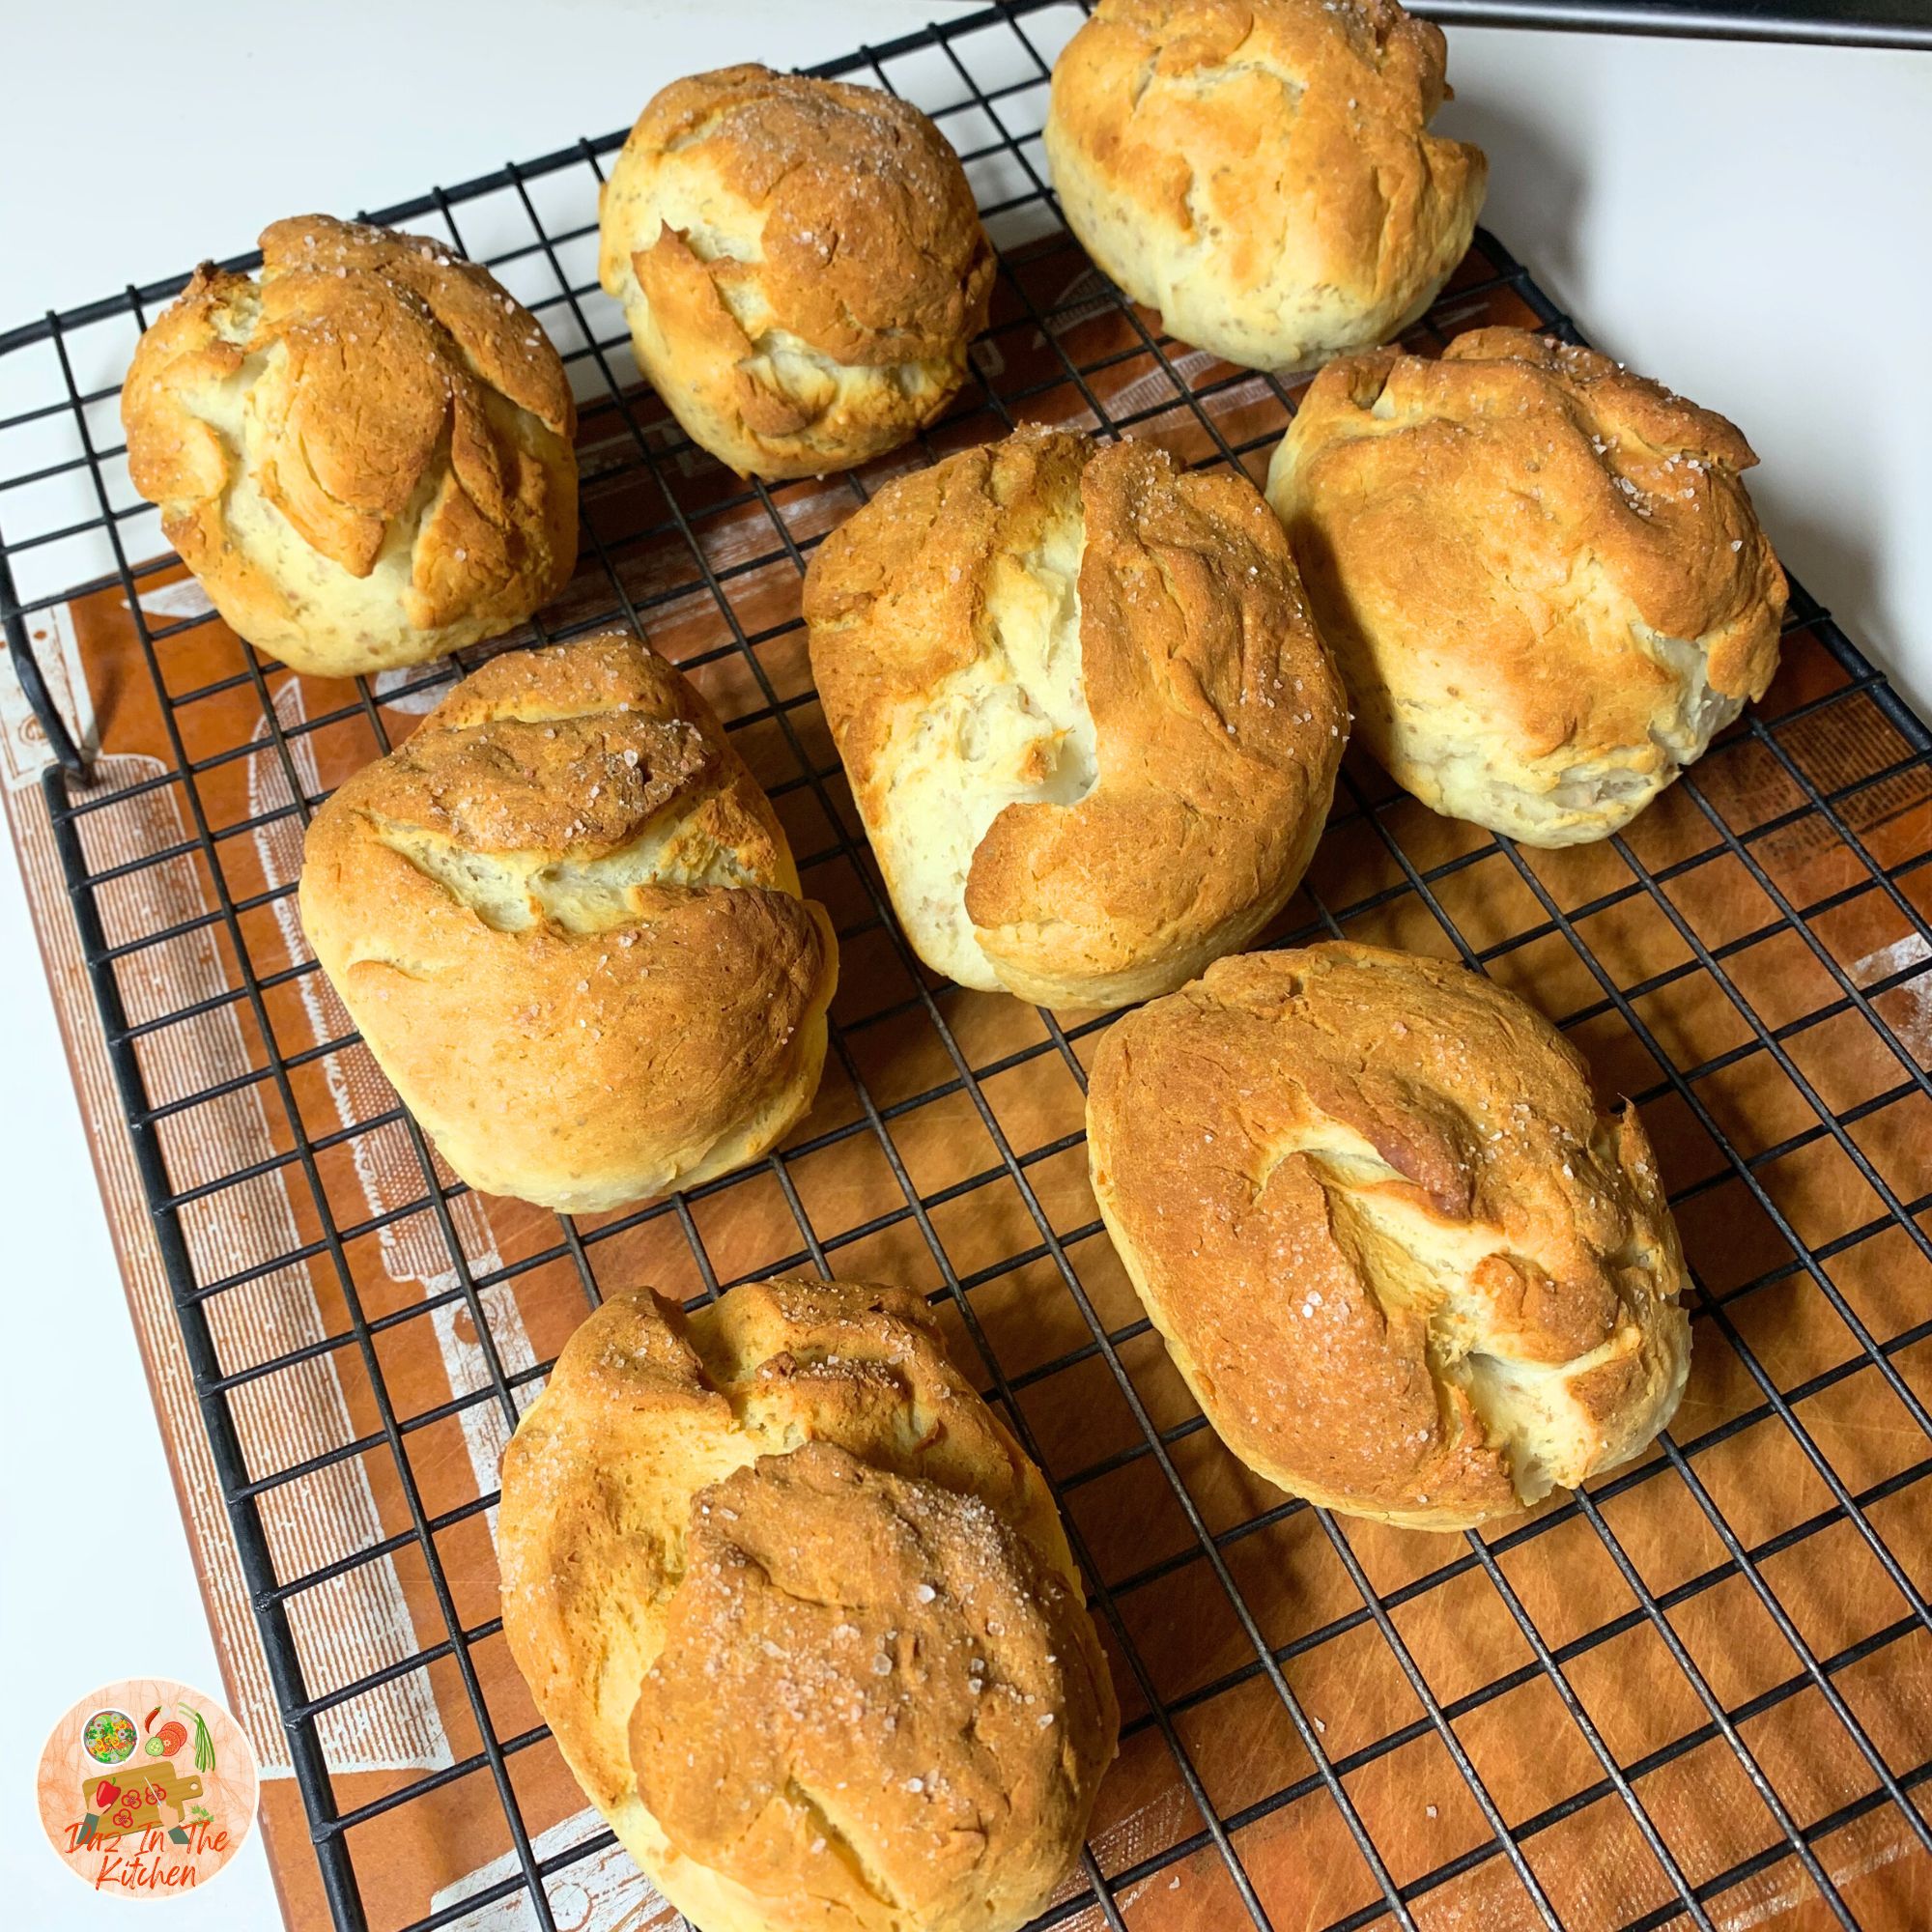
After some tweaking, this is what I landed on. It's still denser than regular bread, and certainly denser than a baguette, but this is a very versatile recipe and you can pretty much shape it however you like. Dinner rolls, buns, baguettes, loaves. Just use different molds or no mold at all. And to make it even easier, you can even make it on the stovetop, but I don't.
Here's the recipe:
© This work is copyrighted to Invest-Ex and Destiny's Fortunes Pty Ltd
Find Deanna on SOCIAL MEDIA:

After some tweaking, this is what I landed on. It's still denser than regular bread, and certainly denser than a baguette, but this is a very versatile recipe and you can pretty much shape it however you like. Dinner rolls, buns, baguettes, loaves. Just use different molds or no mold at all. And to make it even easier, you can even make it on the stovetop, but I don't.
Important Note:
I am attempting to include alternative cooking methods in all my recipes, so where applicable there will always be a traditional/conventional cooking method, an air fryer or crock pot option, or a Thermomix option.
You can choose whichever method you prefer to use.
I am attempting to include alternative cooking methods in all my recipes, so where applicable there will always be a traditional/conventional cooking method, an air fryer or crock pot option, or a Thermomix option.
You can choose whichever method you prefer to use.
Here's the recipe:
Ingredients
- 2 cups gluten-free self-raising flour (ensure it contains no gluten)
- 2 tsp active dry yeast (or instant yeast)
- 1 tsp sugar
- 3/4 cup warm water (about 110°F/43°C)
- 1/2 tsp salt
- 1 tbsp olive oil (optional, for added flavor and moisture)
- 4 tsp xanthan gum or 1/2 cup chia seed gel (see notes below)
- 2 tsp baking soda (optional, for extra lift)
Instructions
- Activate the Yeast:
- In a small bowl, combine warm water, sugar, and yeast. Let it sit for about 5-10 minutes until it becomes frothy.
- Prepare Chia Seed Gel (if using):
- Mix 2 tablespoons of chia seeds with 1/2 cup of water. Let it sit for about 10-15 minutes until it forms a gel-like consistency. Stir occasionally to ensure all the chia seeds have turned into gel.
- Mix the Dough:
- Thermomix Option: Add the gluten-free flour, salt, xanthan gum (if using), and baking soda (if using) to the Thermomix bowl. Pour in the activated yeast mixture, and olive oil, (and chia seed gel if using). Mix for 30 seconds on speed 6 until a dough forms.
- Traditional Mixing: In a large mixing bowl, combine the gluten-free flour, salt, xanthan gum (if using), and baking soda (if using). Make a well in the center and pour in the activated yeast mixture, olive oil, and chia seed gel (if using). Mix until a dough forms.
- Knead the Dough:
- Thermomix Option: Knead the dough for 2 minutes on the knead setting. (Note: Gluten-free dough will be stickier and won't require traditional kneading.)
- Traditional Mixing: Since gluten-free dough is usually stickier, you may not need much kneading. Just mix until well combined.
- Rest the Dough:
- Let the dough rest for about 15-20 minutes in a warm place. This allows the moisture to be absorbed and gives the dough some rise.
- Shape the Dough:
- After resting, divide the dough into equal portions (about 4-6
pieces). Shape each piece into a disc about 1/2 inch thick.
Use wet hands or a bit of oil to prevent sticking.
- Note: this dough is very sticky, so using water or oil to prevent sticking is very helpful. I prefer oil on gloved hands. Much less mess.
- After resting, divide the dough into equal portions (about 4-6
pieces). Shape each piece into a disc about 1/2 inch thick.
Use wet hands or a bit of oil to prevent sticking.
- Preheat the Pan:
- Heat a non-stick skillet or frying pan over medium heat. You can lightly grease it with oil if desired.
- Cook the Bread:
- Air Fryer or Regular Oven Option: Preheat the air fryer to 180°C (356°F). Place one or two discs of dough in the air fryer basket, ensuring they are not overcrowded. Cook for about 20-25 minutes. They are done when they reach an internal temperature of 90°C (194°F) or more.
- Stovetop: Place one disc of dough onto the hot pan. Cover with a lid and cook for about 4-5 minutes on one side, or until bubbles form and the underside is golden brown. Flip the bread, cover again, and cook for another 4-5 minutes on the other side.
- Keep Warm:
- Remove the bread and cover it with a clean kitchen towel to keep warm while cooking the remaining pieces.
- Serve:
- Enjoy your gluten-free bread warm with butter, dips, or as a side with your favorite meals!
Notes and Tips
- Xanthan Gum vs. Chia Seed Gel: You can use either 4 tsp of xanthan gum or 1/2 cup of chia seed gel in the recipe. If using both, you can adjust the amounts based on your preference.
- Thicker Discs: Make the discs slightly thicker for a softer texture.
- Use a Mold: If you want your bread to come out in specific shapes or sizes, use a mold. This dough is very versatile, so you can pretty much make it any shape or size you like.
- Steam: Keep the lid on while cooking to trap steam, which helps with moisture and softness.
- Other Texture Enhancers: Consider using psyllium husk (1 tablespoon per cup of flour) or flaxseed meal (substituted similarly to chia seeds) for additional structure and moisture retention.
- Flavor Variations: You can add herbs, garlic powder, or cheese to the dough for extra flavor. I like to add a 1/2 teaspoon of garlic powder for a slight garlicky kick. The flavor is very subtle, but it gives the bread a slight umami-ness that is delicious.
- Storage and Reheating: This bread can be reheated
after being kept in the fridge or freezer.
- The best way to store the bread to prevent moisture loss (this is what makes the bread hard and dry) is to wrap it individually (if making smaller buns) with cling wrap before storing in the fridge or freezer.
- To reheat so that bread returns to pretty much it’s original
texture and softness:
- From the fridge: Wet two sheets of kitchen paper towel, wring out the excess water. Wrap the bun (sliced in half) and warm in microwave for about 15 - 20 seconds. Check if it’s warm through. If not, give it another 10 seconds. Repeat until it’s warmed to your liking.
- From the freezer: You can reheat the bread from the freezer directly from frozen, but it will take a little longer. I prefer I use a kitchen (cloth) tea towel instead of paper towel for this, since it’s needs longer in the microwave. Again, wet the tea towel, wring out excess water. Wrap the bread in the towel (you don’t necessarily have to halve the bread, depending on its size), then microwave for 1.5 - 2 minutes. If it’s not warmed through enough, repeat in 20 second intervals until it’s warmed to your liking.
- Important: The wet kitchen paper or cloth tea towel is key. This is what keeps your bread soft and moist.
PS. The latest batch didn't even last the day. I
don't know why I bothered to wrap them when I stored them in the fridge.
Should have just chucked them into an airtight container.
PPS. I'm going to try it in a loaf shape next.
PPPS. Hubby says the bread is too nice to eat as a
bun for ham and cheese. It should be enjoyed warm with butter instead.
He'd rather have a ham and cheese sandwich on regular bread. I dunno...
PPPPS. I used BOTH yeast and baking soda. Plus the
chia seed gel. I didn't use any xanthan gum cos I didn't have any in my
pantry. Might try it another time if I buy some when I'm at the
grocery store next.
© This work is copyrighted to Invest-Ex and Destiny's Fortunes Pty Ltd
Find Deanna on SOCIAL MEDIA:
No comments:
Post a Comment