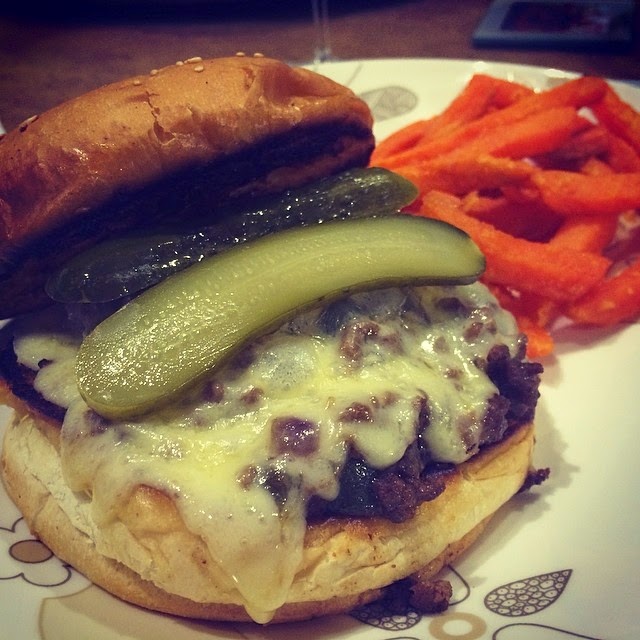
Showing posts with label beef. Show all posts

Friday, October 25, 2024

Portuguese francesinha sandwich

Francesinha sandwich

This was my first attempt at Portuguese food. I thought, oh, it's a sandwich, it can't be that hard to make. Well, it's a LOT of sandwich and the sauce is epic, but took some effort. Otherwise, yeah, it's not that hard. This is a very iconic Portuguese dish and I'm convinced whoever invented it was looking for a cure for a massive hangover after a big night out.

Friday, September 27, 2024

Cowboy butter salad dressing

Gourmet hot dogs

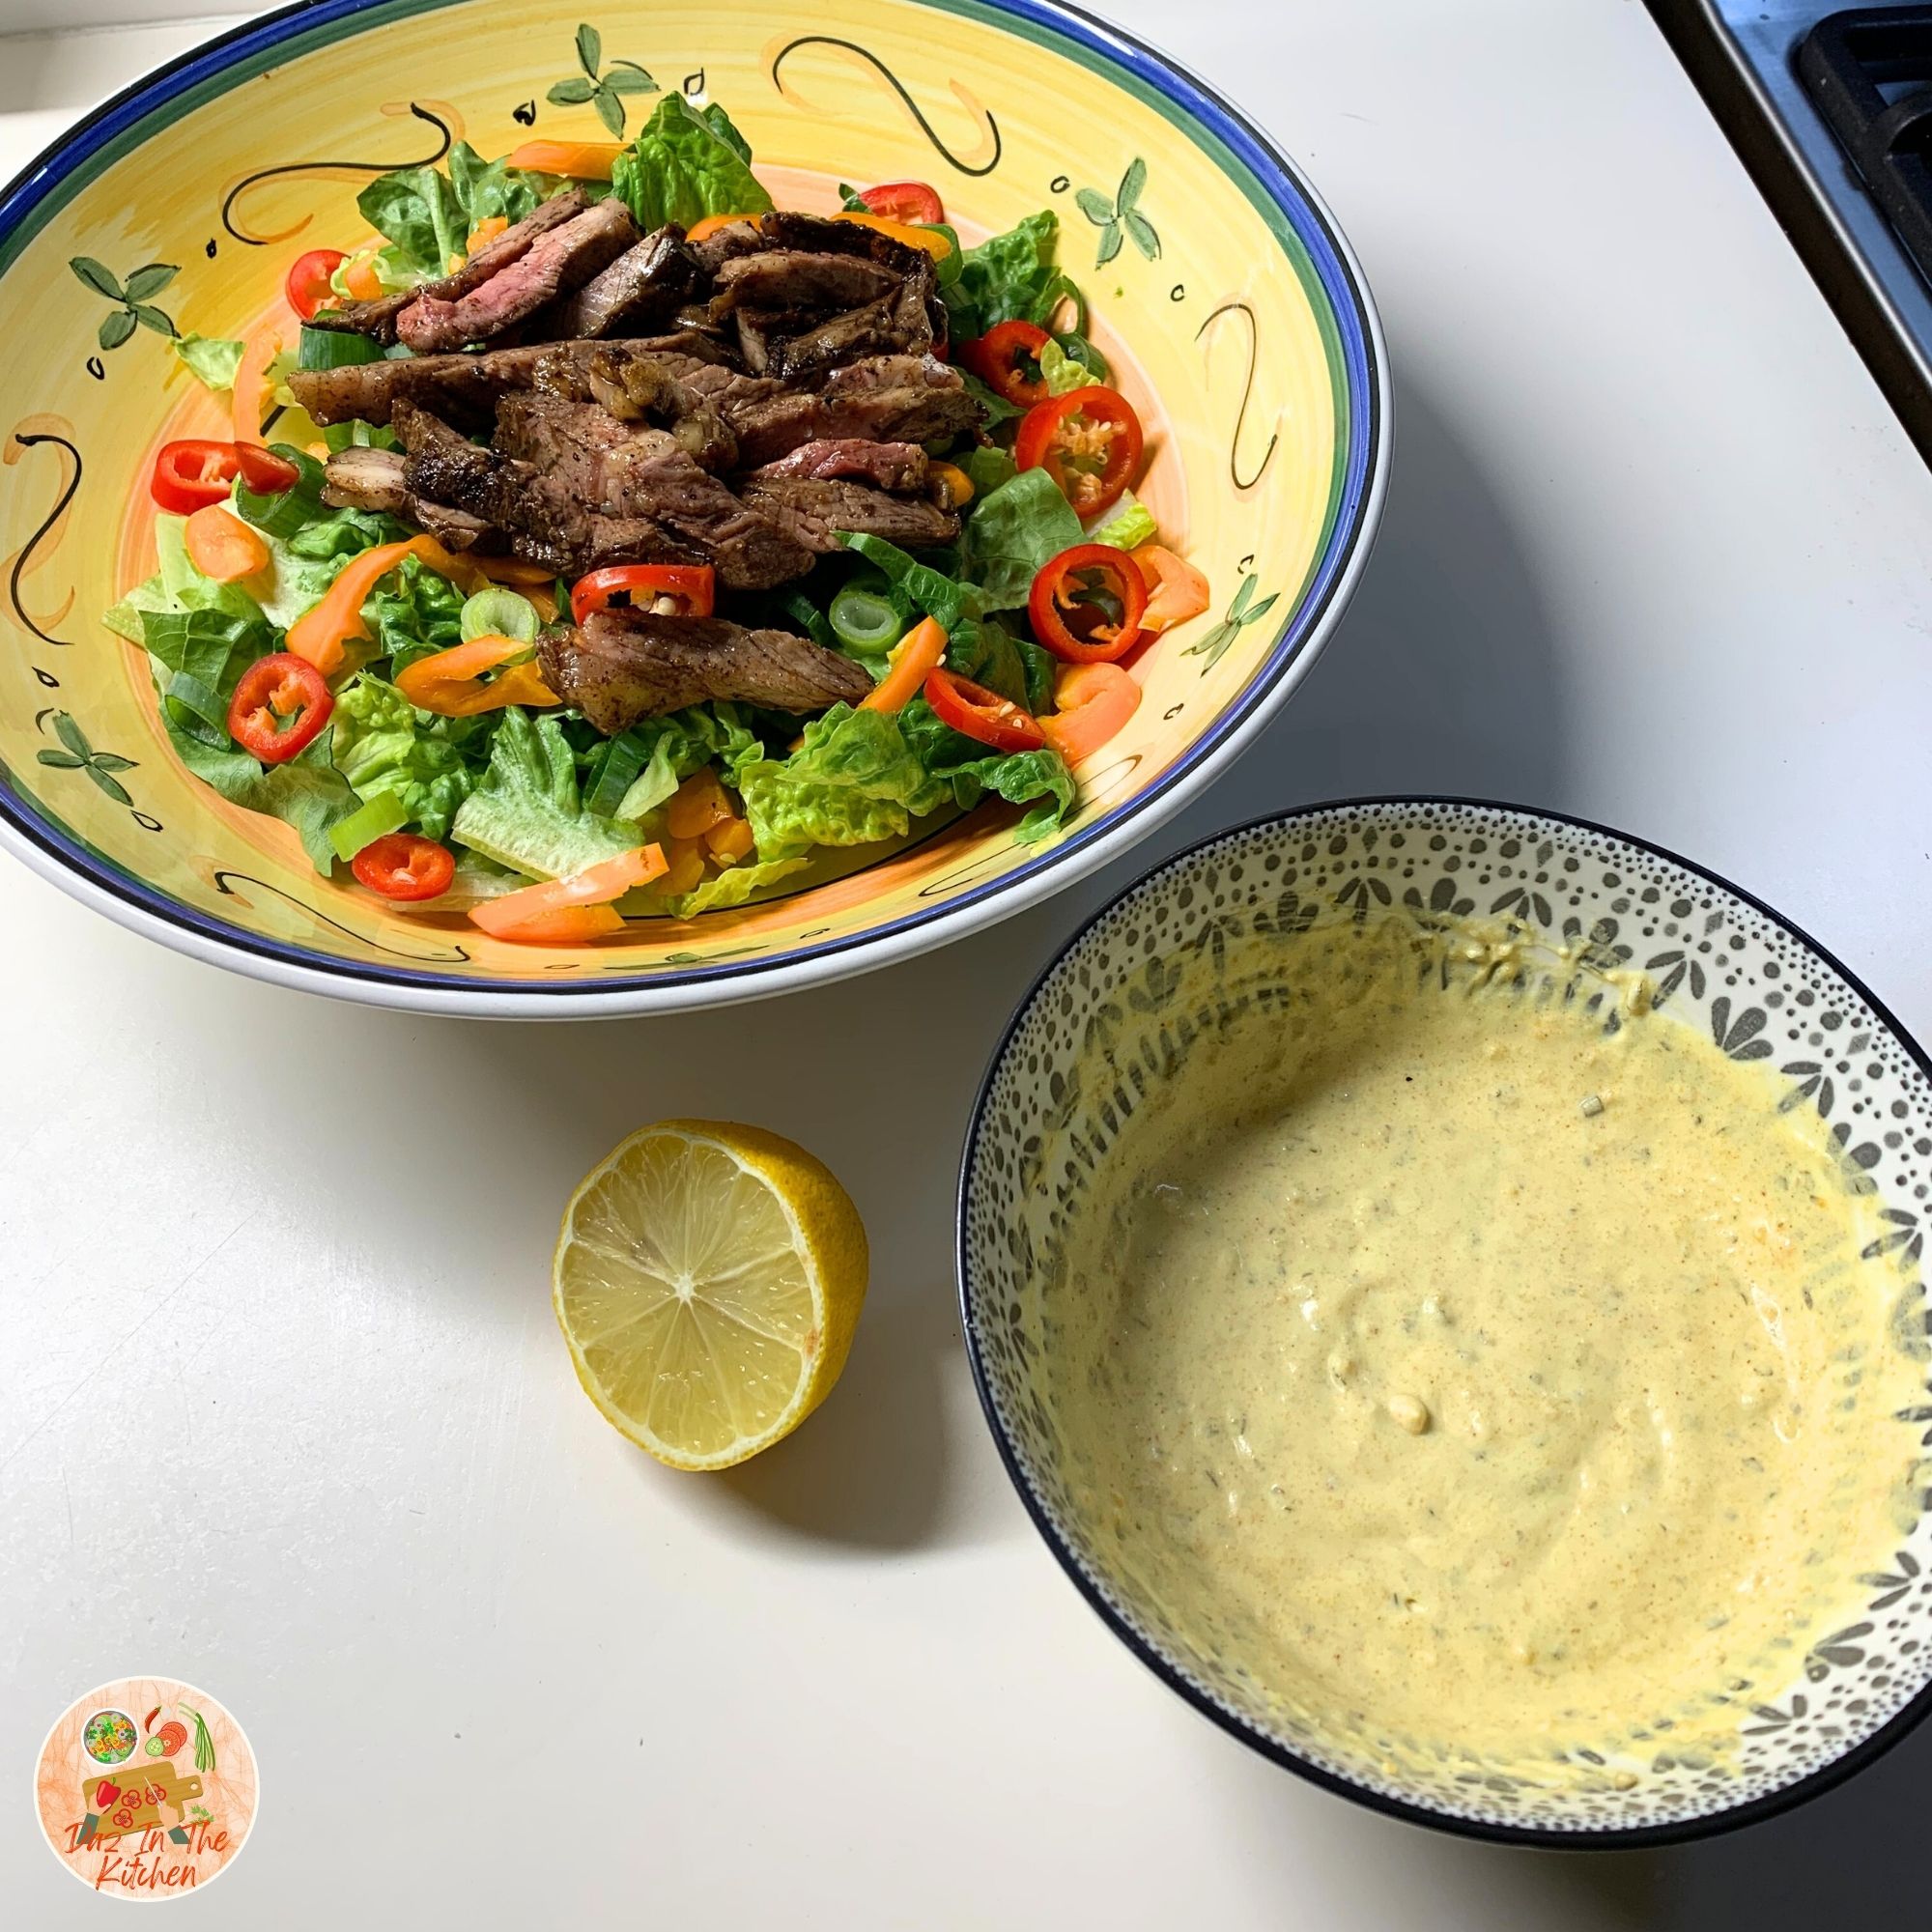
After I made the cowboy butter the other day to go with the tomahawk steak we had for lunch, we still had A LOT of steak leftover. Two people cannot eat 2 kilos of steak. It's just not physically possible for us. Anyway, with the leftover steak, I decided to use it in a salad and turn the cowboy butter into a creamy salad dressing. Yum! And it's super easy.

Sunday, March 5, 2017

Paleo Irish stew


I've had a hankering for some stew and something slow cooked for a while now. This summer has been so hot it's been prohibitive to cook anything in the oven without us expiring from the heat. Mostly we've been eating salads and cold dishes or something that is quick to cook on the stove. I was missing those hearty meals. Now that it's gotten a little cooler I decided a stew was in order.

Thursday, April 28, 2016

Steak and garlic butter rice salad ... perfect with leftovers


Yes, yes, can you believe it? Blog posts weekly for a few weeks!! You know what that means? It means I've been home and I have been cooking!! Nothing super fancy or super complicated, just some simple everyday meals that we enjoy and are tasty, tasty.


We cooked a huge cattleman's cut steak for dinner recently and it was HUGE. We shared one between The Boy and I and still only managed to finish half of it. I saved the leftovers for a steak salad and this is one of my go to recipes for a tasty steak salad. I like adding the garlic rice because it makes it super tasty. Garlic and butter .... mmmm .....

Here's what I did:

Sunday, March 13, 2016

Slow cooked Italian beef pot roast ... on a bed of mashed potatoes in the Thermomix


Well dang! I thought I had posted the recipe for this dish since it's an old favorite but I hadn't. Of course, I only found out because a friend asked for the recipe and I said I had it post. My bad!

Last night was my early birthday dinner with a few friends from the neighbourhood. I had a gorgeous birthday cake made by a friend of mine who is also a professional pastry chef and cake maker. I'll write a post of the cakes she's done for us soon but if you need an excellent cake maker, you can find her here. Say Deanna sent you.

But I digress ... I wanted something slow cooked for the dinner since I had a guest who was 80 and well, tough food is not his friend.

I went through my repertoire of slow cooked meals and decided on this dish. I can't remember where I found the original recipe but I've been cooking it for ages.

Friday, September 26, 2014

The all American sloppy joe


The Boy, as you know, will occasionally send me recipes he finds that he thinks are interesting, or that he would like us to try. Quite a while ago, he found a recipe on Facebook for a Philly cheese steak sloppy joe, which basically means, sloppy joe with a piece of cheese in it!

Recently, I decided to try my hand at making it and I followed the recipe. I found the recipe to be rather bland and then added some cayenne pepper to it to spice it up, but it turned out too spicy and not like your typical sloppy joe, or so The Boy said, as I have never had a sloppy joe before.

The next time I tried it, we were having some friends over and because (1) I didn't know if they could eat spicy food and (2) I wanted to make it a bit more authentic but still tasty, I varied the original recipe yet again and came up with something that was just delicious.

Here is what I did:

Ingredients:
  • 1 lb ground beef
  • 1 small sweet onion chopped
  • 1 green bell pepper seeded and chopped
  • 1/4 cup steak sauce (like A1 or Worchestershire)
  • 1 cup beef broth
  • 1 teaspoon paprika
  • 2 teaspoons garlic powder
  • 2 teaspoons beef stock powder
  • 2 teaspoons of corn flour mixed with a little bit of water
  • Provolone cheese
  • Sliced pickles / gherkins
  • Olive oil
  • Hamburger buns

Instructions:
  • Crumble the ground beef into a skillet and add the chopped onion and pepper. 
  • Begin to cook, when the beef is about half cooked, add the spices, broth and steak sauce. 
  • Cook until all items are done and allow to simmer. While simmering, add in corn flour mixture to thicken sauce and continue to cook down/thicken.
  • Heat a pan on the stove with some olive oil drizzled right around the pan
  • Slice open buns and place the flat side on to the pan and toast the bun till it is golden brown. It's okay if it gets a bit burnt! You may have to rotate the buns to get them toasted equally.
  • Heat your oven to 180°C.
  • Place buns toasted side up on top of a baking / cookie sheet lined with foil and fill them with the meat mixture. 
  • Top each one with a slice of provolone cheese.
  • Place in the oven or under the broiler / grill for 3 minutes to melt cheese.
  • Once cheese is melted, top with a few slices of the pickles / gherkin and serve.

The extra 2 teaspoons of beef stock powder really adds a robustness and depth to the flavor of the sloppy joe, as does the other spices, so don't skip those. Oh, and don't forget to serve with the pickles or gherkin slices as they really do add a lovely counterpoint to the rich beefy flavors.

This turned out to be super tasty and since I made a double batch, I ended up with leftovers which was super easy for me to heat back up in a pan and cook up for another meal.

Of course, they were also a success with our very Aussie friends, who had never tried such an American dish before.

If you do make this, be sure to post pictures for me to see either on Instagram - be sure to tag me with @langshipley or on my Daz In The Kitchen Facebook page.


© This work is copyrighted to Invest-Ex and Destiny's Fortunes Pty Ltd

Find me around SOCIAL MEDIA:
Cooking blog: http://dazinthekitchen.blogspot.com.au/
Facebook: http://www.facebook.com/dazinthekitchen
Twitter: @langshipley https://twitter.com/langshipley
Instagram: @langshipley http://instagram.com/langshipley
Pinterest: https://pinterest.com/langshipley/
Youtube channel: http://www.youtube.com/user/langshipley
Makeup and beauty blog: http://langshipley-deannasworld.blogspot.com.au/

Sunday, September 14, 2014

Steak and fries


For a very long time (2 - 3 years, I think), I was not eating any red meat and certainly not able to handle an entire steak. As a result, my poor darling didn't get any red meat at home (unless it was minced in a spaghetti sauce) and the only time he got a steak was when he went out to a steak house.

Recently, I've been back into the red meats again, slowly but surely. The whole process has taken a good year, but I'm back to eating it again and even craving it slightly.

Last night, The Boy decided that he wanted something simple, steak and fries and that is what he got. It's such a simple meal and so tasty.

Here's what I did:

Ingredients:
  • 2 x scotch fillet steaks
  • Garlic salt
  • Freshly ground pepper
  • Green leafy lettuce
  • Sweet potato fries (frozen from the store - any type you like)

Instructions:
  • Defrost your steaks if they are frozen
  • Place onto a plate and drizzle lightly with olive oil, sprinkle with garlic salt and ground pepper
  • Heat up a pan to medium heat and place the seasoned side onto the pan
  • Cook for about 3 - 4 minutes. While the steak is cooking drizzle a little olive oil onto the top side of the steak and then season again with garlic salt and pepper
  • After the 3 - 4 minute mark, turn the steak over and cook again for another 3 - 4 minutes
  • Note: this will give you a medium-rare steak. If you want a more cooked steak, leave it in the pan for a longer period of time. If you want a more accurate check of your meat, you can also use a meat thermometer, and you can find the correct temperatures here.

For the sweet potato fries:
  • Heat up a small saucepan of canola, sunflower or whatever vegetable oil you like that can be used for frying and has a high heat point
  • Take the fries out of the freezer, and while the fries are still frozen, drop them in batches (how much will depend on the size of the saucepan you are using) into the saucepan and fry until a golden brown, about 2 - 4 minutes for each batch, depending on your oil temperature
  • Remove the fries and drain them in a plate lined with paper towels
  • Repeat until all the fries are cooked
  • Once all the fries are cooked, remove the paper towel, sprinkle some garlic salt over the fries and toss them to evenly distribute the garlic salt. This will make your sweet potato fries very tasty
  • Note: if the oil is hot enough, it will bubble when you drop the fries in. You can do one test fry to check the oil temperature. Also I used sweet potato because I like sweet potato fries, but really, you can use any type of fries you like

For the green leafy lettuce salad:
  • I just used some salad mix from the store and then dressed with with a little olive oil and balsamic vinegar. Very simple

This dinner turned out to be super tasty and The Boy really enjoyed it a great deal. This is also probably the first time in several years that I have cooked a steak for us for dinner. I think I will be doing it again soon. I really enjoyed it.

If you do make this, be sure to post pictures for me to see either on Instagram or on my Daz In The Kitchen Facebook page.


© This work is copyrighted to Invest-Ex and Destiny's Fortunes Pty Ltd

Find me around SOCIAL MEDIA:
Cooking blog: http://dazinthekitchen.blogspot.com.au/
Facebook: http://www.facebook.com/dazinthekitchen
Twitter: @langshipley https://twitter.com/langshipley
Instagram: @langshipley http://instagram.com/langshipley
Pinterest: https://pinterest.com/langshipley/
Youtube channel: http://www.youtube.com/user/langshipley
Makeup and beauty blog: http://langshipley-deannasworld.blogspot.com.au/


Sunday, January 19, 2014

Slow cooker braised beef with horseradish


This blog post was written a while ago. I'm just posting it now.

Tonight we are celebrating our 12th wedding anniversary with a dinner and while usually we head out to some favorite restaurant this year we have decided to cook at home and pop open a really nice bottle of wine with a few episodes of our favorite TV show. Tomorrow night, as the second part of our celebration ... well, actually third part, as we have already started last night with a fabulous bottle of wine which The Boy blogged about here, we are going to watch the new Star Trek movie at the cinemas as a special treat to me.

We were talking this morning about what to cook for dinner and I had The Boy hand over a cook book that was lying on top of the dining table.


We recently went to our favorite discount book store, that has a ton of cook books on sale and I picked up a slow cooker and casserole cook book. This one is called Best Ever Slow Cooker One Pot and Casserole Cookbook by Catherine Atkinson and Jenni Fleetwood.

I went to the "slow cooker meat" section and flipped through a few pages. I eat with my eyes and love my cook books with lots of pretty pictures. One caught my eye and also sounded good, so I asked if The Boy would like it for dinner. I knew that I wanted a slow cooker dish.

This is Braised Beef with Horseradish, slow cooked.


Here's the RECIPE for it:

Ingredients:
  • 2 tablespoon plain flour
  • 4 x 175g braising steaks (I used what we call chuck casserole steaks from the grocery store)
  • 2 tablespoon sunflower oil
  • 12 small shallots, peeled and halved
  • 1 garlic clove, crushed
  • 1/4 teaspoon ground ginger
  • 1 teaspoon curry powder
  • 2 teaspoon dark muscovado (molasses) sugar (I used Golden Syrup)
  • 2 cups near boiling beef stock
  • 1 tablespoon Worchestershire sauce
  • 2 tablespoon creamed horseradish
  • 225g trimmed baby carrots, trimmed
  • 1 bay leaf
  • salt and ground black pepper to taste
  • 2 tablespoon chopped fresh chives to garnish
  • roast vegetables to serve

Instructions:
  • Place the flour in a large flat dish and season with salt and pepper. Toss the steaks in the flour and coat.
  • Heat the oil in a pan and quickly brown the steaks on both sides. Transfer them to the ceramic cooking pot.
  • Add the halved shallots to the pan and cook gently for 10 minutes or until golden and beginning to soften. Stir in garlic, ginger and curry powder and cook for 1 minute more, then remove the pan from the heat.
  • Tip the shallot mixture into the ceramic cooking pot, spreading it over the meat, and sprinkle with the sugar.
  • Pour the beef stock over the shallots and meat, then add the Worchestershire sauce, horseradish, baby carrots and bay leaf. Stir to combine then season with salt and pepper. Cover the lid and cook on high or auto for 1 hour.
  • Reduce the slow cooker to low or leave on author and continue to cook the stew for a fruther 5 - 6 hours or until the beef and vegetables are very tender.
  • Remove the bay leaf from the stew and sprinkle with the chopped chives before serving with roast vegetables.

So, I don't have a slow cooker / crock pot and ended up using a cast iron enamel pot instead. I put the whole pot with the ingredients in it into the oven at 120°C for high and at 90°C for low. The temperatures suggested ranges between 120° to 90° C for high and between 90° to 70° C for low.

I thought it would be hard to stir and combine everything, so I mixed the stock, horseradish, sugar, Worchestershire sauce, salt and pepper together and just poured it into the pot.

I'm relatively new to slow cooking since it's not something The Boy is very fond of - he claims slow cooked food is mushy and tasteless. I'm trying to stay patient and not go poking and prodding at the food while it cooks, especially when it is to cook on low for 5 to 6 hours. We'll see how well I fare on that.

Oh yes, The Boy helped me to prep, and I had him peeling the onion shallots. I forgot to ask him to halve them, so they went in whole. I'm hoping that might be okay. The only thing I can think of that it would do to the onions is that it will not fall apart into the different layers in the cooking and will stay whole.

So this turned out to be very, very tasty. It has a slightly sweet flavor to it, but still very savory. I think the sweet comes from the sugar. I might try it without the sugar next time.

We loved this dish. It is a perfect winter dish, for a cold winter's night. We will probably serve it with mash potatoes next time. There was plenty of gravy to soak up which was just delish.

© This work is copyrighted to Invest-Ex and Destiny's Fortunes Pty Ltd

Find me around SOCIAL MEDIA:
Facebook: http://www.facebook.com/dazinthekitchen
Twitter: https://twitter.com/langshipley
Instagram: langshipley
Pinterest: https://pinterest.com/langshipley/


Sunday, July 28, 2013

Slow cooker beef with mushrooms and barley


On Sundays, I like to cook a nice meal for dinner and have leftovers for the week, so the dish needs to be something which leftovers will work. Some dishes just don't lend itself well to leftovers.

Anyway, this Sunday, I really, really wanted to do a slow cook meal and I thought beef would be nice, since The Boy likes beef and because I don't eat much red meat, he doesn't get much beef at home.

I pulled out my slow cooker cookbook, Essentials of Slow Cooking. I actually was looking for a different cookbook but couldn't find it. I think we may have taken it up to The House and left it there accidentally, but now we won't know till we get up there again and check.

I flipped through the beef section of the cookbook and found the Beef with Mushrooms and Barley recipe and decided that that was what I wanted to make for tonight's dinner. I like mushrooms and I like barley.

Here's the recipe:

Ingredients:
  • 30g dried mushrooms such as porcini
  • 2 tablespoons of unsalted butter
  • 1kg beed chuck, cut into 2 inch / 5cm pieces
  • 2 yellow onions, finely chopped
  • 2 cloves of garlic, minced
  • 500g fresh mushrooms, preferably cremini, brushed clean, stems removed and caps thinly sliced
  • 2 cups beef broth / stock
  • 1/2 cup pearl barley
  • 3 carrots, finely chopped
  • 2 parsnips, peeled and finely chopped
  • salt and pepper to taste
  • 2 tablespoons chopped fresh dill

Instructions:
  • Put the dried mushrooms in a bowl and add 2 cups boiling water. Let soak for 20 minutes. Strain through a fine mesh sieve lined with a double layer of cheesecloth (muslin) placed over a bowl. Rinse the mushrooms under cold running water and finely chop. Set the mushrooms and soaking liquid aside.
  • In a large frying pan over medium-high heat, melt the butter. Working in batches if necessary, add the beef and cook, turning frequently, until browned on all sides, about 10 minutes. Remove from the pan and set aside.
  • Add the onion to the pan and saute over medium-high heat until softened, 3 - 5 minutes. Add the garlic and cook for 1 minute. Stir in the rehydrated mushrooms. Add the fresh mushrooms and saute over medium heat until they start to brown and release their liquid, about 5 minutes. Stir in the mushrom soaking liquid and broth.
  • OVEN: preheat oven to 300°F (150°C). Transfer the beef to a Dutch oven. Add the mushroom mixture and stir to combine. Cover and cook until the beef is tender, about 2 hours. Uncover and stir in the barley and 1 cup of water. Cover and cook for 1 hour. Uncover and stir in carrots and parsnips. Cover and cook until the beef and barley are tender, about 30 minutes longer. Season to taste with salt and pepper.
  • SLOW COOKER: Transfer the beef to a slow cooker. Add the mushroom mixture and stir to combine with the rest of the ingredients. Cover and cook for 3 hours on low heat setting. Uncover and stir in barley and 1/2 cup water. Cover and cook for 2 hours. Uncover and stir in carrots and parsnips. Cover and book until the beef and barley are tender, about 1 hour longer. Season to taste with salt and pepper.
  • Spoon the stew into warmed bowls, garnish with the dill and serve at once.

Well, for starters, as usual, I did a few of things differently here, just because I didn't have some things and didn't want to get them.

I did not have any dried mushrooms, so I skipped that. And because of that, I didn't have the 2 cups of mushroom water, so I used 4 cups of beef stock instead.

I bought two parsnips like the recipe said, but the parsnips I got were HUGE, so I'm going to have a lot of parsnips in the stew. :-)

Additionally, the recipe said finely chop the carrots and parsnips, but I didn't want it too fine and look like mush after it cooked down, so I went with little chunks that were just a touch larger than a pea in size. That worked out really well.

I also used a ton of garlic, just because I love garlic. I think I must have used 6 or 8 cloves of garlic instead of the recommended 2. Don't feel you need to do that at all.

With the beef, I coated them in some salt, pepper and flour, before I browned them, because I wanted the flour in the stock to thicken up the stock a bit into a nice sauce.

When I put everything into the pot, before going into the oven, I had the pot on the stove and brought it to a boil before putting it into the oven. I used the oven to slow cook as I do not have a slow cooker (nor do I have the room in my tiny kitchen for one!!)

Once I put the parsnips and carrots in, that took up a lot of space in the pot, but it also meant that there was not enough sauce / juice left and the sauce got quite thick while slow cooking, so I added another 2 more cups of beef stock (or just enough to cover the vegetables) and brought it back to a boil on the stove before putting it back into the oven to cook again.

On the last round of cooking while the vegetables where still in the pot, I cooked it in the oven for another hour, so in total, I cooked it for 2 hours, then 1 hour and then another hour. I always brought the pot back to the boil on the stove before putting it back in the oven each time.

The apartment smelled amazing the whole time that the stew was cooking!!

This stew turned out to be very delicious. The Boy loved it. In fact, he had been sneaking tastes in between each time I took the pot out of the oven. :-)

This is a fabulous winter dish. I served it with a side of quinoa and a side salad. The quinoa soaked up the sauce from the stew and was just delicious!!

© This work is copyrighted to Invest-Ex and Destiny's Fortunes Pty Ltd

Find me around SOCIAL MEDIA:
Cooking blog: http://dazinthekitchen.blogspot.com.au/
Facebook: http://www.facebook.com/dazinthekitchen
Twitter: @langshipley https://twitter.com/langshipley
Instagram: @langshipley http://instagram.com/langshipley
Pinterest: https://pinterest.com/langshipley/
Keek: http://www.keek.com/langshipley
Youtube channel: http://www.youtube.com/user/langshipley
Makeup and beauty blog: http://langshipley-deannasworld.blogspot.com.au/

Sunday, August 5, 2012

Simple beef and cheese macaroni casserole


Last night I decided to try out a recipe that I had seen on Pinterest and thought it looked or at least sounded good.

For the most part it seemed like a very simple recipe, mostly made up of a Bolognaise sauce and elbow pasta (or macaroni).

Here's the *actual* RECIPE: (I didn't think the instructions in this recipe were very good or well written so you might want to pay a bit of attention to what I did outside of the instructions!)

Ingredients:
  • 1 large onion, diced
  • 1 tablespoon canola oil
  • Salt to taste
  • Optional seasonings: black pepper, oregano, cumin, coriander, chopped garlic, hot smoked paprika, chilli powder—whatever you're in the mood for
  • 1 large 800g can whole tomatoes, pureed in the can with a hand blender or in a blender
  • 1kg lean ground beef
  • 250g of elbow pasta or macaroni
  • 1 cup each grated cheddar and mozzarella cheeses

Instructions:
  • Sweat the onions in the oil with a three-fingered pinch of salt.  Add the beef and cook it, breaking it up as you do.  Add another three-fingered pinch of salt or two, along with any dry seasonings you want.  Add the tomatoes and any fresh seasonings you may be using, bring to a simmer, then reduce the heat to low and cook for an hour.
  • Cook the macaroni in boiling water till it's half done.  Drain it and add it to the tomatoes.  Stir it into the sauce.  Taste it.  Add more salt and other seasonings as needed, and cover.  When it's cooled and the pasta has absorbed the tomato juices, transfer it to a large baking dish and cover it with foil.  It can sit out for several hours like this, be refrigerated for up to two days, or frozen a few weeks.
  • Bake it in a 200 degree Celsius oven till it's piping hot (about 45 minutes if it's cold to room temperature).  Just before you're ready to eat, remove the foil, cover macaroni with the cheese and broil till it looks beautiful.

I went about cooking this pretty much the way that I would making a Bolognaise sauce as I would when making spaghetti, so to be honest, I didn't follow the instructions that much for the sauce part of the recipe.

I did decide to vary the spices so that it wasn't my usual Bolognaise flavors so that we could taste something different. Instead of using Italian Herbs, I used Mixed Herbs, along with a generous sprinkling of cumin, paprika and ground coriander.

I also added several (okay a lot!) cloves of garlic into the mix.

After cooking up the sauce, I put it into a saucepan and placed it in the oven to simmer at 120 degrees Celsius for 1 hour, rather than have it sit on the stove at a low heat. I always find this way of simmering a sauce much more effective, safer and consistent.

After an hour, I pulled out the sauce and had the pasta boiling. I also tasted the sauce to make sure it tasted the way I liked it and added some more salt and pepper to taste.

I usually boil pasta for 8 minutes for it to be al dente but this time I only boiled it for 4 minutes based on what the recipe said.

After that, I layered the pasta, then two handfuls of shredded cheese (mix of tasty, cheddar and mozzarella cheese) over the top of it into a baking dish (I should have used a larger dish as I had sauce leftover!). Then I ladled the sauce on top of it.

I then placed the baking dish into the oven at a very low heat - 90 degrees Celsius for 20 minutes for the pasta to finish cooking and soaking up the sauce.

After 20 minutes, I put two more handfuls of shredded cheese on top of the casserole and back into the oven at 200 degrees Celsius for another 20 minutes.

All up, this takes about 2 to 2.5 hours, possibly 3 hours of cooking time. Make sure you allow that if you are going to make it.

I misjudged a few things:
  1. I used a baking dish that was slightly too small and ended up with some sauce leftover. I'll probably freeze that and use it for a pasta dinner one night when I want to just cook something quick.
  2. I also started cooking it a little too late so dinner was quite late for us. I should have started cooking about 5pm or even at 4:30pm but I started instead at about 6pm or possibly a little after. This meant that we didn't end up eating till close to 9pm. Very late for dinner at home.

One last thing, since it's all baked and the casserole has pasta in it, you need to be a little heavy handed with your seasoning if you want the dish to taste good. Don't be shy with your spices and your seasoning. It will really help your dish taste yummy.

While the casserole was baking, The Boy snuck into the kitchen and had a taste of the leftover sauce. He declared it "very tasty" and was quite adamant about saving it for another pasta dish one night. :-) It always makes me happy when The Boy enjoys the food I make.

Anyhow, it turned out to be delicious!! The Boy loved it though he termed the dish very "pedestrian" by which he means "everyday, home cooking that is yummy to eat". We have a ton of leftovers, so there are at least another 2 whole meals for the both of us left for the week.

© This work is copyrighted to Invest-Ex and Destiny's Fortunes Pty Ltd


Sunday, July 1, 2012

Beef lasagne with bechamel sauce ... in the Thermomix


For this weekend's Sunday dinner I decided to try my hand at lasagne. Now, I know a lot of people make lasagne at home and looking at the recipe it's not that big a deal but for some reason, lasagne has always intimidated me, I think because of the layers and also the bechamel sauce. I have had some previous experiences of cooking bechamel with someone where we ended up throwing away so many batches because we didn't make it right the first time, so the idea of bechamel always used to freak me out. Now I have the Thermomix. :-)

I looked through my recipe books and didn't find a recipe for lasagne that I liked and then decided to let Google do the looking for me. I actually searched for "thermomix bechamel sauce" and not lasagne and found a lovely and simple looking recipe that I thought I could make.

The recipe did call for homemade pasta sheets but I decided to skip that step and just buy my pasta sheets from the store. Other than that, I mostly followed the recipe for the bolognaise sauce and the bechamel sauce.


Here are the recipes:

RECIPE for Bolognaise Sauce

Ingredients:
  • 500g Minced beef
  • 50g Bacon
  • 80g Celery
  • 6 cloves Garlic
  • 1 Carrot
  • 1 Onion
  • 50g olive Oil
  • 2 x tins dices Italian tomatoes
  • 1 x tin small tomato paste
  • Salt and pepper

Instructions:
  • Place Bacon, celery, carrot, onion and garlic into thermomix and mix for 15 seconds on speed 7. this finely minces everything.
  • Add oil and saute for 3 mins at 100 degrees on speed 1.
  • Add mince and cook on Varoma, Reverse, Soft for 10 mins. At this point I usually give the sides a scrape down to make sure everything is below the surface.
  • Add tomatoes and cook for 15mins at Veroma temp on Reverse, Soft. Turn over the MC to reduce the spit effect.
  • Once finished place in the Thermomix warmer to keep hot.

RECIPE for Bechamel Sauce

Ingredients:
  • 1Lt Milk
  • 100g Plain Flour
  • 60g Butter
  • 1tsp salt

Instructions:
  • Place all ingredients into the bowl and cook for 12 minutes at 90 degrees on speed 4.
  • Chopping the butter into 4 smaller pieces stops the splash effect when you first turn the thermomix on.

I'm especially grateful for the thermomix when it comes to making a roux or a white sauce or a cheese sauce or a bechemal sauce because it just makes such a difference in terms of how easy it is to do.

I did do some things differently, because that is just me:

For the bolognaise sauce:

  • Where it said "Place Bacon, celery, carrot, onion and garlic into thermomix and mix for 15 seconds on speed 7. this finely minces everything." I only ran the Thermomix for about 3 seconds because that almost minces the ingredients up without turning it to mush. Running the Thermomix for 15 seconds would have given you a fine paste. I didn't want that.
  • I also left out the bacon from the mincing part of the recipe and decided to slice the bacon into thin strips and cook with the minced beef.
  • I also had a few mushrooms that had been sitting in the fridge for a while and needed to be used up. Instead of throwing them in with the other vegetables, I sliced them up and included them in to cook with the minced beef so that I had slices of mushroom in the mix.
  • After it cooked in the thermomix, I poured it out onto a pan and added a generous amount of Italian herbs and a teaspoon of chili powder. After that, I set the oven to 100 degrees C and put the whole pan into the oven to simmer for about an hour, just to really get the flavor going.

With the bechamel sauce, I added two handfuls of cheese to really give the flavor a good base. I like cheese to the sauce because to me it "grounds" the flavor of the sauce.


To assemble the lasagne

Ingredients:
  • Lasagne pasta sheets
  • Bolognaise sauce
  • Bechamel sauce
  • Shredded cheese
  • Handful of basil

Instructions:
  • Assemble the lasagne in layers of pasta, bolognaise and bechamel repeatedly until finished in a large baking dish.
  • Place a few leaves of basil on top of each layer, on top of the bechamel sauce.
  • Top off with some shredded cheese
  • Put into the oven and bake in oven for 45 mins in 180 degree oven with another 7-10 mins on 225 degrees to really brown the top.

That's pretty much it for my lasagne making efforts. It seems quite a long drawn out process with all the bolognaise making, bechamel making, assembling and baking but if you take it one step at a time, it's not too bad. That said, you still need to allow a fair bit of time for this whole thing to be prepared and cooked. I'd say allow yourself a good safe 3 hours from start to finish, though there's some down time in between like when the sauce is simmering and when the lasagne is in the oven. You don't need to be standing over it then.

Also, remember - this may be a thermomix recipe but people have been making lasagne without a thermomix for much longer than the thermomix has been around. You can easily make the bolognaise sauce and the bechamel sauce in a saucepan and get the same results.

Happy eating!!!


© This work is copyrighted to Invest-Ex and Destiny's Fortunes Pty Ltd

Sunday, June 24, 2012

The makings of our beef stroganoff dinner


We're having beef stroganoff for dinner tonight. Just prepping the food for cooking.

Me: Is beef stroganoff one of your favorites?
Boy: No, it's decent, why?
Me: Was just wondering.
Boy: I'll get some more wine and then it will be one of my favorites.

The Boy is planning (of course) a blog post on what wine goes best with beef stroganoff.

It's beef but it's also rich and creamy, so what do you think would be a good wine for beef stroganoff?

Head over to The Boy's blog to read more about the wine he pairs with my food and also for the post on what wine to have with beef stroganoff. (I'll post the link once it's been written!)

Hope everyone's having a great weekend.

© This work is copyrighted to Invest-Ex and Destiny's Fortunes Pty Ltd

Sunday, April 1, 2012

I want to know what HUX is ....

We've got friends visiting us from Qatar. They are dear, dear friends who we met when we lived over there. As was said over the meal, when you are there, as people come and go, you have to love them fast and love them deep and with these friends, this is what we did.

We are delighted to have them over in our fair city and to be able to show them our home and share parts of our lives with them.

Fortunately, they also arrived on a Friday night which gave us the weekend with them. On the Saturday, we spent the day at the Blue Mountains and ended the day at HUX @ Nortons.

When I mentioned that we would be eating at HUX for dinner, the response was quite excited and enthusiastic.

"I must know what this HUX is, I see you talking about it on facebook so much."

"This HUX has peppered so many of your facebook status updates, I'm so excited to find out what it's all about."

So .... dinner at HUX, it was.

Fortunately for us, Jay was there the night we turned up and we had a nice time and was also able to introduce him to our friends.

As usual the food was delightful and as usual, I didn't eat it all because I have a stomach the size of a pea. Again, fortunately, Jay is used to me and my odd eating habits and takes it all in stride. When I mentioned what I wanted to try that night, he looked at me and exclaimed "my gosh! I'm going to have to serve you everything in a thimble!" .... LOL!! Jay knows me so well!!

We started with a beetroot, goats cheese and asparagus salad, which The Boy had. Jay tells us that the watermelon radish in the dish was grown in how own garden specially for this dish. I'm not a fan of beetroot, but I will eat Jay's beetroot.


I had the seafood chowder, which was thick and creamy and made with big chunks of John Dory. Possibly the yummiest chowder I've had in a long time. I was certain it would give me cow belly, but it didn't. :-)


Our friends shared a prawn salad with a chili infused mayonnaise. The salad was tossed in a rather delightful and tangy vinaigrette that had one of our friends almost licking the plate. He said that he was not one for frilly green stuff but this was an exception. Of course, the salad was also massive and a meal in itself. There was plenty to share.


As we moved onto our mains, I, of course, had wondered how I was going to finish mine but then I remembered that I had three other people to help me with it. :-)

The Boy had his usual, which was the Angus Porterhouse steak done medium rare, but with Jay's awesome potato salad rather than potato chips. I think The Boy has had this dish 4 out of the last 5 times he's eaten at HUX.


I had the slow roasted pork belly in apple juice, which was supposed to come with beans and chorizo, but I didn't want beans and chorizo, so Jay had to make something up for me. Fortunately (again!), Jay is very good at "making something up" and whatever he served with the pork belly was yummy. I only ate one of the two pieces of pork belly that came with my dish, and left the other piece for my other three dinner companions to sample. The pork belly was delicately flavored, moist and topped with a super crunchy crackling.


Our friends both had fish. One of them had a whole fish of the day - which was a flounder lightly grilled with lemon herb butter. It looked very tasty to me. I think I would have liked it.


And the other friend had the John Dory fish and chips. I've had that dish before and it is superb. She had it with the chips, whereas I usually have it with the potato salad, but her husband did order a side of the potato salad, so they shared that as well.


As usual, it was a delicious and satisfying meal at HUX. Of course, also great value being technically speaking "pub food" but seriously, it ain't "pub food" in the traditional sense when you have Jay cooking your meal for you. Everything is "home made" and nothing is processed or pre-packaged.

Of course, I recommend HUX highly and think everyone should go!

© This work is copyrighted to Invest-Ex and Destiny’s Fortunes Pty Ltd

Monday, February 6, 2012

Making meatballs for dinner


It's a messy job but someone's got to do it and that someone was The Boy!!! Well, okay, I did help, which made shaping the meatballs go a lot quicker.

The Boy wanted Swedish meatballs for dinner tonight, which meant meatballs, creamy mushroom sauce with fettuccine. (We seem to be eating a lot of pasta with our meals lately).

We decided that we would make our own meatballs. We've bought meatballs from the grocery store before and they were quite decent, but decided to make them ourselves this time.


Here's what we did:

Ingredients:
  • 500g mince beef
  • 1 small onion chopped finely
  • 1 carrot chopped finely
  • 4 cloves of garlic minced
  • 1 bunch of chived chopped finely
  • 1 teaspoon salt
  • 1 teaspoon pepper
  • 2 eggs
  • Oil (any sort other than olive oil)

Instructions:
  • Mix all the ingredients (except the oil) thoroughly in a large bowl
  • Form into small round balls
  • Heat a pan and fill with about 1cm of oil
  • Cook meatballs in oil until golden brown

The recipe made about 30 meatballs, of which we ate about 10 tonight. The rest we've put in the freezer for another meal or two.

The verdict? The Boy says it tasted exactly the way he expected it to taste. :-)

© This work is copyrighted to Invest-Ex and Destiny’s Fortunes Pty Ltd

Saturday, February 4, 2012

Beef stroganoff with fettuccine noodles


I'm not entirely certain why I had a craving for beef storganoff. I have not really eaten the dish before, perhaps once or twice in the past, but not often. Somehow, the idea of beef stroganoff works for me. Creamy tender beef over noodles. It just seems such a warm, hearty meal - very comfort food.

I had talked about cooking this dish all week and finally got round to doing it last night, after (also) finally doing grocery shopping so that I had ingredients to cook it.

As I mentioned before, I had tweeted about it and got the recipe from a responding tweet. Very pleased with how it turned out.

This RECIPE comes from yummly.com and is called their Beef Stroganoff III (probably because there are so many others before it. :-) I thought that was cute!):

Ingredients:
  • 500g beef chuck roast sliced thinly
  • 1/4 tsp salt
  • 1/4 tsp black pepper (ground)
  • 60g butter
  • 2 shallots / green onion (sliced white parts)
  • 2 tbsps all-purpose flour (purpose)
  • 160ml beef broth (concentrated)
  • 1/2 tsp prepared mustard
  • 1 small can sliced mushrooms (drained)
  • 50ml sour cream
  • 50ml white wine
  • salt (taste)
  • black pepper (ground, taste)

Instructions:
  • Remove any fat and gristle from the roast and cut into strips 1/2 inch thick by 2 inches long. Season with 1/2 teaspoon of both salt and pepper.
  • In a large skillet over medium heat, melt the butter and brown the beef strips quickly, then push the beef strips off to one side. Add the onions and cook slowly for 3 to 5 minutes, then push to the side with the beef strips.
  • Stir the flour into the juices on the empty side of the pan. Pour in beef broth and bring to a boil, stirring constantly. Lower the heat and stir in mustard. Cover and simmer for 1 hour or until the meat is tender.
  • Five minutes before serving, stir in the mushrooms, sour cream, and white wine. Heat briefly then salt and pepper to taste

I must say, it turned out to be delicious (I don't like cooking bland food) and The Boy loved it. He had seconds and then complained that I made the dinner too yummy and fed him too much. :-)


I, of course, could not help myself and did a few things differently.
  • I used about 80g of butter instead of the 60g mentioned 'cos I had a bit more beef as well, possibly about 600g instead of the 500g since it was 2 pieces of chuck steak that I cut up. It was an approximation.
  • I sliced up the beef very, very thinly, though still keeping them long - lengthwise. I did not want big chunks of beef in the dish especially since I'm off red meat right now and can't stand the sight of large chunks of red meat.
  • I was a bit confused by the recipe asking for 160ml of beef broth concentrated, so I used the beef stock that I had. I used 4 teaspoons of beef stock to 500ml of water, which is more concentrated that usual (such as when I am cooking soup and I use that amount of stock to 1 litre of water). This made for a lot of liquid that I had to reduce a little bit, but not by much because we liked it saucy.
  • I only had a large can of mushrooms so I went with that. I figured a few more mushrooms wouldn't hurt, especially since I had so much sauce to go with the dish.
  • We had a bottle of white wine that The Boy opened a few nights ago that he did not like for drinking and I asked him to save it for me so that I could cook with it. Since I had so much white wine leftover and I didn't have a small measuring cup, I ended up using 100ml of white wine.
  • I went a little overboard with the sour cream. I knew that I would have to throw out whatever sour cream was leftover as I would not have a use for it, so I was generous with the sour cream. I used 150ml of sour cream (which was half the tub) rather than the 50ml recommended. That made for a very creamy (but very tasty) sauce. For those of you who do not like a creamy sauce, just follow the recipe exactly and just use the 50ml recommended.
  • Where it said to simmer for 1 hour, rather than do it over the stove on an open flame, I decided to slow cook it in the oven. I had already planned on that from cooking the entire dish in a cast iron pot, so after it was ready, I put the whole pot, covered, into the oven at 120dC for a little over an hour to simmer. That worked out very well. The thing I like about doing it this way is that I do not need to watch it and with the cast iron pot covered (the lid seals really well), there was not chance of it boiling dry.
  • Between the stock and everything else in the dish, it did not need salt for further seasoning. I did add a little bit of pepper to give the flavor a bit of depth, but not enough to overpower the dish. I don't think you could even really taste the pepper, which was great.

I served the beef storganoff on a bed of fettuccine noodles with a side of a mixed lettuce salad dressed in caramelized balsamic vinegar (1.5 tablespoons) and garlic infused olive oil (3 tablespoons).

I definitely think this one is a keeper and I'm going to do this again, though not regularly. It's just too rich a dish to eat on a regular basis.

© This work is copyrighted to Invest-Ex and Destiny’s Fortunes Pty Ltd
Friday, February 3, 2012

Beef stroganoff bubbling away in the pot


I had been wanting to cook beef stroganoff for a while and was looking for a recipe. I've got tons of recipe books on my shelves but did not feel like sitting down and sifting through all of them, so tweeted about it. I got some replies from other tweeters and picked one of the recipes that was recommended.

© This work is copyrighted to Invest-Ex and Destiny’s Fortunes Pty Ltd

Wednesday, February 1, 2012

Killer beef

Last night we had Killer Beef for dinner. I talked about it here and mentioned why this dish is called Killer Beef. It's a very silly reason really, but the name has stuck and now whenever The Boy wants this dish, that's what he asks for.

We still haven't gone grocery shopping yet, so we continue to scrounge through the pantry and fridge for food to cook for dinner. That's not necessarily a bad thing because it's making us diligent about using up what we have and not building up an excess of stock. It also keeps things fresh and pre-expiry date.

Anyway, back to the dish ... this is really a one-pot dish. Veggies, meat and rice all in one. Very easy to cook and very tasty.


Here's the RECIPE for it:

Ingredients:
  • 1 tablespoon olive oil
  • 600gms beef strips / bite size pieces (can use steak cut up)
  • 2 cups broccoli florets in bite size pieces
  • 1 cup water
  • 1 tablespoon brown sugar
  • 1 tablespoon soy sauce
  • 1 tablespoon hot chilli sauce
  • 1 packet Lipton Onion gravy soup mix
  • I large packet brown rice (cooked)

Instructions:
  • Heat wok or frying pan and put in olive oil to heat
  • Put in steak pieces and brown , remove from pan
  • Put in remaining ingredients, except rice and bring to boil, simmer for 2 minutes
  • Put steak back into pan
  • Add rice into pan, continue to heat for a few minutes, or until liquid reduces
  • Remove from pan and serve

Because I'm running down the fridge and The Boy had a craving for veggies, I made an extra large serve and threw in a few more veggies that I normally would.


I used an entire head of broccoli, as well as a carrot and an onion. Surprisingly, this dish does not call for garlic, so I didn't use any, although it felt a bit weird cooking without garlic.

I also added a little extra soy sauce for flavor since I had a bit more rice than usual and all those extra veggies.


I had some chicken mince in the freezer that I found, which has been there for I don't know how long, so I decided to throw that in too. I cooked the chicken mince first, removed it from the pan and then cooked the beef. With the beef, I did not cook it all the way through, just gently browned it, since later on, it will cook a little more when the rice is added and you don't want to over cook the beef and have it tough. You want your beef to stay tender.

The other thing to note also is that I'm about to run out of the Lipton Onion gravy soup mix and I can't get it where I am. I think that when I'm out, I'll most likely switch to a locally available onion soup mix of some sort, either Continental or some similar brand, probably in the French Onion flavor.

© This work is copyrighted to Invest-Ex and Destiny’s Fortunes Pty Ltd

Ingredients from last night's dinner


We had Killer Beef for dinner last night, a name given to the dish that The Boy claims tried to kill him once when he was eating it. In reality what happened was that the dish was still very hot when I served it up and when The Boy tried to eat it, it burned his tongue and exclaimed "Ow! The beef tried to kill me!!" hence, Killer Beef was born. It's actually a beef and broccoli dish with rice. :-) Recipe to follow.

© This work is copyrighted to Invest-Ex and Destiny’s Fortunes Pty Ltd