Showing posts with label dessert. Show all posts

Sunday, March 30, 2025

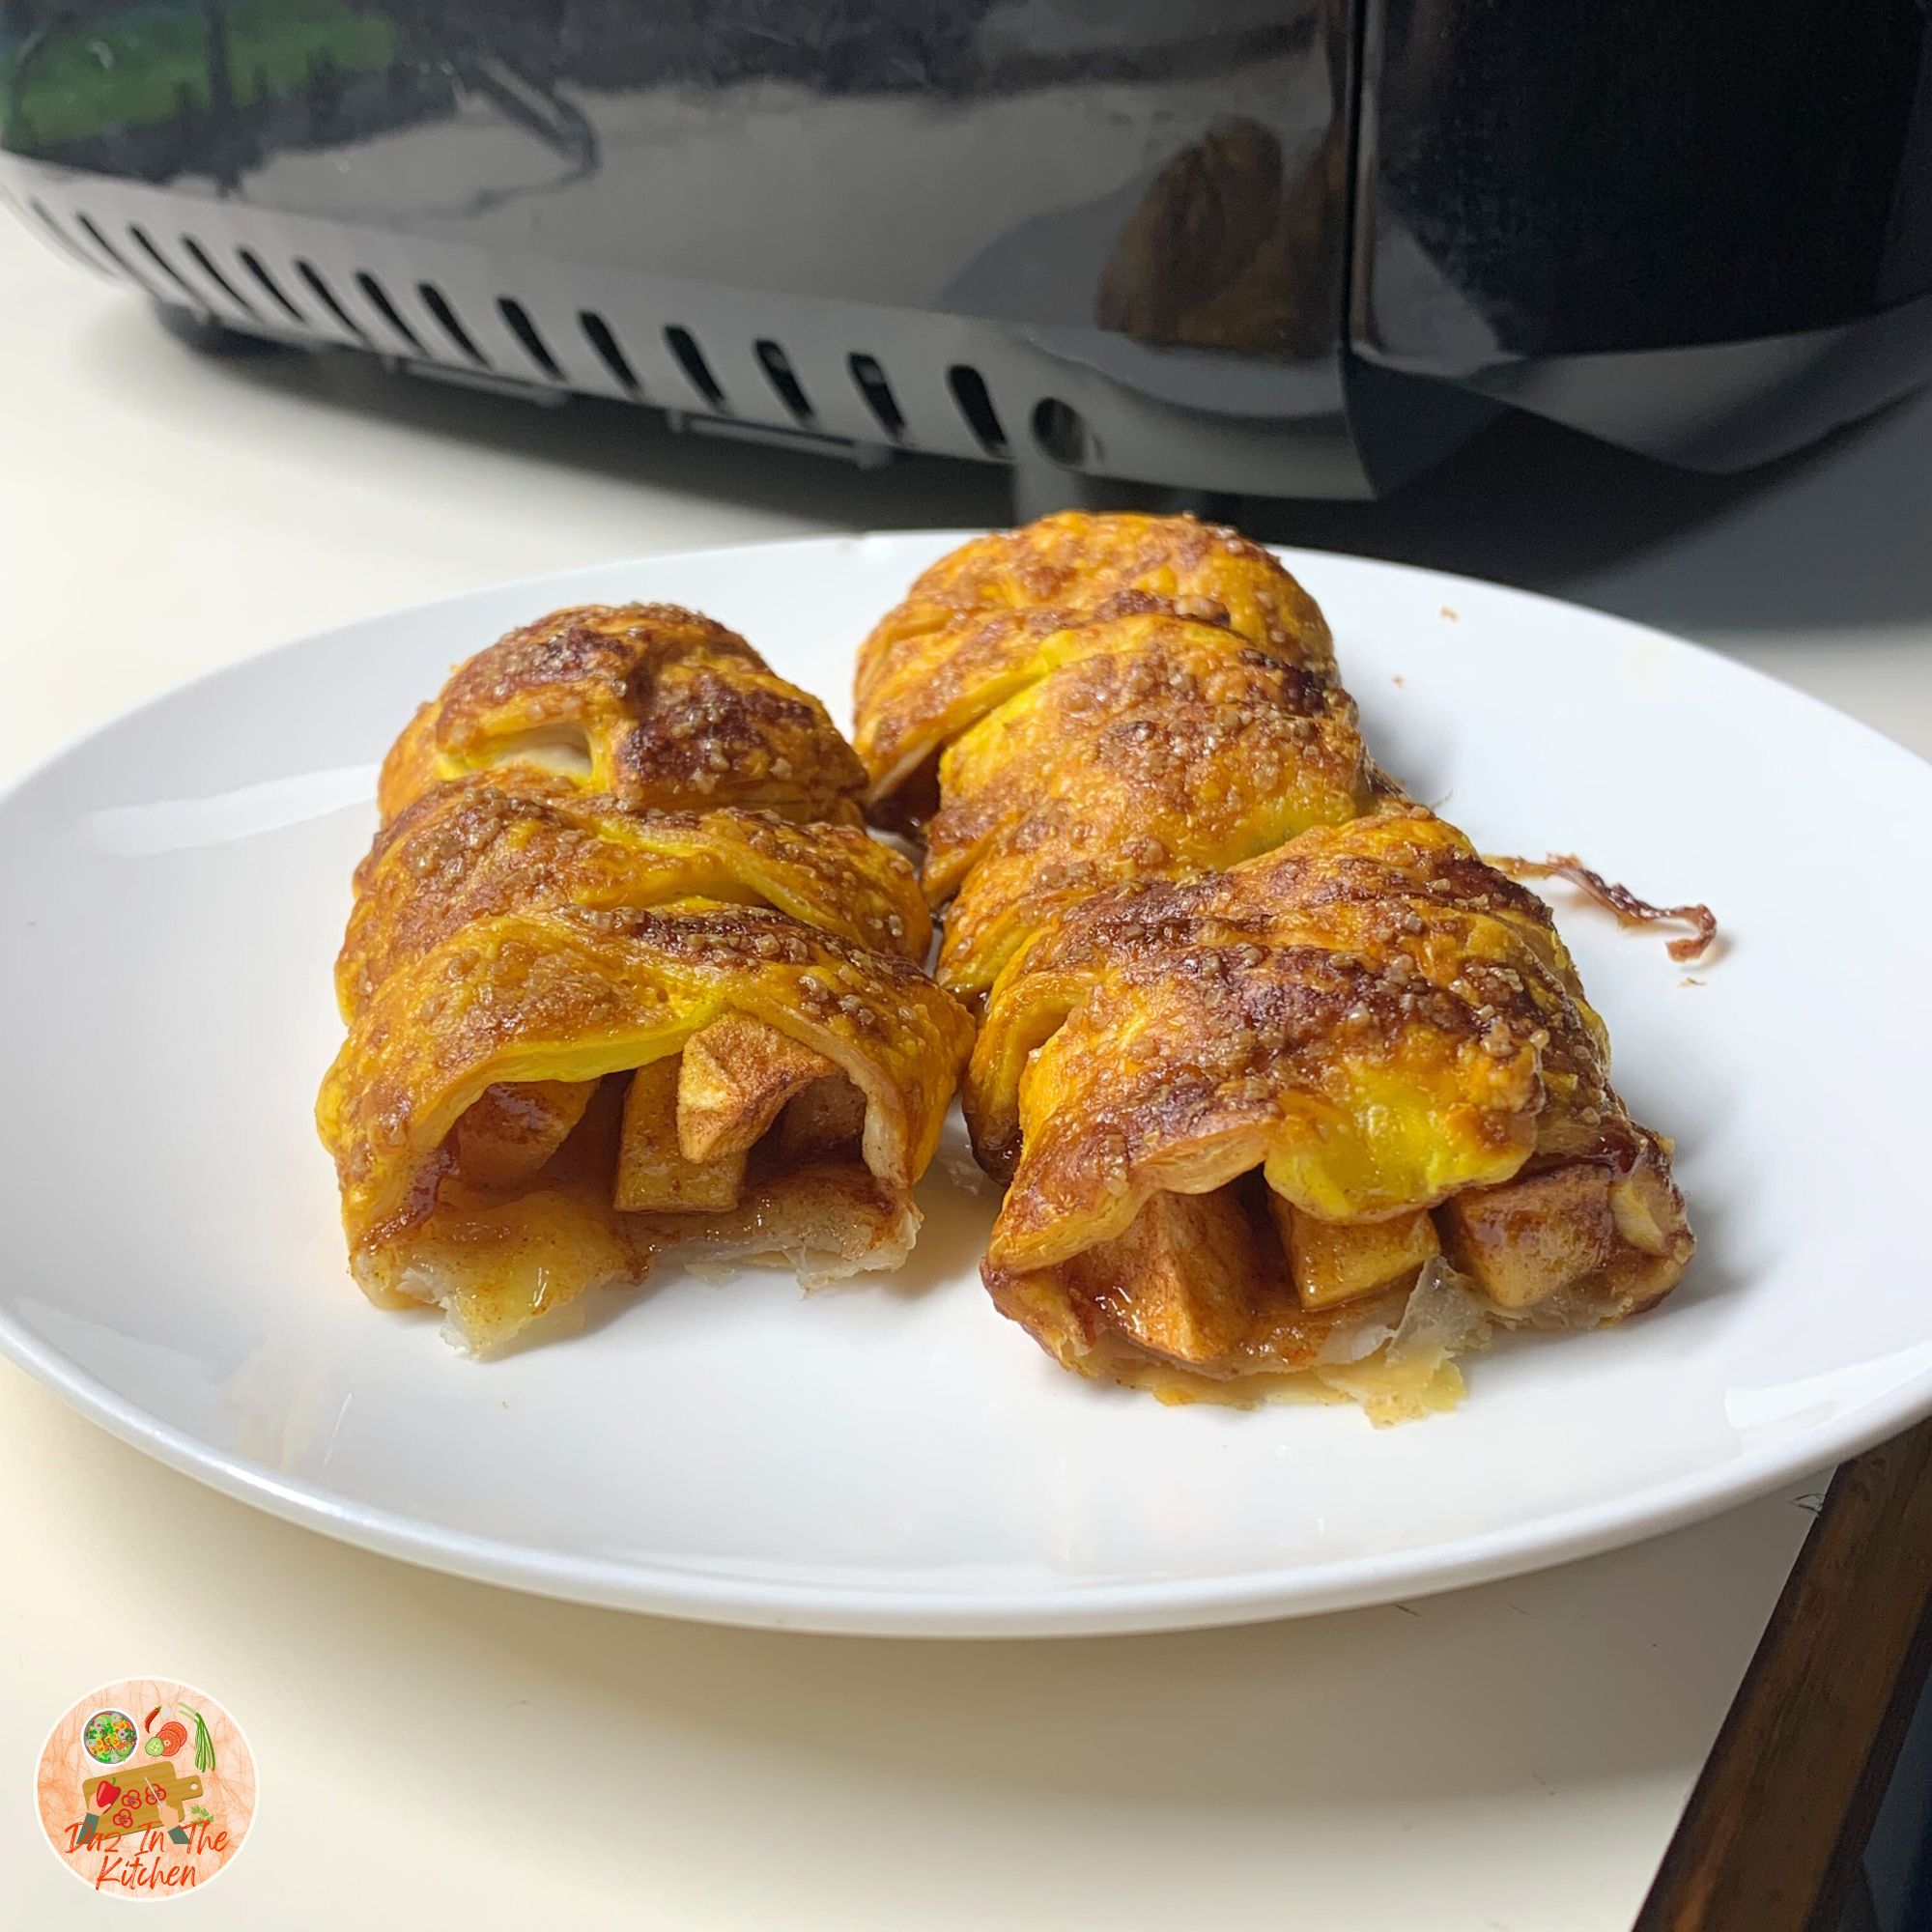
Apple pie braids

Apple pie braid Apple pie braid

I had these apples hanging around and I'm not a fan of eating raw apples. I do, however, LOVE anything baked apple. These were the result. Yum!
Thursday, December 19, 2024

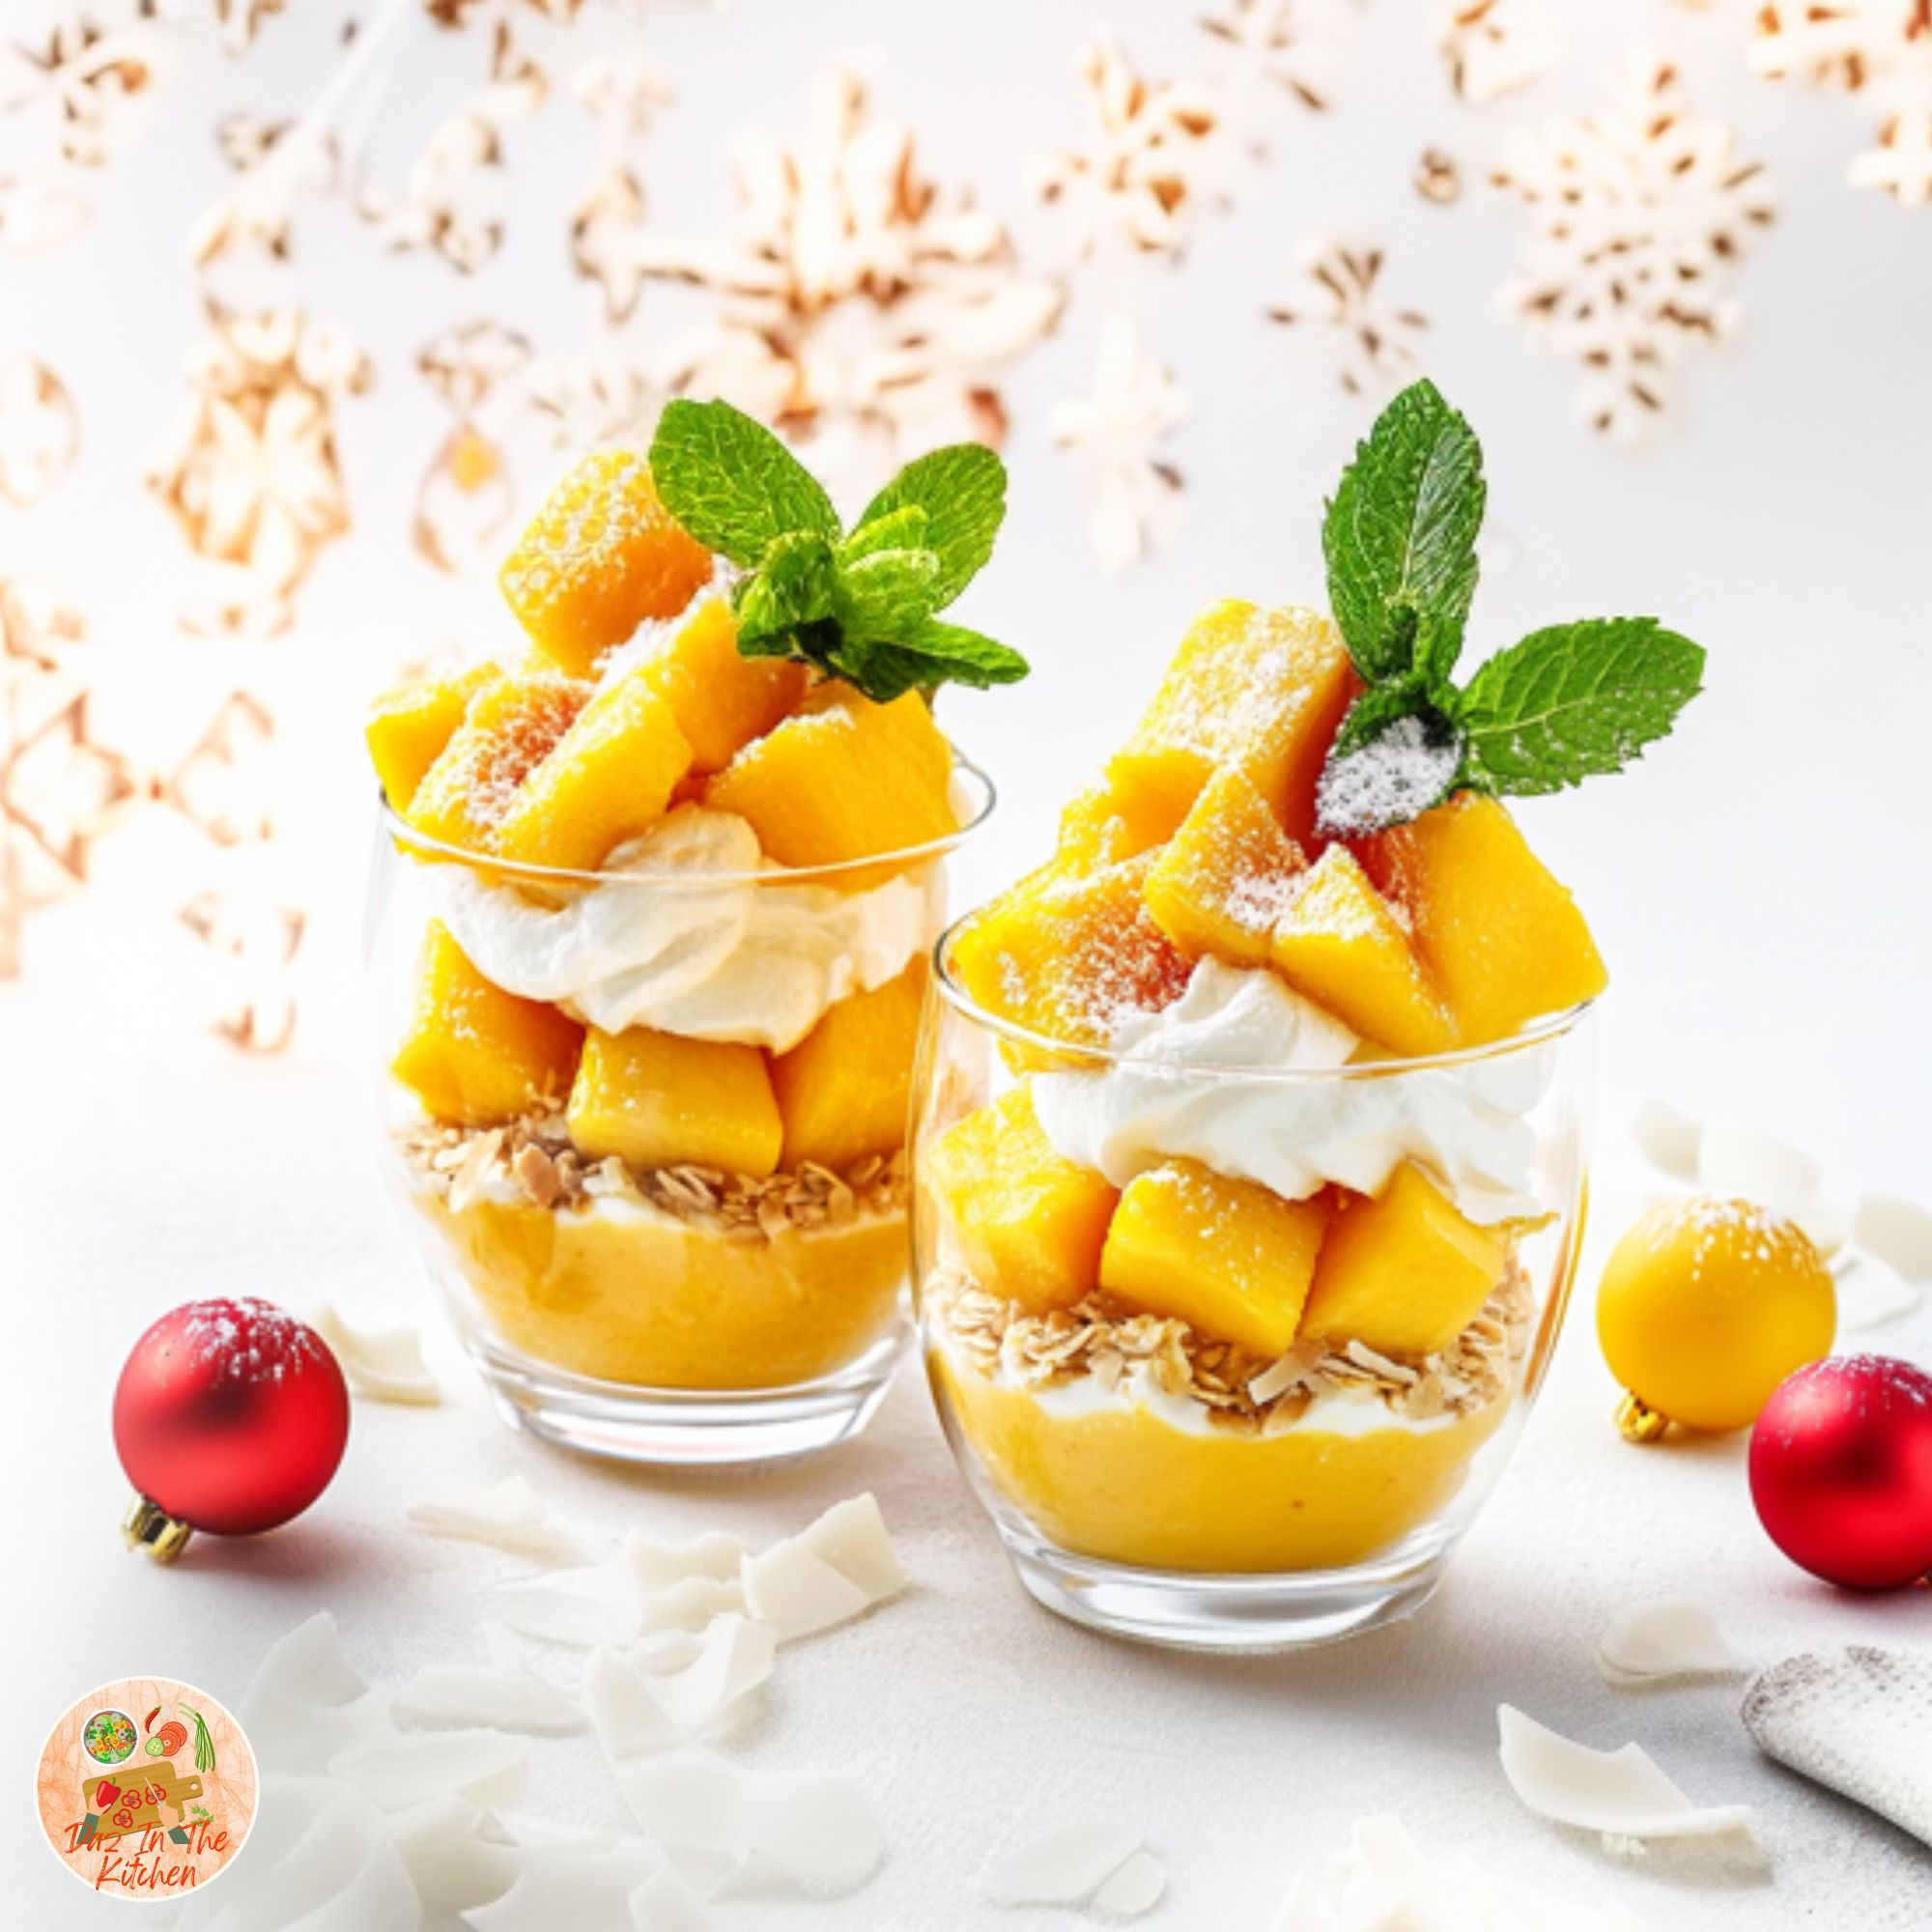
Mango cream parfait

Mango cream parfait

I'm not big on dessert since I'm a diabetic, so you won't find me baking a lot of cakes and cookies. But I had this idea that I wanted to serve a dessert with Christmas lunch. A friend mentioned a trifle, and I thought, hey, it's mango season and I could do a twist on a traditional trifle. No cake since your girl barely bakes.

Wednesday, March 4, 2015

Blueberry cobbler and lemon cheesecake ... sometimes it's a bust!

I know I'm always posting about the yummy food I make and how delicious they turn out to be, but let's be frank here, not all food experiments turn out great. For me, more often than not, it is the baking or dessert dishes that turn out to be rather sad for me. I just don't do them well. I am working on it and trying more experiments and adding more to my repertoire but alas, some things are a bust!

Most recently, I had two things which I made that I was not entirely happy with. I don't think they will be keepers for me.

One of them was a cobbler. A friend of mine posted a lovely picture of a blackberry cobbler which she made with her grandson and it was a delightful family scene with the cobbler in front (looking delicious) and her grandson cute as can be in the background. He wanted "grandma time" and my lovely friend who is a wonderful baker decided they would bake together.


Her cobbler looks amazing. My cobbler looks like little blueberry turds.


I'm not too fussed about the way they looked, as I made them individually in ramekins whereas she made one huge one in a big glass bowl. The problem I had with my cobbler is that it was way too sweet. The recipe called for 1 full cup of sugar and I felt like I was literally just eating pure sugar with that much sugar in the dish. If I were to ever make this again, I will use half the sugar and see how I go with that. Of course, The Boy is also not a fan of cooked blueberries, so I don't know if I will be trying this again soon.


The other more recent disappointment was my lemon cheesecake. We were having company for dinner and I had the idea of a cheesecake for dessert. I searched the interwebs and found a lemon cheesecake recipe that I could make in the Thermomix which the poster claimed was wonderful and easy. However, at the end of the recipe, she put a disclaimer in which said:

Since I posted this recipe, some people have commented that their filling didn't set, although many others have said it worked fine.  I have no answers as to why this might have happened.  Perhaps the correct ingredients or quantities were not used?  Sometimes people substitute 'light' ingredients and expect the same result.  All I can say is I have been making this recipe of my Grandmother's since I was a teenager (over 30 years) and I have never had a problem with it. I hope it works for you.

This, of course, is not promising.

Anyway, turns out, I'm one of those people where the cheesecake didn't set properly for me. In fact, when I cut it, it just turned out to be this gooey mess with the filling spilling out of the sides. She said that I didn't use the correct ingredients or quantities, which is not true. I followed her instructions exactly and I did not substitute "light" ingredients. :-/

On top of that, what she failed to say was that this is only a half sized cheesecake, which I didn't really mind, but her recipe proportions were all wrong. The proportions she had down for the crust was not enough for the crust to reach 5cm up the side of the springform pan (my pan wasn't even that high or large) and I needed to use 1.5x portion of the crust ingredients just to get enough crust for my small 20cm springform pan.

The filling was also under proportioned, since I think I would have had to double the ingredients to get the filling to fill up my small pan. As it was, I only got half a pan of cheesecake filling and there was 2.5cm of crust sticking out the top of the cheesecake.

All that said, the filling and crust were both very tasty and it was a yummy cheesecake. It just didn't set properly and did not present well. Don't let my picture fool you, it looks really pretty in the crust but you can't tell that the filling didn't set from picture, can you? :-p

When I grumbled about the cheesecake recipe on Facebook, a foodie friend of mine made the comment that unfortunately a lot of recipes are posted untested. He and his wife are working with a chef to publish a cookbook right now and he says they test each recipe at least 3 times to make sure that they work before it goes to print. He also mentioned that Julia Childs never tested any of the recipes in her famous cookbook.

This just goes to show that there are so many variabilities when it comes to baking and desserts and these were certainly some of my #bakingfail moments. :-(

It also takes practice, I think, but there are only two of us in the house and practicing on baking and making desserts without many people to eat them would just mean my blood sugar levels will go through the roof. Not a good thing.

Anyway, that's it from me today. Just a little trip the lane where sometimes my food experiments go awry. Back to yummy (and tested) recipes time.

ps. I didn't post the recipes for the cobbler and lemon cheesecake because well, I don't feel good about posting recipes that didn't work for me and I can't say that it turned out great, but if you really want it, message me on Twitter or Facebook and I'll send it to you.


© This work is copyrighted to Invest-Ex and Destiny's Fortunes Pty Ltd

Find me around SOCIAL MEDIA:
Cooking blog: http://dazinthekitchen.blogspot.com.au/
Facebook: http://www.facebook.com/dazinthekitchen
Twitter: @langshipley https://twitter.com/langshipley
Instagram: @langshipley http://instagram.com/langshipley
Pinterest: https://pinterest.com/langshipley/
Youtube channel: http://www.youtube.com/user/langshipley
Makeup and beauty blog: http://langshipley-deannasworld.blogspot.com.au/


Wednesday, February 11, 2015

Brandied strawberry tarts with fresh whipped cream ... in the Thermomix


Anyone who knows me and knows my cooking abilities will know that dessert is not my strong suit. I suck at baking and I always struggle with trying to figure out what to make and serve for dessert when we have company.

Recently, we had some friends coming over for dinner and after a while of thinking, I had managed to figure out starters and mains but dessert still eluded me. I even posted on Facebook asking my friends to offer suggestions (I got some good ones!).

Then I looked into the fridge and found that I had a lot of strawberries waiting to be eaten and I thought that I would do something simple like fresh strawberries and cream, but that just seems like such a cop out.

Next, I decided that I would marinate the strawberries to give it a little something interesting to just fresh strawberries. This quickly evolved into the idea of perhaps a strawberry tart.

I'd like to point out that I have never made this dish before at that point and was rather nervous about the whole thing, but decided to be adventurous. I was experimenting on dinner guests, which I generally don't like to do, but these friends were our neighbors and well, they've seen me in my pajamas so an experimental strawberry tart would not be too terrible.

Here's what I did to make the tarts:

Ingredients:

  • 500g strawberries halved
  • 1/2 cup of spirits, rum, brandy or any sort you like
  • 1/3 cup brown sugar
  • Juice of 1 lemon
  • 2 sheets of puff pastry, defrosted, halved
  • 1 egg
  • A dash of milk

Instructions:
  • Halve the strawberries and put them into a large bowl.
  • Pour in spirit, brown sugar and lemon juice. Mix thoroughly. Cover in cling wrap in put in fridge to marinate. After a few hours take out, stir, cover again and put back in fridge. Best if marinated overnight but if not, 4 to 6 hours is good.
  • When ready to cook, thaw out two sheets of puff pastry. 
  • Heat oven to 200°C.
  • Halve the puff pastry sheets and fold over the edges on all sides to make a 1cm rim. Make an egg wash with the egg and milk and paint over the rim of the pastry.
  • Place strawberries (without the liquid marinate) into the middle of puff pastry - divide equally between the 4 serves.
  • Put into oven and bake for about 25 minutes or until the sides are golden brown.
  • Serve with freshly whipped cream.

And of course, the cream was just quickly whipped up in my trusty Thermomix.

Ingredients:
  • 250 ml Whipping Cream
  • 40 grams Caster Sugar

Instructions:
  • Speed 3, 1 Minute 15 seconds, Butterfly  - Place the ingredients in the TM 31 bowl and mix per settings.

If you find the cream is not thick enough, just whip it for an extra 15 or 30 seconds, but be careful not to over-whip it or you will end up with butter.

I'm very pleased to say that the tarts turned out to be delicious. Served with the whipped cream, which got all melty from the hot tart, it was just divine. The Boy loved it and our guests asked for spoons so they could scoop up the melted cream that had mixed with the brandy mixture from the strawberries. Very tasty!

If you do make this, be sure to post pictures for me to see either on Instagram - be sure to tag me with @langshipley or on my Daz In The Kitchen Facebook page.


© This work is copyrighted to Invest-Ex and Destiny's Fortunes Pty Ltd

Find me around SOCIAL MEDIA:
Cooking blog: http://dazinthekitchen.blogspot.com.au/
Facebook: http://www.facebook.com/dazinthekitchen
Twitter: @langshipley https://twitter.com/langshipley
Instagram: @langshipley http://instagram.com/langshipley
Pinterest: https://pinterest.com/langshipley/
Youtube channel: http://www.youtube.com/user/langshipley
Makeup and beauty blog: http://langshipley-deannasworld.blogspot.com.au/

Friday, October 10, 2014

Grand Marnier souffle ... in the Thermomix


I have recently decided that I need to spend more time working on and testing dessert recipes as desserts seem to be the most lacking component of my cooking repertoire. As a result, we did a little shopping trip to my favorite bargain book store and picked up a heap of dessert recipe books.

Even before the recipe books, I decided that I would like to try my hand at a souffle because I wanted to focus more on individual serve desserts rather than big pies and cakes (plus I suck at baking!).


I had a few souffle recipes in the books I got but randomly found a Youtube video of a really corny American guy (you have to watch the video to get what I mean!) making a Grand Marnier souffle to impress a girl on Valentine's Day. Of course, if you want to make the souffle the traditional method, by all means, just do what the guy did in his video (with his freakishly small spatula!). I have also included links below to the written recipes.


I decided to study the recipe and convert it for the Thermomix because (1) I could not find a Thermomix Grand Marnier souffle recipe and (2) The Boy really wanted a Grand Marnier souffle. He's been talking about it forever.

It took quite a while to convert the recipe from a regular recipe to a Thermomix recipe and I worked on it for a little over an hour, researching other souffle recipes to compare and to make sure that I got the timing and settings right. I have to admit, going into making the souffle that I was quite stressed and anxious as I did not know if it would turn out, or rise, or taste good. (The initial batter was not tasty at all!!)


Here's the recipe for what I did:

Ingredients: http://allrecipes.com/Recipe/Grand-Marnier-Souffle/Detail.aspx 
  • 1 tablespoon butter, melted
  • 1 tablespoon white sugar
  • 5 teaspoons butter, melted
  • 5 teaspoons all-purpose flour
  • 1/4 cup cold milk
  • 2 egg yolks (room temperature)
  • 1 teaspoon freshly grated orange zest
  • 1 tablespoon brandy-based orange liqueur (such as Grand Marnier®)
  • 1/8 teaspoon vanilla extract
  • 2 egg whites
  • 1/4 cup white sugar, divided

  • 2 large egg yolks (room temperature)
  • 1 cup heavy cream
  • 1/3 cup white sugar
  • 1 tablespoon brandy-based orange liqueur (such as Grand Marnier®)
  • 1/4 teaspoon vanilla extract

Instructions:
  • Butter and sugar ramekins and set aside on top of baking sheet.  Butter the ramekin and use a brush with strokes going straight up the sides. It encourages the rise to work properly.
  • Heat oven up to 180°C
  • Add butter, flour, milk, egg yolks, orange zest, grand marnier liquer and vanilla extract into Thermomix. Cook on  7min/90C/speed 4. VERY IMPORTANT: Check it at 5 minutes and make sure that is has not gotten too thick. Add more milk if necessary. You can't just let it run for the full 7 minutes without checking it, as your batter will probably end up too thick and dense, and not creamy enough! It needs to be a thick, creamy consistency. Transfer to a bowl and set aside to cool.
  • In a separate bowl, whisk egg whites and slowly add sugar until they form soft peaks. Insert the butterfly whisk and whisk the egg whites on speed 3 measuring cup OFF / 4 minutes. Add sugar slowly when it starts to foam. Continue whisking until soft peaks (the whites shouldn't be very firm).
  • Pour grand marnier mixture into a bowl when it is lukewarm, add 1/3 of the beaten egg whites and stir vigorously to loosen it. Then, add the remaining egg whites and fold them in gently in order to keep as much air in as possible.
  • Bake in the preheated oven until risen and browned, 16-20 minutes.
  • To serve, take out of oven, sprinkle with icing sugar. Then, make a hole in the middle of the souffle and pour in 3 tablespoons of the Creme Anglaise. Makes it very lush! Serve and eat immediately!!

Creme Anglaise (souffle filling):
  • Add everything into TM bowl. Cook 8 min/80C/speed 3.
  • Pour into a small gravy boat or a milk jug to serve.

This recipe makes 2 medium sized souffles. If you want to make more, just double or triple the recipe as required.

From start to finish, between prep and cooking time, this took between 45 - 60 minutes, so if you are planning on making this for dessert after a dinner party, be prepared for that. It could take a while between courses.

Also, I didn't slowly pour the sugar into the egg whites to slowly whisk to make soft peaks. I just dumped all the sugar in and whisked away. I did, however, stop and check while whisking and whisked a total of about 4 - 4.5 minutes. The meringue was quite soft (slighly liquidy but not runny) and very glossy in texture. I expect that if you didn't want to check it and just ran it for 4 minutes, you could be okay, but with meringues I like to be safe and check regularly. It's a fine line and a short time between just right and too much!

This was a two Thermomix bowl jobbie for me. I used the first bowl to make the batter. Then immediately switched to the second bowl to make the meringue. After that, I washed (okay, The Boy washed, not me!) the first bowl and set it aside to use to make the Creme Anglaise. If you do not have two Thermomix bowls, then you will have to quickly wash and dry between each step.

I got so darned excited when I checked (okay, stalked!) the oven to see if it had risen at all, and it had!!


I have to say, I am super happy with the way that this turned out. It was light, fluffy and delicious. Adding the Creme Anglaise in the middle made it super decadent. When you poke a hole in the souffle to pour in the Creme Anglaise, just bear in mind that your souffle will deflate somewhat because of you putting a hole in it.

The Boy was super pleased with the dessert (we had it for afternoon tea as I was recipe testing!) and even went so far to say that it was the best thing he had ever put in his mouth. :-) Of course, that compliment from him made me very happy!


If you do make this, be sure to post pictures for me to see either on Instagram - be sure to tag me with @langshipley or on my Daz In The Kitchen Facebook page.


© This work is copyrighted to Invest-Ex and Destiny's Fortunes Pty Ltd

Find me around SOCIAL MEDIA:
Cooking blog: http://dazinthekitchen.blogspot.com.au/
Facebook: http://www.facebook.com/dazinthekitchen
Twitter: @langshipley https://twitter.com/langshipley
Instagram: @langshipley http://instagram.com/langshipley
Pinterest: https://pinterest.com/langshipley/
Youtube channel: http://www.youtube.com/user/langshipley
Makeup and beauty blog: http://langshipley-deannasworld.blogspot.com.au/


Saturday, December 21, 2013

Christmas cake with walnuts and brandy ... in the Thermomix


Well, I've been experimenting with Christmas cake recipe and I made this a little while ago and had very good results with them. However, my mother asked for Christmas cake with brandy instead of sherry and also with nuts in them, so I experimented a little more and came up with this recipe.

Ingredients:
  • 1kg mixed dried fruit
  • 500ml of milk (any sort)
  • 400ml of brandy
  • 375g of crushed walnuts
  • 300g self raising flour


Instructions:
  • Soak fruit in milk and brandy for at least 4 - 6 hours or overnight
  • Preheat oven to 150°C
  • Line a 25cm cake tin with baking paper and set aside
  • Place fruit mixture, nuts and flour into mixing bowl and mix for  90 sec / Reverse / Speed 3 (for more even distribution of flour, put flour in the middle between layers of fruit and nuts
  • When mixing is done, pour out into a large bowl and hand mix a little to make sure the flour is evenly distributed right through the mixture
  • Pour into prepared tin and bake for 1 hour 10 minutes or until a skewer comes out clean

This turned out very, very well. It was super easy to make and not really all that different from the first recipe. There's a little bit more flour in it and also the walnuts.
The walnuts gave this Christmas cake a very lovely texture.

This is makes up quite a large batch of batter and I was baking them in a muffin tin for single serve Christmas cakes that we could serve on Christmas Day lunch.

For single serve Christmas cakes, they only need to be in the oven for 40 minutes and they are done.

This recipe makes about 14 single serve Christmas cakes.

When you first bite into these, you get a lovely whiff of the brandy escaping from the cake and getting a lovely nose full of the brandy fumes. The cake itself is slightly drunken but not overly so.

If you want to continue to get the cakes even more drunken, you put the cakes in an air tight container, poke a few holes into them and pour more brandy, sherry, rum or any alcoholic beverage of your choice into it, over a few days, weeks or month. This will sufficiently preserve the cake and marinate it at the same time. With copious quantities of the special juice :-) the Christmas cakes will last a long time, even if you don't keep them in the fridge.

I hope you enjoy this recipe and I wish you a very Merry Christmas and Happy New Year.

© This work is copyrighted to Invest-Ex and Destiny's Fortunes Pty Ltd

Find me around SOCIAL MEDIA:
Cooking blog: http://dazinthekitchen.blogspot.com.au/
Facebook: http://www.facebook.com/dazinthekitchen
Twitter: @langshipley https://twitter.com/langshipley
Instagram: @langshipley http://instagram.com/langshipley
Pinterest: https://pinterest.com/langshipley/
Keek: http://www.keek.com/langshipley
Youtube channel: http://www.youtube.com/user/langshipley
Makeup and beauty blog: http://langshipley-deannasworld.blogspot.com.au/

Friday, December 13, 2013

A rather yummy Christmas cake ... in the Thermomix


It's getting around to the festive time of year again and my how quickly the year has zoomed past. This year, like the year before, and the year before that, I am responsible for making the dessert on Christmas Day lunch.

Previously, I've made my famous creme brulee in the Thermomix and that was very well received. In actual fact, my mom had asked for the creme brulee again but since we are traveling 2 hours to get to Christmas Day lunch, the creme brulee is not going to survive in the car for that duration so I had to think of something else to make and I landed upon Christmas cake.

Now, those of you who know me will know that I am no baker by any stretch of the imagination. In fact, I am no baker at all and I like all my baking to be simple and done in the Thermomix, as you can tell from my banana bread and zucchini bread recipe.

I, of course, immediately rang my friend Yanna and asked for a recipe.

This is what she gave me:

Ingredients:
  • 1kg mixed dried fruit
  • 620g full cream milk, white coffee or chocolate milk
  • 280g self raising flour

Instructions:
  • Soak fruit in milk for at least 4 - 6 hours
  • Preheat oven to 150°C
  • Line a 25cm cake tin with baking paper and set aside
  • Place fruit mixture and flour (put the flour in the bottom) into mixing bowl and mix for  60 sec / Reverse / Speed 3
  • Pour into prepared tin and bake for 1 hour 10 minutes or until a skewer comes out clean

Which I varied a little bit, but not by very much, because I know enough to know that baking is a lot more exact than cooking.

I added 250g of sherry and the remainder in fat free soy milk instead of 620g of full cream milk, because (1) I wanted the Christmas cake to be drunken, and (2) I'm lactose intolerant and can't have full cream milk. Plus, I soaked the fruit overnight instead of just for the few hours that the recipe requested.

I also baked them in my customary single serve muffin tin sizes, rather than a full cake tin, since I like my cakes and muffins in single serves. In the single serve sizes, the Christmas cake took 45 minutes to cook.

The cakes turned out very well and very fruity. It's kind of an odd recipe because it's like 95% fruit. It's the sort my mom really likes too cos she likes her cake with lots of fruit and very little "cake". In fact, just enough cake to hold it all together. :-)

The Boy who is not a fan of Christmas cake at all liked it, which says a lot for it since he usually cannot be convinced to eat the stuff. I will take it as a win.

This recipe made exactly 12 single serve mini Christmas cakes.

The next time, I am going to try adding nuts to the recipe and maybe a bit more flour. That would take a little bit more experimenting.

In the meantime, if I do not post again before Christmas, have a very Merry Christmas and may you have a blessed day with family and friends.


© This work is copyrighted to Invest-Ex and Destiny's Fortunes Pty Ltd


Find me around SOCIAL MEDIA:
Cooking blog: http://dazinthekitchen.blogspot.com.au/
Facebook: http://www.facebook.com/dazinthekitchen
Twitter: @langshipley https://twitter.com/langshipley
Instagram: @langshipley http://instagram.com/langshipley
Pinterest: https://pinterest.com/langshipley/
Youtube channel: http://www.youtube.com/user/langshipley
Makeup and beauty blog: http://langshipley-deannasworld.blogspot.com.au/

Wednesday, July 25, 2012

Microwave chocolate chip cookie in a cup


Anyone who knows my cooking, knows that I suck baking, so imagine my delight when I found this recipe on the interwebs when I googled "microwave cookie in a cup" and found this little gem. I can't remember where I found the recipe but I'm very grateful for it. If you do want to find the source, just google it. :-)

I have to admit to being somewhat dubious about the efficacy of this recipe but then again I also know nothing about baking.

I won't blather on much more because there really isn't much to say about this little recipe besides the fact that it's quick to make and very tasty. I like that it's a small single serve cookie and I think it would also be great as a dessert, warm right out of the microwave and with a scoop of vanilla ice cream.

Without further ado, here's the RECIPE:

Ingredients:
  • 1 Tablespoon Butter
  • 1 Tablespoon Granulated White Sugar (caster sugar)
  • 1 Tablespoon of firmly packed Dark Brown Sugar
  • 3 Drops of Vanilla Extract
  • Small Pinch of Kosher Salt
  • 1 Egg Yolk (discard the egg white)
  • 1/4 cup of All Purpose Flour (plain flour)
  • 2 Tablespoons of Semi Sweet Chocolate Chips

Instructions:
  • Start by melting your butter in the microwave.
  • Add sugars, vanilla and salt. Stir to combine.
  • Separate your egg and add the yolk only to your cup. Stir to combine.
  • Add flour, then stir again.
  • Add the chocolate chips, and give a final stir.
  • Cook in microwave 40-60 seconds, start checking for done-ness at 40 seconds.
  • Mine takes 60 seconds in a 1000W microwave.

Just for the record, this *is* baking, so I didn't vary the recipe ... sort of. I didn't have any granulated white sugar, so I used raw sugar instead. The cookie came out a little crunchy from that, I thought.

I did think it was a little sweet for my taste but then I think you can adjust the sweetness to taste by adding more or less sugar according to what you like.

© This work is copyrighted to Invest-Ex and Destiny's Fortunes Pty Ltd

Sunday, July 22, 2012

I'm no fool ... oh, you mean it's a Raspberry Fool


I  have always found the name of this dessert amusing. That said, it's an old, old dessert dating back to the 16th century and it's simply delicious and very easy to make.

For me, easy to make desserts are a must because I am not most proficient when it comes to baking. As an example, I've now attempted banana bread / cake about five times and each time it has come out different though mostly tasty. I think it has to do with the fact that baking requires a specificity and exactness that is just not in my make up. So, the Raspberry Fool is a winner for me.

And yes, I did do some things differently, but I will leave that for after I give you the RECIPE:

Ingredients:
  • 150g (1 punnet) raspberries
  • 1 300ml container thickened cream
  • 1 tbs icing sugar, sifted

Instructions:
  • Set aside 12 raspberries. Place the remaining raspberries in a bowl and use a fork to roughly mash.
  • Use electric beaters to whisk the cream, icing sugar until firm peaks form. Fold the mashed raspberries into the cream mixture to create a swirled effect.
  • Spoon the mixture into four 125ml (1/2-cup) serving glasses and place in the fridge for 10 minutes to develop the flavours.
  • Top the fools with the reserved raspberries and serve with the biscuits, for dipping.

So here's what I did differently:

I used frozen raspberries instead of fresh because they were not in season and even if they were, they are just too pricey to buy.

I didn't just mash up the raspberries (because they were frozen), I dumped them in a pot and made a coulis out of them, which basically involved heating up the frozen raspberries, bringing them to a boil and putting some icing sugar into them and sweetening them up. This made a very lovely, gooey, liquidy mess of raspberry and juice.

Instead of just raspberries (which I didn't have, I used fresh strawberries and fresh blueberries and just layered them in the glass - coulis, cream, fruit, repeat until the glass is filled and then just drizzle some coulis right on top. Mine turned out looking nothing like the picture of the recipe that I was given, of course. You get a picture of mine. :-)

This is a very rich dessert, so a small glass goes a long way.

© This work is copyrighted to Invest-Ex and Destiny's Fortunes Pty Ltd

Thursday, May 24, 2012

Chocolate covered peanut butter balls


Continuing on the theme of peanut butter and chocolate, this is something that I have been wanting to do for a while.

I first tried these chocolate covered peanut butter balls when we hosted a wine tasting evening at our apartment and the winery brought along a chef that served some delicious food that went along very well with the wine.

These little chocolatey delights were part of dessert that was served. You should have heard some of the noises people were making when they ate them. Heh!

Of course, many of us begged for the recipe and I, in turn, bugged and bugged and bugged them until the published the recipe in their newsletter. The winery have recently opened a cafe and they serve this delicious dessert there.

Here's the RECIPE for the balls:

Ingredients:
  • 1/2 cup unsalted butter
  • 2 cups rice bubbles cereal
  • 2 cups crunchy peanut butter (do not use old-fashioned style or freshly ground)
  • 2 cups dry milk powder
  • 2 cups icing sugar
  • A pinch of chilli powder (optional)
  • 425 grams dark chocolate, chopped

Instructions:
  • Line cookie sheet with foil. Melt butter in heavy small saucepan over low heat.  
  • Combine cereal, peanut butter, dry milk and powdered sugar in large bowl. Mix in butter. Moisten hands and roll tablespoon mixture into ball. Place on prepared cookie sheet. Repeat with remaining mixture. Chill overnight. 
  • Line cookie sheets with foil. Melt chocolate in double boiler over low heat, stirring occasionally. Remove chocolate from over water. 
  • Using fork, dip peanut butter balls at a time into chocolate and transfer to prepared cookie sheets. Refrigerate until chocolate is firm. (Can be prepared week ahead. Refrigerate in airtight container.) 

The only thing that I did differently to the recipe (because I always do) is that I added the chili (and quite a lot of it - I used about a teaspoon) into the melted chocolate that coated the peanut butter balls so that could get that hint (kick!) of chili when I bit into the little chocolatey peanut buttery delight. :-)

If you keep them in an airtight container in the fridge, it will keep for up to a week, possibly a little more, if you have a really good fridge. 

ps. Can you tell I have Internet and my blogging mojo back??


© This work is copyrighted to Invest-Ex and Destiny's Fortunes Pty Ltd

Thursday, May 3, 2012

Créme Brûlée ... in the Thermomix

I'm still without Internet at home but this is a post I wrote a while back and never posted. Plus, I've got someone asking me for the recipe, so I thought I'd better post it.


For those of you who have been following me on Facebook or on Twitter, you will know that I've been churning out creme brulees like there is no tomorrow. The reason for this? The Mother decided that she wanted creme brulee for Christmas Day lunch. Argh! Having never made creme brulee before, I hunted down recipes and practiced. Between starting to learn how to make creme brulees and Christmas Day, I have made 38 servings of creme brulee. If I never see another creme brulee again, it will be too soon. Seriously, I have made so many of them, I'm a little over them - even though they are one of my favorite desserts.

Speaking of desserts, those who know me will know, I'm no good with desserts ... or baking. The sweet department is not one of my strong points. When I have a dinner party, if I can, I'll ask someone to bring dessert, though admittedly, there is a sense of satisfaction of knowing how to make desserts and cooking an entire 3 course meal on my own. I am getting better at making desserts too. I make a mean chocolate mousse and I've also learned how to make a berry delight that is amazing. I will post recipes for those later. Someone remind me!

Anyhow, creme brulee is one dessert that I found quite daunting, what with the whole baking in a baking tray of hot water. For some reason, that part intimidated me - I do not know why. For that reason, I decided to turn to my trusty Thermomix. I wouldn't use it for everything and not often for cooking, but I decided that it works well for baking and desserts (and crushing rock salt, but that's another story!).


This RECIPE that I used for the creme brulee is for the Thermomix. If you don't have a Thermomix, try this recipe instead (I've tested it and it does work, plus it's not that different from my Thermomix recipe). I've just stuck with the Thermomix recipe for myself cos it was just easy and I had to churn out 38 of those things, and easy works in that instance.

Ingredients:
  • 400 g whipping cream
  • 70 g granulated sugar
  • 1 tsp real Vanilla extract (or seeds from 1 or 2 Vanilla pod)
  • 275 g eggs (approx. 5 large eggs)
  • Brown sugar for the topping

Instructions:
  • Place all ingredients except brown sugar into mixing bowl and mix for 1 minute/speed 3.
  • Cook for 15 minutes/90d C/speed 3. Note: If using cold eggs or cream, you may need to cook a little longer to thicken the mixture, taking into consideration that the mixture will continue to thicken whilst left standing to cool.
  • Check that the créme looks perfectly smooth and is not grainy at all. If it has gone grainy or become scrambled, it can be easily rescued. Just add 30g cold milk or cream and blend for 30 seconds/speed 8.
  • Repeat if necessary until desired smooth texture is achieved.
  • Pour out mixture immediately into individual ramekins or a large dish.
  • Leave to cool to room temperature and then chill in fridge.
  • Once chilled, and set, sprinkle a thick layer of brown sugar on top, then caramelise by heating under a hot grill or with a kitchen blowtorch.

Tip: When measuring the eggs it's important to get 250 - 300g of egg (approx. 5 large eggs). This will affect the thickening of the brulee and the overall end product.

I did do some things differently, even though with the Thermomix and desserts, exactness is a good trait. I just can't help myself.
  • I used 2 vanilla bean pods, and at one time, I even used 3. The Boy really, really likes vanilla bean.
  • I used raw sugar because I was not sure what they meant by granulated sugar. There are many types of granulated sugar.
  • I did not use the brown sugar to caramelize. I found (with Batch #1) that the brown sugar does not caramelize well. I used raw sugar which worked quite well, but I was also recommended demerara sugar, and that worked well too. 
  • The blow torch needs to be quite strong so don't bother with those dinky ones in the restaurant store. Rather, go to eBay and search for "blow torch" and look at the ones that come up. You want something that will throw a nice big flame.
  • I also ended up usually with 300g of eggs, which is about 6 large eggs. With the size of the eggs I was buying, it was just closer to 6 eggs than 5 eggs. As long as you don't exceed the 300g, you'll be okay, so I would suggest cracking your eggs into a bowl and weighing them.
  • And ... last but not least, at least for me - in the Thermomix, the optional step of going an extra 30 seconds on speed 8 with another 30g of cream make the creme brulee much smoother. I found that when I did the step, I got a much better result. Of course, this does not apply if you do not have a Thermomix. However, if you do have a Thermomix, I strongly recommend that you do not skip this step. 

© This work is copyrighted to Invest-Ex and Destiny’s Fortunes Pty Ltd