Showing posts with label salad. Show all posts

Friday, September 27, 2024

Cowboy butter salad dressing

Gourmet hot dogs

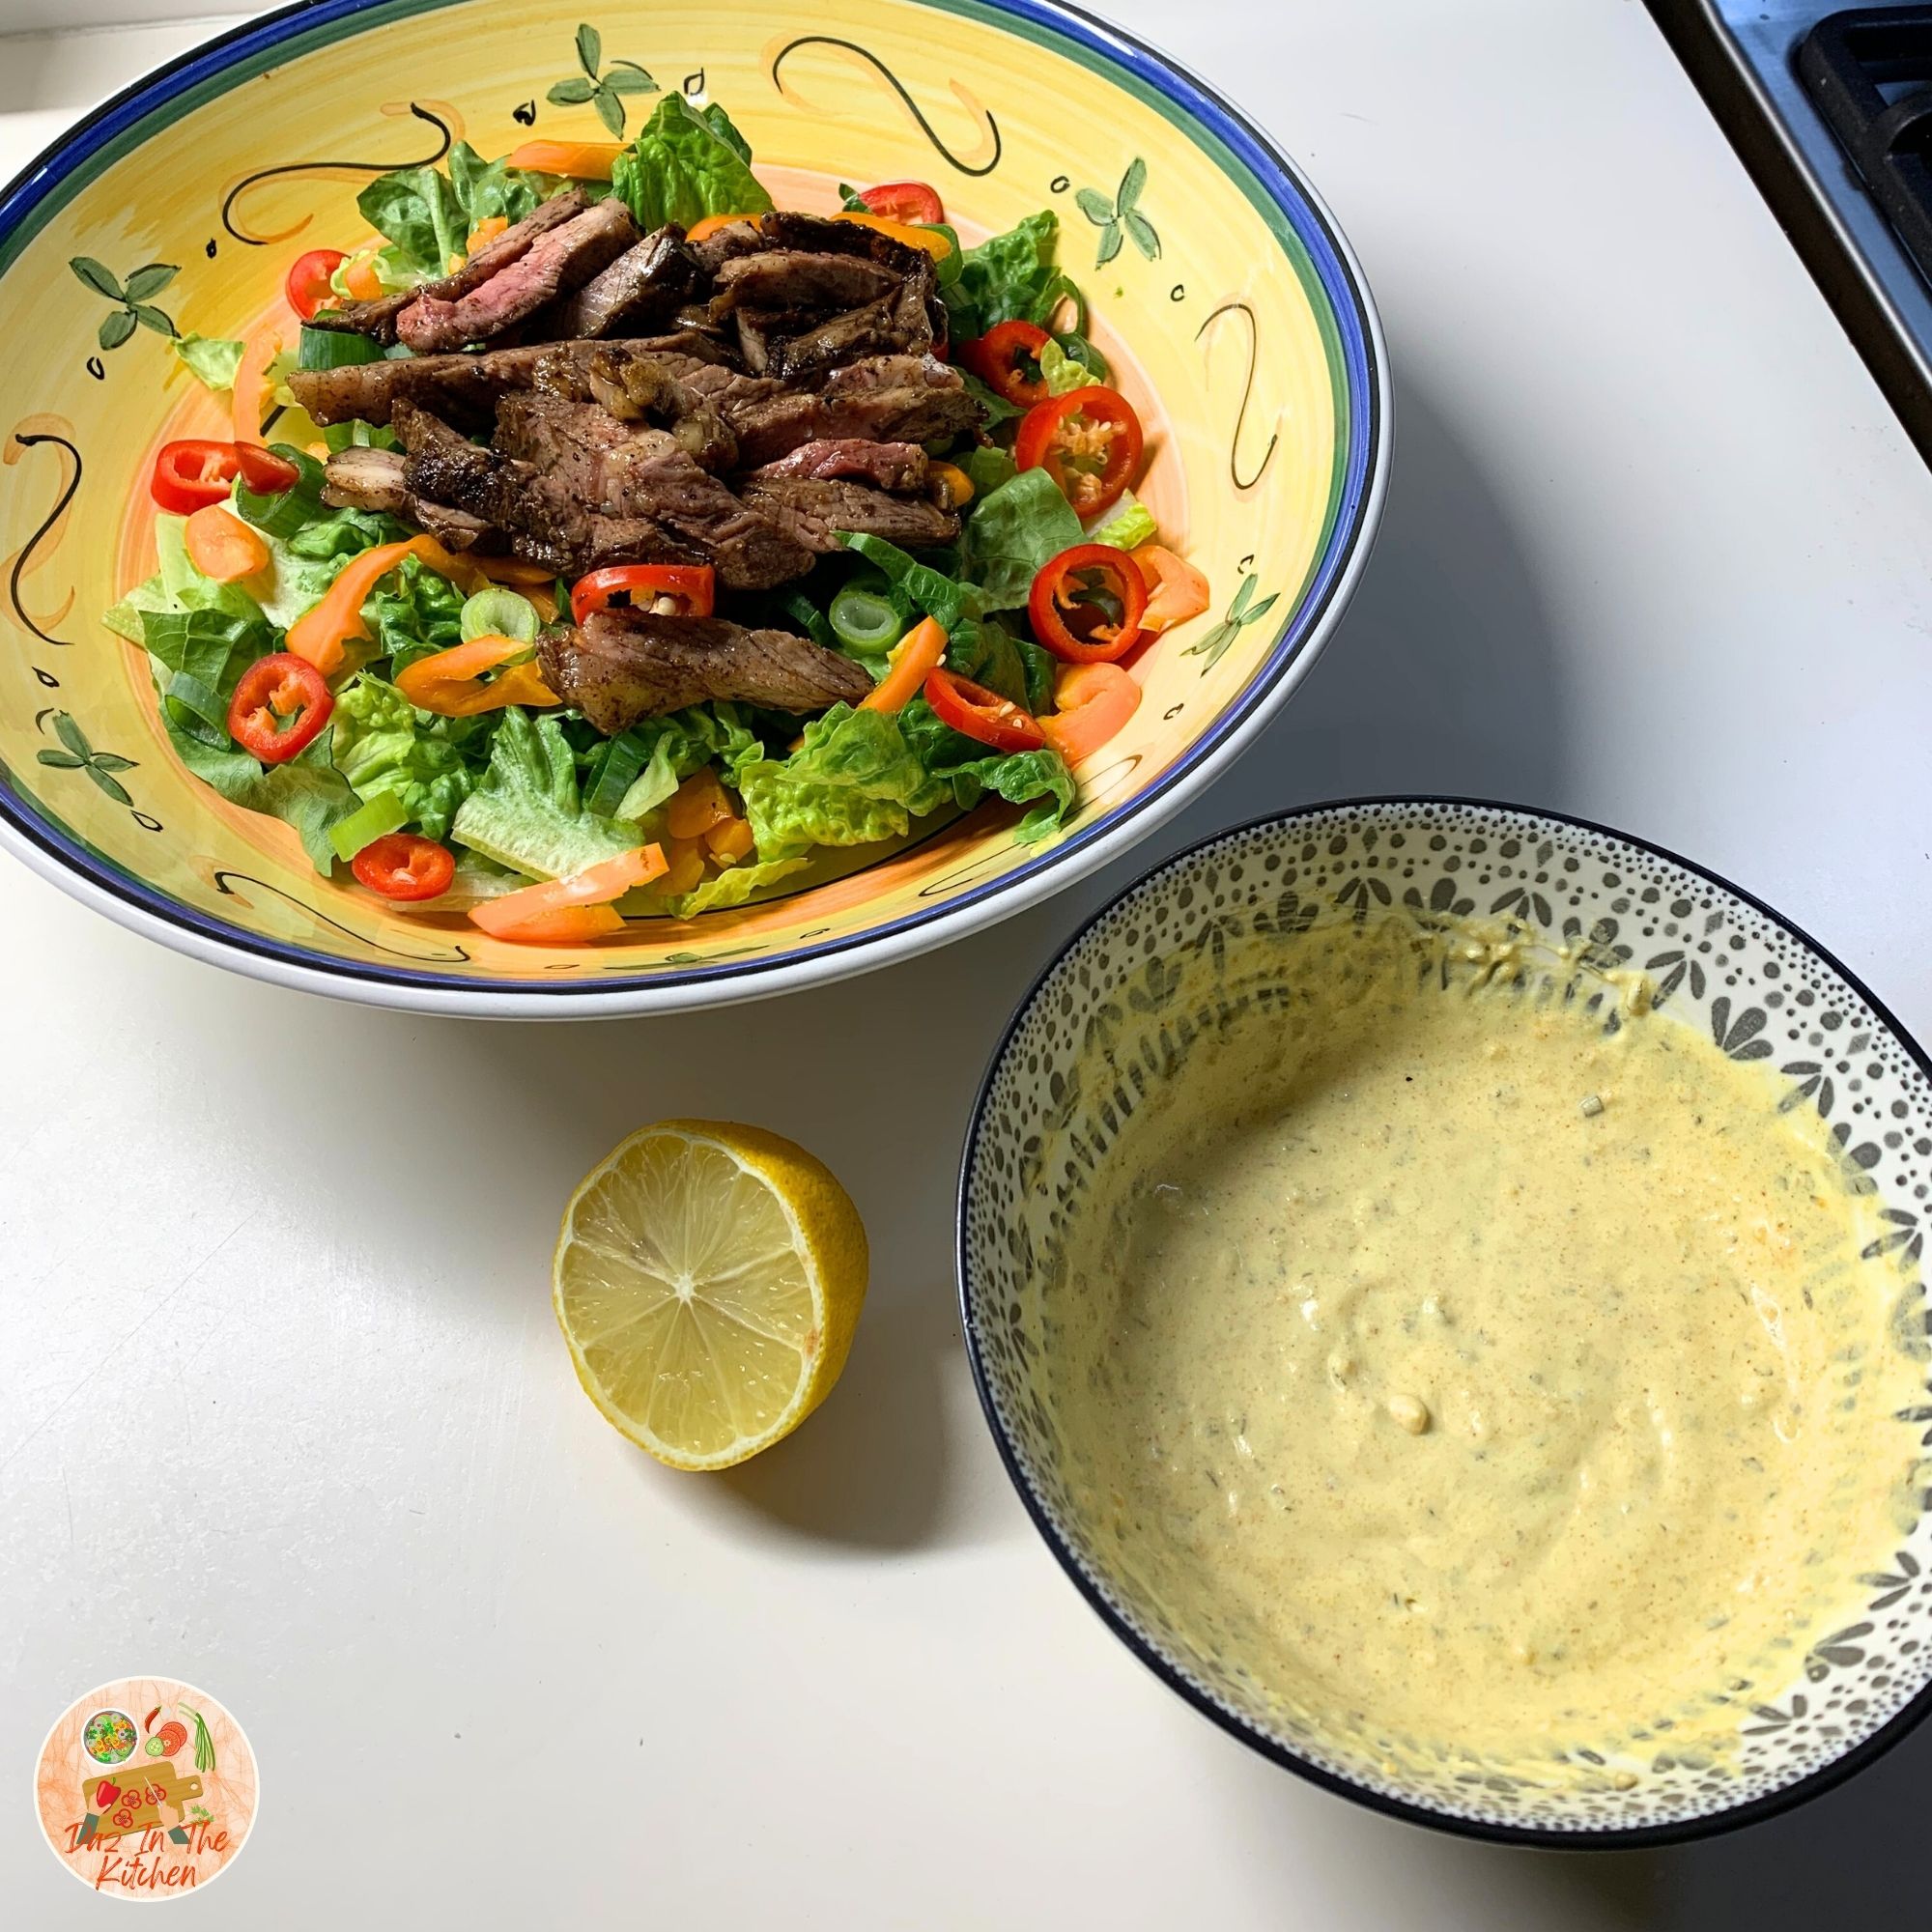
After I made the cowboy butter the other day to go with the tomahawk steak we had for lunch, we still had A LOT of steak leftover. Two people cannot eat 2 kilos of steak. It's just not physically possible for us. Anyway, with the leftover steak, I decided to use it in a salad and turn the cowboy butter into a creamy salad dressing. Yum! And it's super easy.

Monday, August 17, 2020

Rainbow pasta salad


This dish started about a week ago when I had some leftover duck from a meal out and I was trying to figure out what to do with it. I decided on a simple pasta salad with some bow pasta I had. It turned out to be delicious. The bright colors from the spring onions and tomatoes make this dish not only tastes but bright and fun too. It's like eating the rainbow.

Tuesday, May 31, 2016

Asparagus and tomato salad


The weather has been completely bonkers lately. It's late Fall / Autumn here and is the weather cooperating? No. Mind you, the weather has been close to perfect. Warm, sunny days, cool, clear nights, but still ... not the normal weather for this time of the year.

So ... salads. We are still having a few of those now and then because the weather isn't quite what we'd call "soup weather" yet. But it's getting there. :-) This morning was a little chilly when we woke up.

This is a particularly easy to make salad and also great for taking to friends when out visiting and you want to bring a dish. You can easily assemble the salad at home, put the dressing ready to go in a jar and it transports well. It also keeps well.

I've really enjoyed this particular salad. It's fresh but satisfying. Sometimes, I like to jush it up with some marinated feta if I want to get all fancy. It adds to the flavor.

Thursday, April 28, 2016

Steak and garlic butter rice salad ... perfect with leftovers


Yes, yes, can you believe it? Blog posts weekly for a few weeks!! You know what that means? It means I've been home and I have been cooking!! Nothing super fancy or super complicated, just some simple everyday meals that we enjoy and are tasty, tasty.


We cooked a huge cattleman's cut steak for dinner recently and it was HUGE. We shared one between The Boy and I and still only managed to finish half of it. I saved the leftovers for a steak salad and this is one of my go to recipes for a tasty steak salad. I like adding the garlic rice because it makes it super tasty. Garlic and butter .... mmmm .....

Here's what I did:

Thursday, April 7, 2016

Grilled garlic and chili baby octopus and prawn salad with chimmichurri dressing ... in the air fryer


So, I'm in a bloggity mood right now and we're home for a long weekend, which means a bit more cooking coming out of me. I'm giving the air fryer a good work out. Tonight I decided to combine some leftover chimmichurri sauce with some grilled baby octopus and prawns in a salad.

This is one of those super easy meals I like to throw together when we want something light and tasty. The seafood adds protein and makes the salad substantial which gives us a proper meal.

Here's what I had going on:

Friday, February 19, 2016

Spicy pork and apple salad


Greetings my foodie friends! I have another recipe for you today.

We've been home this last week and The Boy has been down with bronchitis. Each day he thinks he's going to be better and we'd head back into the city for him to go back to work. Each day he's still not better. 8 days and counting.

We've also been taking things day by day and meals have been planned on a day by day basis. I recently got an air fryer (more on it later!) and have been cooking up a storm with it. Best roast chicken ever!

Tonight, I was totally without inspiration. None! Nada! Zip! Nothing on Pinterest interested me (pun intended!), nothing on the Googlesphere and then I started randomly flipping through recipe books. I picked a salad one cos The Boy suggested a salad might be good since we'd been mostly doing veggies for the past week.

After a few cookbooks, I started on The Australian Women's Weekly Salad cookbook. (I'm sorry, I tried but could not find a link to it!). I found this salad which I thought sounded tasty and I'd try.

Monday, January 25, 2016

Cous cous salad with grilled chicken tenderloins


It's been forever since I've written a foodie blog post and I'm sorry for that. We haven't been home much and hence, there hasn't been much cooking. When we have been home, The Boy has asked for some old favorites and there hasn't been a lot of experimenting.

This hear is the first new thing I've done in a while. It's Summer right now and the weather has been particularly cruel to us. We've had horrible 40°C plus temps and when it hasn't been stinking hot, it's been pelting down rain.

With this heat, The Boy has been asking for salads. Actually, I tell a lie, there's another salad I've made which I haven't posted about. I'll do it another day.

This little salad is one I threw together with some inspiration from a cookbook. I was browsing for a recipe and found one for a cous cous salad. I didn't make that particular salad, but I went with the cous cous idea.

Wednesday, March 11, 2015

Yummy Caesar salad dressing ... in the Thermomix


We recently bought a BBQ chicken from the shop and decided to use some of it for a Caesar salad. I've posted in the past about my Caesar salad, where I usually use the Cardini's Caesar salad dressing for the salad, but this time we were out.


I decided to try my hand at making my own Caesar dressing instead and looked around for a recipe to use. I knew I wanted a recipe that used anchovies but also not a raw recipe that used egg yolks that were uncooked.

This recipe that I found turned out to be perfect and it seemed simple enough to do and convert in the Thermomix so that's what I went with.

Here's what I did:

Ingredients:

  • 2 small garlic cloves, minced
  • 1 teaspoon anchovy paste
  • 2 tablespoons freshly squeezed lemon juice, from one lemon
  • 1 teaspoon Dijon mustard
  • 1 teaspoon Worcestershire sauce
  • 1 cup mayonnaise
  • 1/2 cup freshly grated Parmigiano-Reggiano
  • 1/4 teaspoon salt
  • 1/4 teaspoon freshly ground black pepper

Instructions:

  • In the Thermomix bowl, mix together the garlic, anchovy paste, lemon juice, Dijon mustard and Worcestershire sauce on speed 7 for 5 seconds. Scrape down sides.
  • Add the mayonnaise, Parmigiano-Reggiano, salt and pepper and mixed until well combined on speed 7 for 10 seconds. Taste and adjust to your liking.

I used 4 or 5 (I can't remember exactly!) cloves of garlic because I like garlic, plus instead of anchovy paste because I didn't have any of that, I just used whole anchovies and blended it up in the Thermomix.

For the mayonnaise, I used whole egg mayonnaise instead of the usual Kraft or Praise mayonnaise, which I find tends to taste a bit sweet and vinegary at the same time, and I'm not a fan of. I think whole egg mayonnaise generally tastes a lot better, but of course, if you prefer a lighter dressing, by all means use a low fat or fat free mayonnaise.

This recipe takes next to no time at all to make and it is so tasty, there was no need to add any salt or pepper.

The next time I need Caesar dressing, I'm not going to the store for a bottle, I'm going to make it myself!

If you do make this, be sure to post pictures for me to see either on Instagram - be sure to tag me with @langshipley or on my Daz In The Kitchen Facebook page.


© This work is copyrighted to Invest-Ex and Destiny's Fortunes Pty Ltd

Find me around SOCIAL MEDIA:
Cooking blog: http://dazinthekitchen.blogspot.com.au/
Facebook: http://www.facebook.com/dazinthekitchen
Twitter: @langshipley https://twitter.com/langshipley
Instagram: @langshipley http://instagram.com/langshipley
Pinterest: https://pinterest.com/langshipley/
Youtube channel: http://www.youtube.com/user/langshipley
Makeup and beauty blog: http://langshipley-deannasworld.blogspot.com.au/


Friday, November 22, 2013

Chickpea and goat cheese salad


We've decided on a salad again tonight since (once again) it is going to be a very hot day. I am also coming to quite enjoy those hearty salads that are meal in itself.

Once again I've gone to my "Mmmm ... salad" cookbook and have found a salad that looks like it will be rather hearty and yummy.

Here's the RECIPE for our dinner tonight:

Ingredients:
  • 1 can chickpeas drained
  • 2 spring onions finely chopped
  • 50g red peppers (capsicum) diced
  • 15ml / 1 tablespoon fresh chopped parsley
  • 100g cherry tomatoes sliced in half
  • 50g rocket
  • 30g goat cheese sliced or crumbled to serve

Dressing:
  • 1 teaspoon olive oil
  • 1 teaspoon balsamic vinegar
  • 1/2 teaspoon runny honey
  • 1 clove garlic peeled and crushed or finely chopped

Instructions:
  • Rinse the chickpeas and put into a bowl.
  • Add spring onions, red pepper, parsley and cherry tomatoes, mix well.
  • To make dressing, which together the oil, vinegar, honey and garlic and stir into the chickpeas.
  • Serve on a bed of rocket with the goat cheese sprinkled over.

I forgot to buy parsley when I went to the grocery store, so I just used the leftover coriander paste that I had from the bean and feta cheese that I made the other day.

Instead of cherry tomatoes, I used grape tomatoes just because I think grape tomatoes taste better and I like them better. :-)

Monday, August 12, 2013

A simple but delicious chicken Caesar salad


Small aside: I wrote this post in the Summer, but I'm just posting it now. Somehow, I failed to post it when it was written. It's Winter here right now!!

I'm a huge fan of the chicken Caesar salad. When I am not sure what I want to eat when I'm out for lunch and it's a warm day, this salad is always a tasty option. Of course, the quality and taste varies from place to place, but for the most part, I enjoy it a great deal.

Last night was hot, hot, hot, a nasty 37 degrees C and The House was sizzling. We had the AC on but couldn't bring ourselves to do much cooking that involved heat, either from the stove or the oven.

We decided on a chicken Caesar salad since it was quick and easy.

Here's my RECIPE for this delicious and simple salad:

Ingredients:
  • 2 chicken thigh fillets of cooked chicken cut into bite size pieces, seasoned with Masterfoods Season All
  • 4 tablespoons Caesar salad dressing (we use Cardini's)
  • 120g Lettuce salad mix or cos lettuce
  • Garlic salt (my not-so-secret ingredient)
  • 1 handful shredded cheese (I just use the Coles Pizza cheese mix)
  • 1 hard boiled egg quartered
  • Croutons (optional)

Instructions:
  • Place a layer of salad mix in the bottom of a large salad or mixing bowl, then sprinkle a small amount of garlic salt over the top of the lettuce.
  • Repeat until all the salad mix is in the bowl.
  • Drizzle some of the Caesar dressing on top of the salad mix - I use about 4 tablespoons for the two of us, but you can use whatever amount you like, depending on how much dressing you want in your salad.
  • Sprinkle the shredded cheese on top of the dressing and mixed everything together.
  • Top the mixed salad with the chicken pieces and serve up salad onto plates
  • Once the Caesar salad is in the plates you are serving with, place the quartered hard boiled eggs on top of the salad.
  • Enjoy!

This recipe serves two people for dinner with nothing else to accompany, so it's quite large and filling.

When I am more inclined, I cook my own chicken thigh fillets but last night, The Boy decided that we just buy a roast BBQ chicken from Coles so that we could have the chicken for the salad and then also for sandwiches and eating as cold meats to accompany an antipasto dish. I actually really do enjoy the Coles BBQ chicken since they are quite tasty and still fresh and hot when you buy them. Usually, when we buy them, I bring them home and take the meat off the bones - breast, drumstick and thigh. I also take all the other meat around the chicken carcass off and put them together for the salad and anything else I want to use them for. Then I enjoy nibbling on the bones, the chicken wings and the stuffing as a small snack.

I have in the past made my own salad dressing but last night we decided to just run to the store and get a pre-made salad dressing. Cardini's is The Boy's favorite even though it also has the most calories, but really, it's the tastiest. The other one that we like is the Paul Newman Caesar dressing, either the Newman's Own Caesar Dressing or the creamy version.

The garlic salt makes a huge difference to the taste of the salad. Don't use a lot, but just a little sprinkle between the layers of lettuce as you place it into the bowl for mixing adds a lot of depth to the flavor of the salad.

An alternative to the shredded cheese is also just straight shredded Parmesan cheese - something like this, though it doesn't need to be this exact brand. Just make sure it is shredded so you get texture and not the powdered or finely grated stuff for pasta.

Since there are the two of us, we each got two quarters each for the hard boiled egg but you can decide how much egg you like.

Notice I don't have croutons in my recipe, but that's entirely up to you. I don't like croutons, so for me, I leave them out. If you like them, of course, include them.

I hope you enjoy this very simple salad recipe. It's one of my favorites.


© This work is copyrighted to Invest-Ex and Destiny's Fortunes Pty Ltd


Find me around SOCIAL MEDIA:
Cooking blog: http://dazinthekitchen.blogspot.com.au/
Facebook: http://www.facebook.com/dazinthekitchen
Twitter: @langshipley https://twitter.com/langshipley
Instagram: @langshipley http://instagram.com/langshipley
Pinterest: https://pinterest.com/langshipley/
Keek: http://www.keek.com/langshipley
Youtube channel: http://www.youtube.com/user/langshipley
Makeup and beauty blog: http://langshipley-deannasworld.blogspot.com.au/


Sunday, January 13, 2013

Turkish bean salad


The Boy has decided that he wants to cook more meals entirely on his own, which I'm very happy about.

He recently got this cookbook from one of his online author friends called "A Gluten Free Taste of Turkey" by Sibel Hodge on his Kindle and has been excited to try some of the recipes. It's a beautifully written and edited book with lovely pictures for each of the recipes. There's also a great review on the book here.

So far The Boy is doing pretty well. He's managing to cook most of the things he's decided to cook on his own without consulting me too much. I'm enjoying the time off. :-)

The Boy loves beans so when he came across the recipe for a bean salad he bookmarked it to try. This one in English is simply known as "Bean Salad" though in Turkish it is known as "Baharatli Kuru Fasulye" which I also assume translates to "Bean Salad". :-)


Here's the RECIPE for the bean salad:

Ingredients:
  • 1 can of white beans (haricot / butter beans / cannellini)
  • 1 red onion - diced
  • 1/4 teaspoon chili flakes
  • 1 green chili - diced and fried
  • 1 small red pepper (capsicum) - diced and friend
  • 1/2 to 1 teaspoon cumin
  • 1 teaspoon tomato puree
  • Salt to taste
  • 2 teaspoons lemon juice
  • 2 cloves garlic - crushed and chopped
  • 1 tablespoon olive oil for frying
  • Chopped coriander (for garnish)

Instructions:
  • Drain can of beans, then rinse and place in a bowl.
  • Fry onion, chili, garlic and pepper in olive oil until soft and add to beans.
  • Add the rest of the ingredients into the bowl with the beans as well.
  • Mix all the ingredients together, garnish with chopped coriander and serve.

This recipe serves 4 people as a starter or two people as a main for dinner, though a bit on the light side.

I don't think The Boy did much different to this recipe aside from the lemon juice. He used the juice of half a lemon, which is more than 2 teaspoons worth of lemon juice, but that's okay cos we like our lemon juice. :-)

Oh, I just checked ... instead of a whole red onion, he only used half a red onion because it seemed like a lot of onion, and he used 2 green chilis instead of one because we like our chili.

There was a lot of slicing and dicing with this recipe, all into small pieces and I'm glad that it was The Boy doing it rather than me. Can't say that I'm a fan of the fine dicing work.

This recipe was delicious and certainly quite different from what we normally eat. The Boy loves beans, so this worked out well for him. It was zingy and tasty. I think next time though, we might have something else to accompany the dish since just this dish alone was not quite enough just for dinner. I think this makes a much better side dish than a main dish.

© This work is copyrighted to Invest-Ex and Destiny's Fortunes Pty Ltd

Find me around SOCIAL MEDIA:
Facebook: http://www.facebook.com/dazinthekitchen
Twitter: https://twitter.com/langshipley
Instagram: langshipley
Pinterest: https://pinterest.com/langshipley/

Sunday, December 9, 2012

Smashed avocado and feta on toast with tomato salad and smoked salmon


We're up at The House for the weekend and when we're up here, The Boy likes to get the weekend paper, sit and read the paper with a cup of coffee. It's something that he truly enjoys.

Very often, when he reads through the lifestyle sections of the paper, he'd pull out any recipes that sound interesting to him and suggest I make them. I confess, I don't often do but the recipe he pulled out this weekend sounded like the perfect meal for a dinner to me. In reality, this would also make a lovely weekend breakfast dish but we had it for dinner instead because we're crazy like that. :-)

The thing I love about this recipe is that there is no cooking involved and it's super easy to make. You just need to make sure you have all the ingredients and that it's thrown together quickly.

Here's the RECIPE for our meal.

Ingredients:
  • 1 ripe avocado, halved and stoned
  • 1 tbs dill, finely chopped
  • 1 tbs mint leaves, chopped
  • Sea salt and pepper
  • 1 tbs lime or lemon juice
  • 100g feta cheese, crumbled
  • Half a red onion, finely sliced
  • 100g cherry tomatoes, halved
  • 2 slices of thick toast
  • 2 tbs extra virgin olive oil
  • Extra dill or mint for serving
  • 200g smoked salmon

Instructions:
  • Roughly chop the avocado with a fork, but don't make it completely mushy. Place into a bowl with chopped dill, mint, salt, pepper and lime or lemon juice. Put in the crumbled feta and lightly toss it all together. Check the taste and add more salt and pepper if necessary.
  • Put the cut tomatoes in bowl and add the sliced red onion to it. Mix with the olive oil, salt and pepper.
  • Take the smoked salmon out of the package and place onto the plate.
  • Toast the bread and brush the toasted bread with butter or olive oil.
  • Place bread on the plate and top with the avocado and feta mix, then add the tomato salad on top.
  • Serve and enjoy!

This is a very simple meal to pull together and also very nutritious and tasty.

I didn't use any salt in the avocado and feta since the feta itself it quite salty but I used a fair bit of pepper because I like my pepper.

I also didn't crumble the feta like the recipe said, instead I just chopped it up into small pieces (about the size of my little fingernail) with a knife since the feta I used was not crumbly and quite hard.

Instead of cherry tomatoes, I also used grape tomatoes. I generally prefer grape tomatoes to cherry tomatoes since I think they are a little sweeter and also to me they taste more tomato-ey.

Half a red onion is a lot of onion so 1 only used 1/4 of an onion. If you really really like your onion, you can certainly use half the onion but then you would have more onion than tomato.


The Boy had his on toast, while I just had mine on its own without the toast. I was trying to be good and going a little carb free for the evening since I'm been a little carb crazy the last couple of weeks and I really need to cut back on it. My downfall is the steamed Chinese BBQ pork buns!

Anyway, I hope you enjoy this recipe. It's a fabulous summer dish since it's a very cool dish. We had a hot day up in The House last night, so this lovely cool dinner dish really suited us.

ps. I also just realised that it's been over month since my last post and for that I apologise. I've got another one lined up, which I hope I'll get up shortly.

© This work is copyrighted to Invest-Ex and Destiny's Fortunes Pty Ltd

Sunday, November 4, 2012

Corn on the cob ... in the microwave


First of all, I want to apologize for the lack of attention that my blog has been getting lately.

We haven't been cooking all that much as for some reason or other, either both of us, or just The Boy has not been home for dinner and we've been busy over the weekends. Usually, there is at least one big cooking day, normally, a Sunday where I cook a new recipe or spend quite some time in the kitchen. This has not been happening much at all.

We're still cooking at home most nights and eating in when The Boy is not out for a work function, but the meals have been simple and more often than not, just fruit or vegetables.

I've been on a fruit and yogurt kick, so a lot of the time, I've been eating a small bowl of blueberries (they are in season right now!) with some strawberry yogurt (I've managed to find one type of yogurt that does not aggravate my lactose intolerance and I've been able to eat it with no problem).

Tonight, has not been much different. We had a big day yesterday and were out for both lunch (visiting with some friends we hadn't seen in 9 years) and dinner (visiting with some other friends we had not see in in 18 months). We were fed well, 3 courses of starter, main and dessert with both meals.

As a result, we decided on a simple dinner. We had bought some fresh corn from a farmer's stall while up in the country last weekend that needed to be eaten along with some lovely tomatoes.

Our mish-mash of dinner consisted of some corn on the cob, along with a tomato, basil and boccocini salad.

You can find my recipe for the boccocini salad here and it's very simple to make. Very refreshing and satisfying!

As for the corn on the cob, I used to cook my corn by boiling it.

The boiling method was quite simple, boil water, put in corn, continue to boil for 12 minutes, then remove corn, season and eat.

These days, I've been using the microwave. I learned this from my mother-in-law.

I put the corn in the microwave and the general rule of thumb is 4 minutes per corn cob. This has worked generally really well for me, but recently we got a new microwave and that sucker packs a punch, so now 4 corn cobs only take 8 minutes to cook. You just need to check the power levels on your microwave and adjust accordingly. If your corn kernels start to look prune-like and shriveled then you've cooked it too long.

The corn goes on a large dinner plate into the microwave. This is for 4 corn cobs - I cook it for 4 minutes on one side and then turn the corn and cook it for another 4 minutes.

Then I take the corn out, butter and salt it to taste and munch away.

Hopefully, I will get back to some more regular cooking and doing some new recipes soon so that this blog will get some much needed love again.

© This work is copyrighted to Invest-Ex and Destiny's Fortunes Pty Ltd
Tuesday, June 26, 2012

Pizza party!! ... with a tomato, basil and boccocini salad


So, The Boy has committed me to writing a post about pizza only I've just discovered that I've already blogged about our pizza making and repeating that would just be boring.

Here's the link to where I talk about our ingredients that top our pizza. This time though, we bought our pizza bases because we didn't have time to make our own pizza dough. We'll probably do that again when we make pizza next.


I also didn't have any pizza sauce made up, so we just bought a jar of pasta sauce and used that instead. Usually, I make my own pizza sauce, which consists of:

  • 1 can diced Italian tomatoes
  • 1 small tub of tomato paste
  • Italian herbs (use as much or as little as you like!)
  • Salt and pepper

I heat that in a pan and then blitz it with a hand blender until it's smooth and then let it cool. Usually that makes enough for about 4 serves of pizza. I put them into small baggies and freeze what I do not use. It defrosts just fine and once defrosted, I just add it straight onto the top of the pizza.

We had The Best Bud and his wife over to dinner so it was a little more that pizza that was served.

We started off with some garlic bread and a tomato, basil and Bocconcini salad.


The garlic bread was easy because we bought it, though I think next time I will make my own. The brand that we usually get was not available, so we tried the regular Coles brand (Coles seems to be replacing all the brands with their own brand and sometimes not for the better). The Coles brand garlic bread was disappointing. It was bland and did not have enough garlic or really any other flavor. Both The Boy and I were disappointed in it, but The Best Bud thought that it was ok. We had thought that we would keep any that was unfinished as leftovers to go with lunch the next day, but decided to toss the remaining pieces since it wasn't very good.

We love a good tomato, basil and Bocconcini salad and it's the easiest thing to make. We made enough this time to serve 4 people and here's what I did:


Ingredients:
  • 3 vine ripened tomatoes (they taste better), cut into 7mm slices
  • 1 tub of Bocconcini standard sizes cheese balls, sliced into 7mm slices
  • Basil leaves
  • Olive oil
  • Salt and pepper to taste

Instructions:
  • Place the sliced tomatoes on a serving platter
  • Place one basil leaf on each slice of tomato
  • Place the sliced Bocconcini cheese on top of the basil leave
  • Grind some salt and pepper over the top
  • Drizzle olive oil over the top
  • Serve and enjoy

It was a pretty leisurely evening, so we had the garlic bread and tomato, basil and Bocconcini salad first. After that we made up the pizza and popped it into the oven for 12 minutes at 180 degrees C to cook and melt the cheese. When that was ready, we had a few slices of pizza but decided not to eat the second pizza that we made so that there was room for an Affogato for dessert.

We ended up with a whole pizza leftover that we've put into the fridge. The Boy will probably have some for lunch over the next few days and will likely take a few slices to work as well.

© This work is copyrighted to Invest-Ex and Destiny's Fortunes Pty Ltd