Showing posts with label baking. Show all posts

Sunday, March 30, 2025

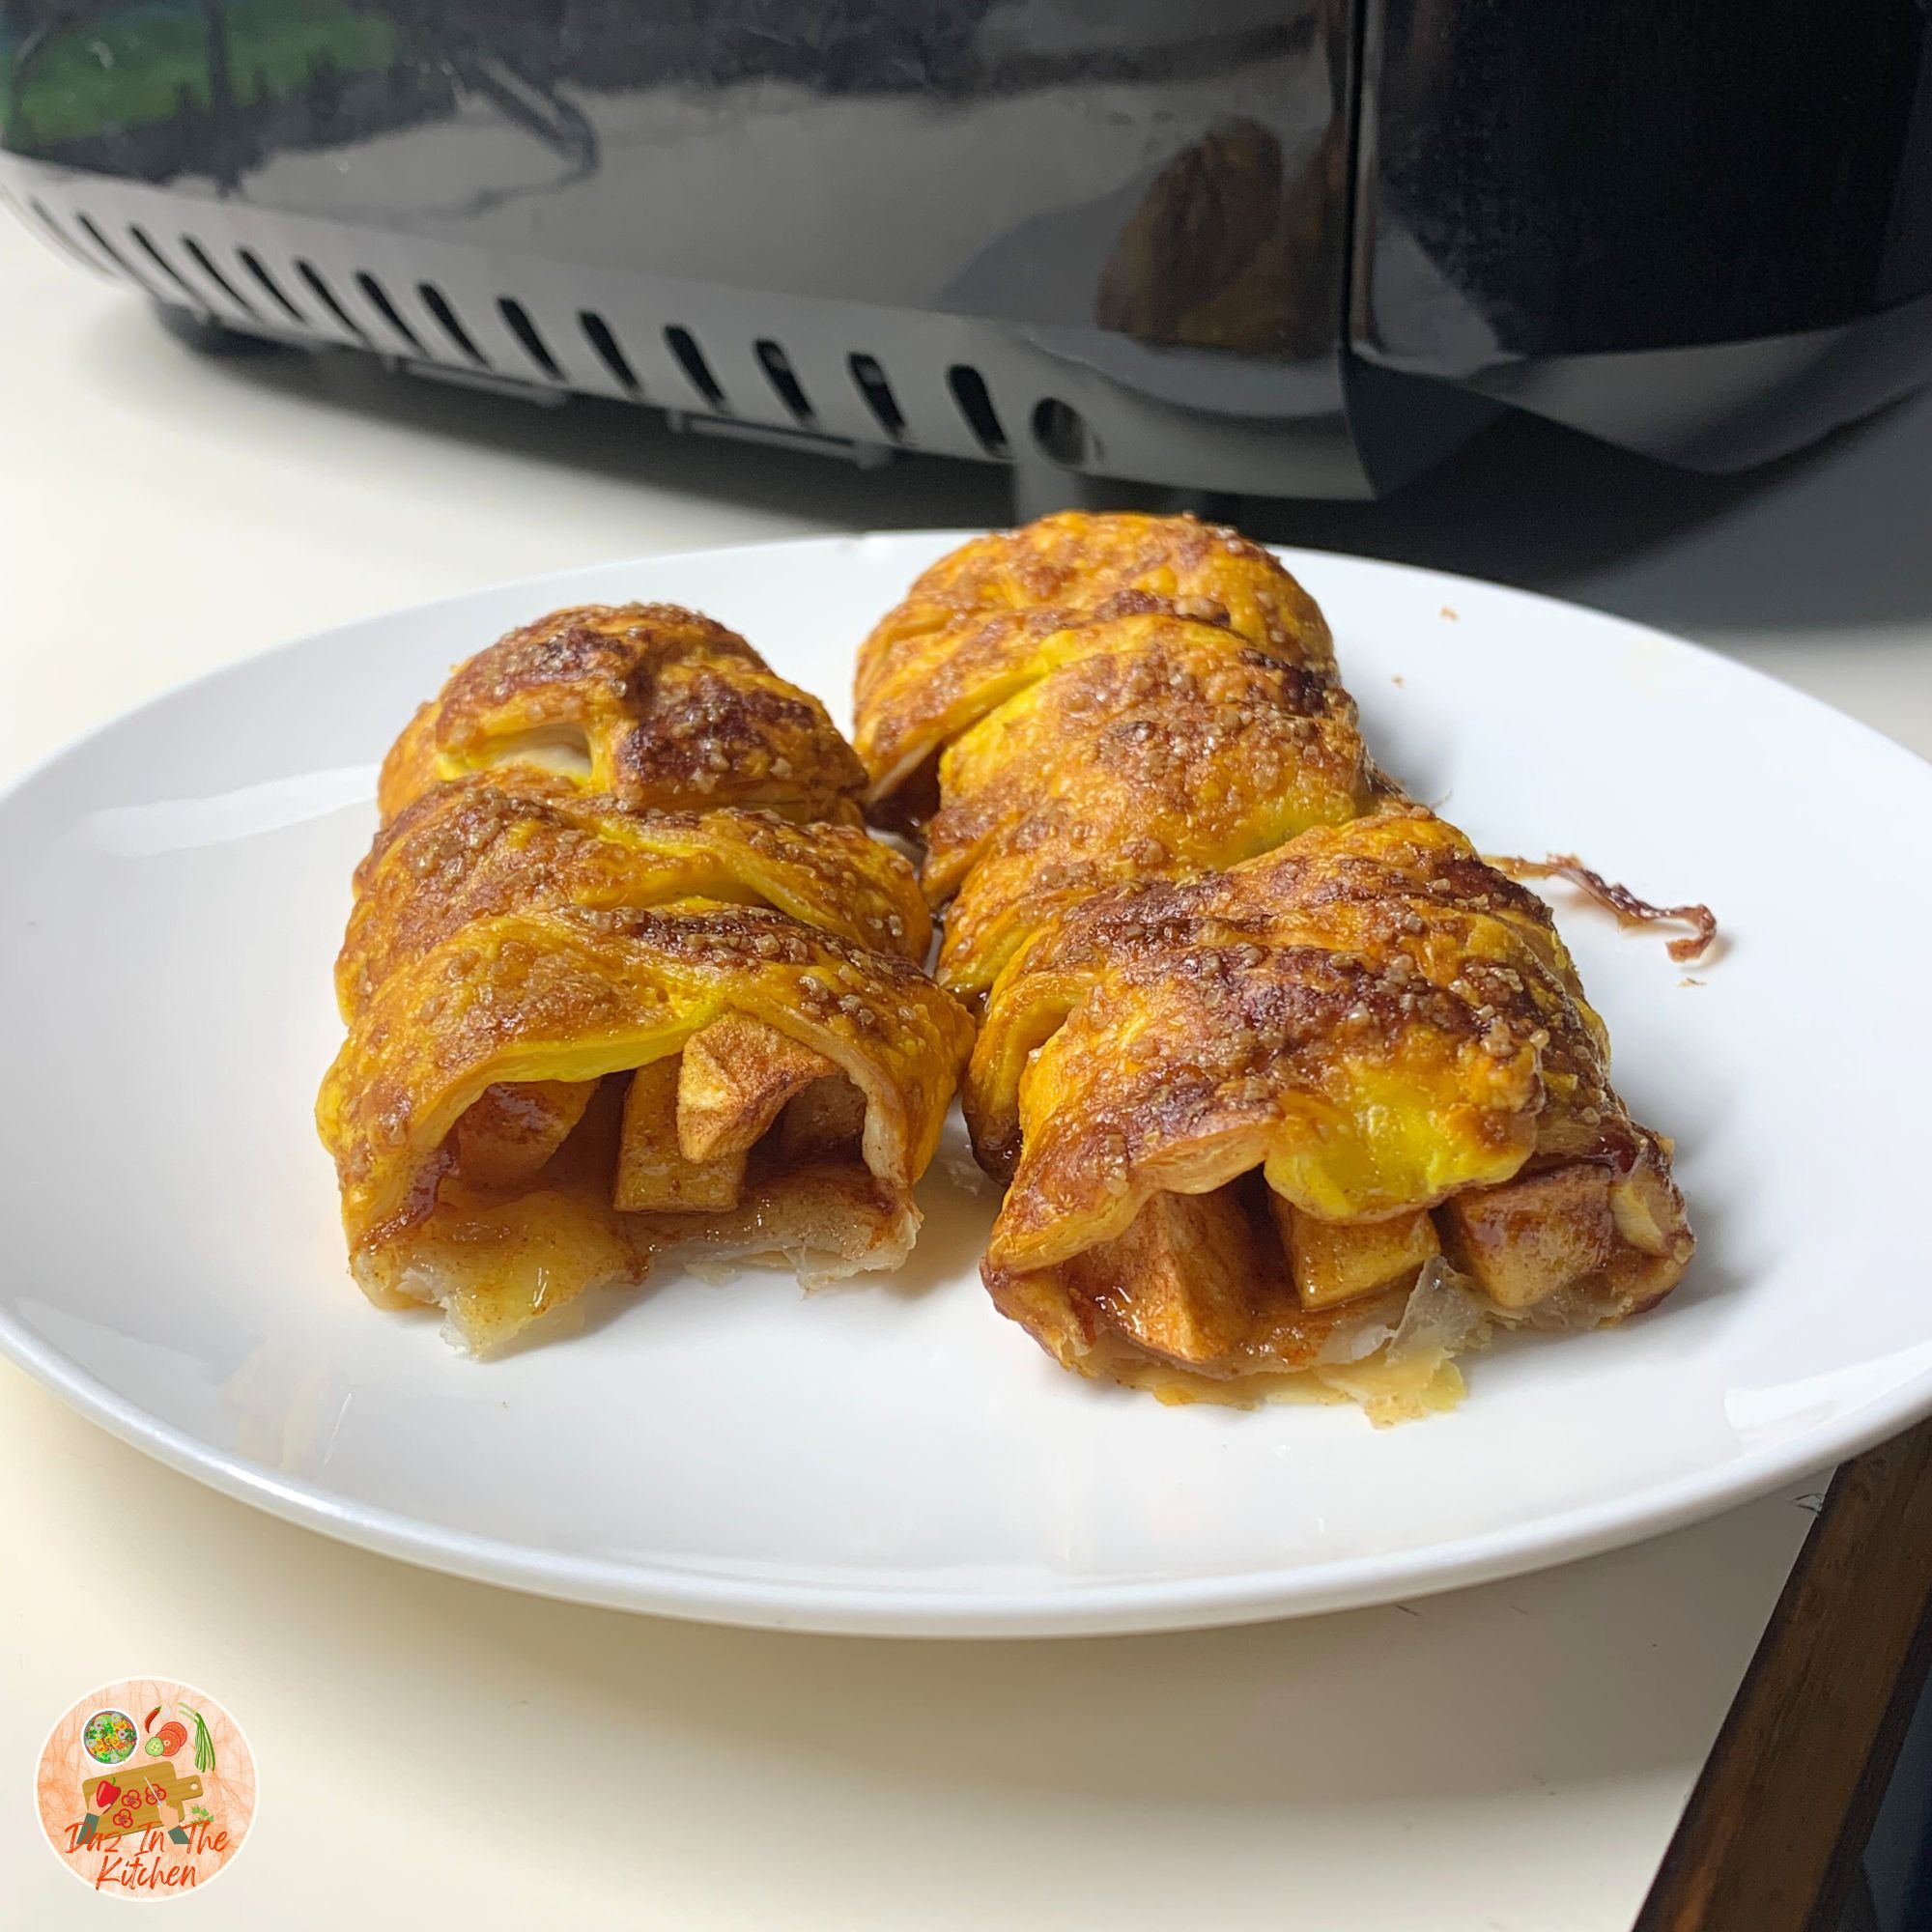
Apple pie braids

Apple pie braid Apple pie braid

I had these apples hanging around and I'm not a fan of eating raw apples. I do, however, LOVE anything baked apple. These were the result. Yum!
Tuesday, January 28, 2025

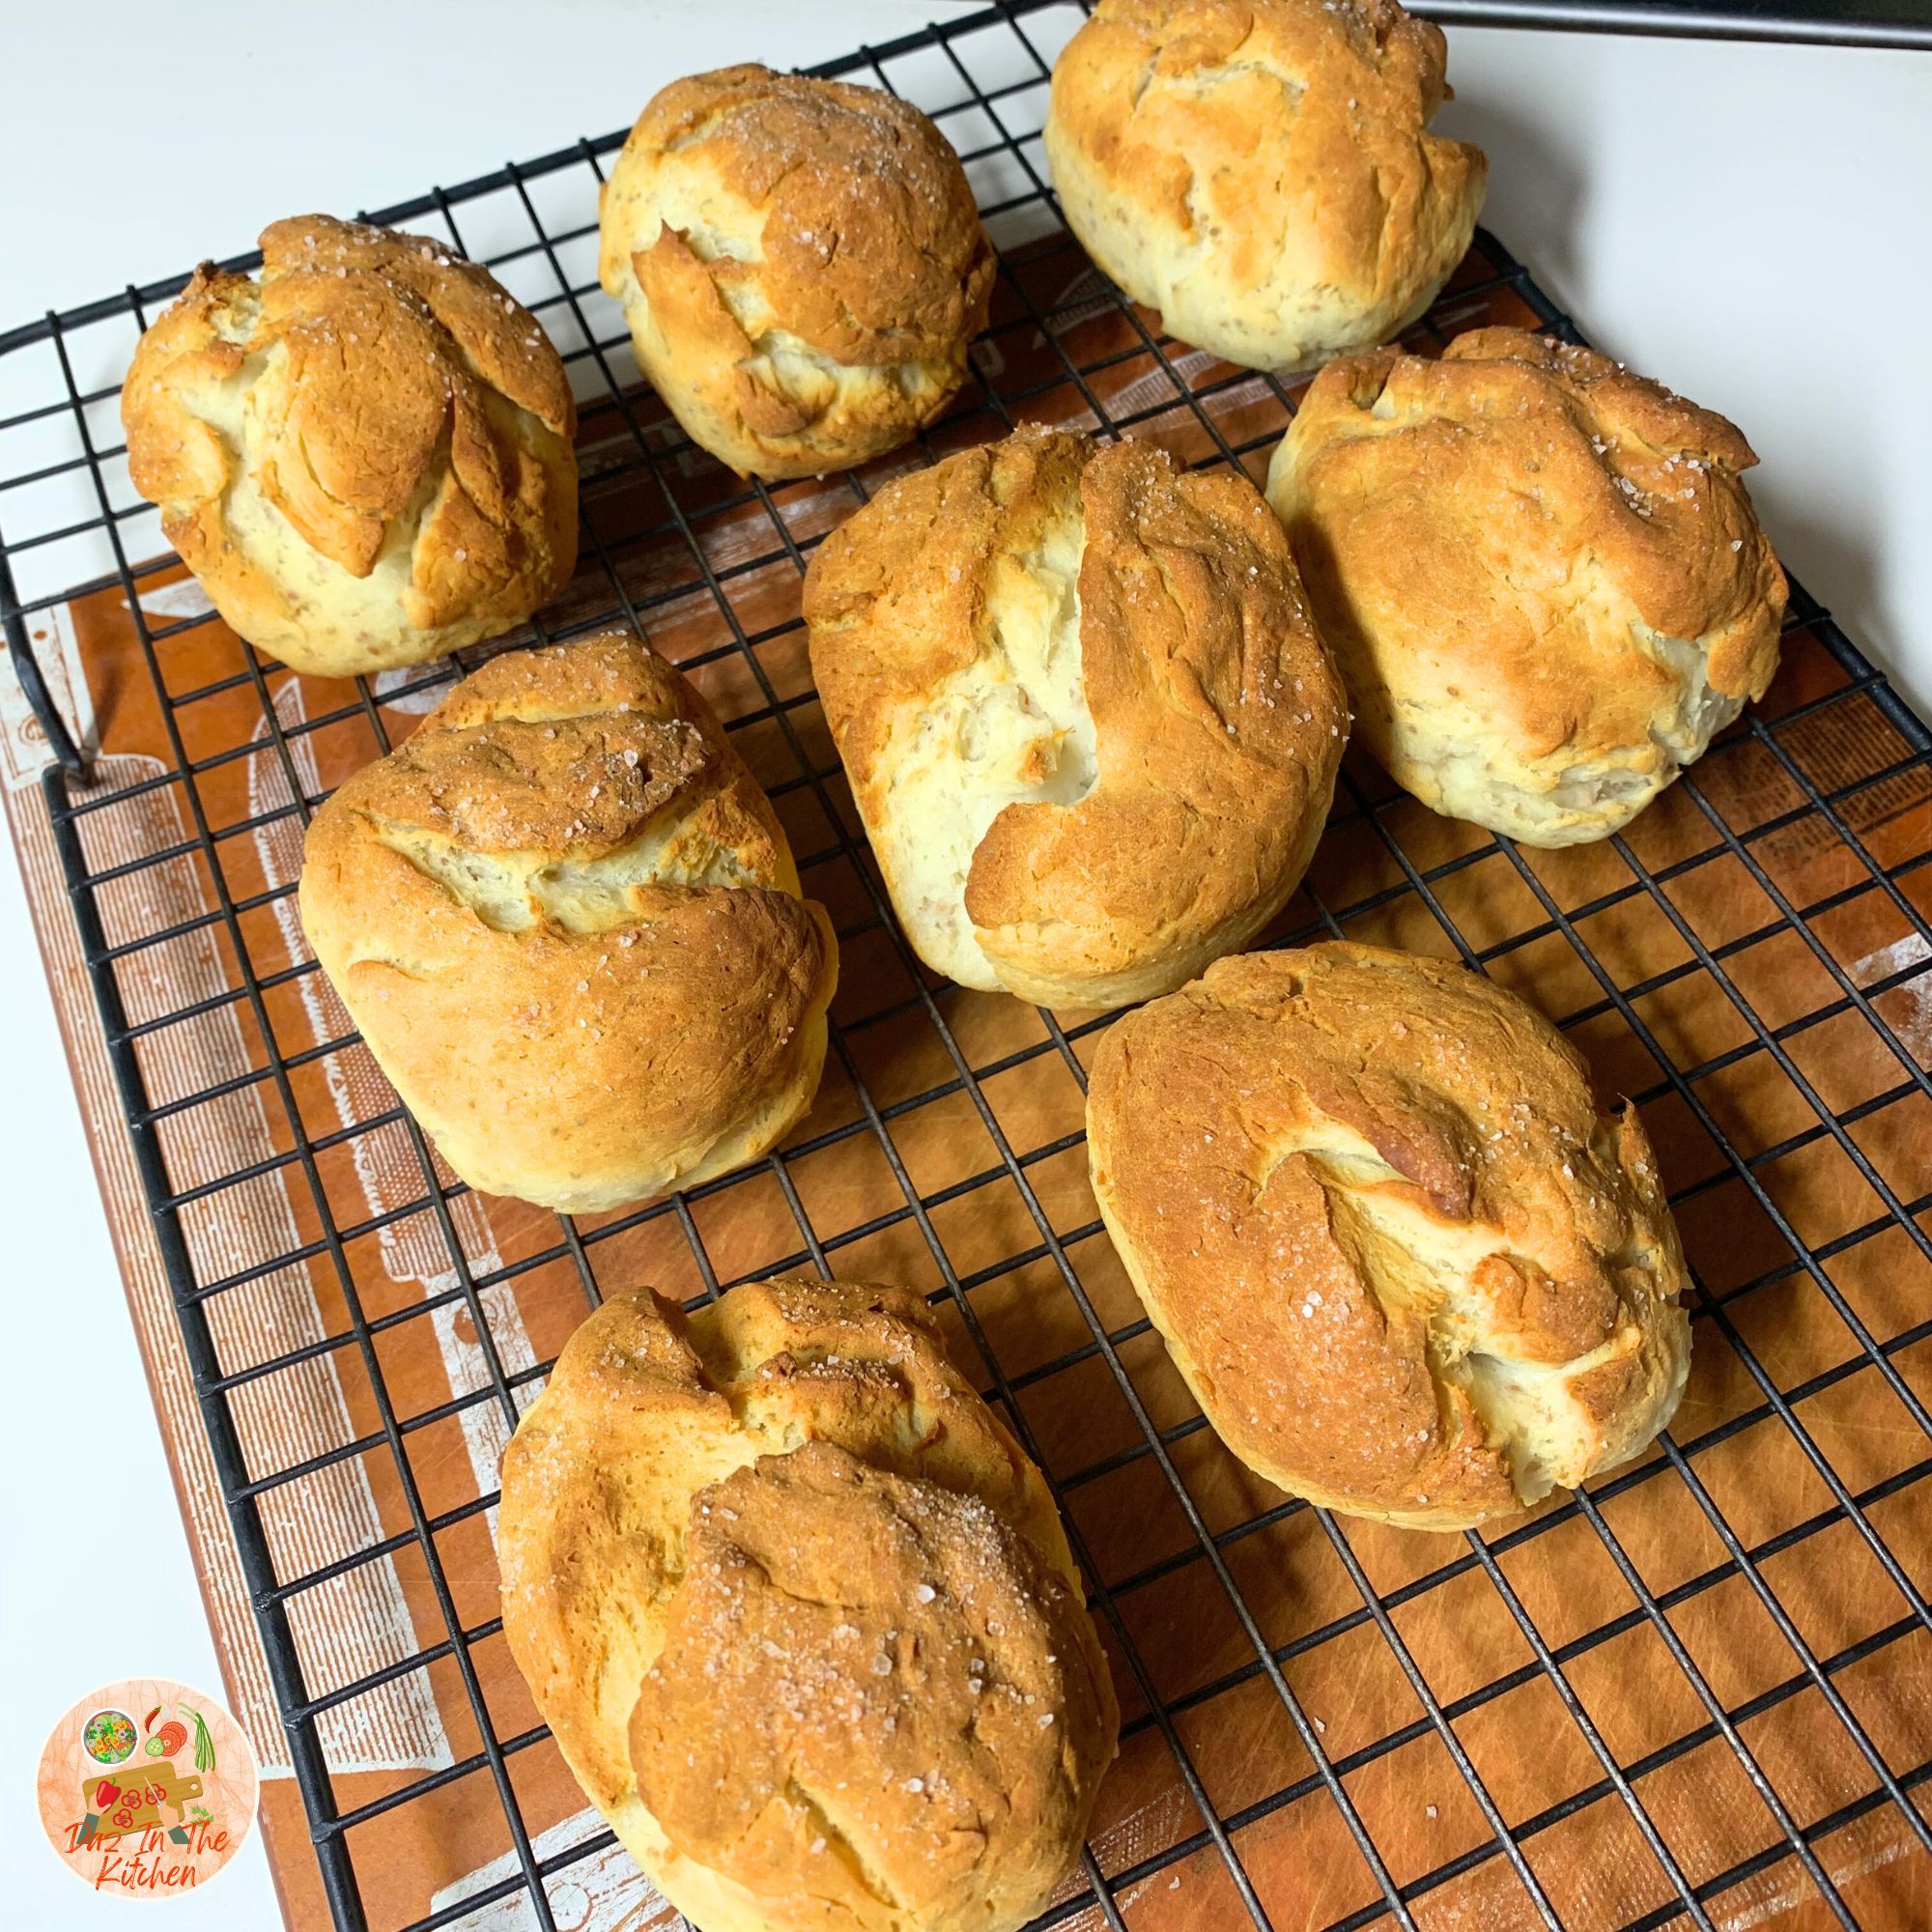
Gluten-free bread that tastes like real bread. No cardboard allowed

Gluten-free bread

I have a friend who is gluten-free. An inherited genetic immune disorder that hits when she reached her early 20s. She said to me that she'd never tried Vietnamese banh mi when she visited Vietnam because she couldn't find gluten-free baguettes there. I told her I'd experiment with some gluten-free baguette recipes and make her banh mi. For those of you who don't know, Banh mi is a Vietnamese sandwich on a crisp baguette filled with savory ingredients like pâté, meats, pickled vegetables, and fresh herbs. It's delicious.

Saturday, January 4, 2025

Focaccia charcuterie board with baked Brie

Focaccia with baked Brie Focaccia charcuterie board with baked Brie

I was influenced by social media for this recipe. I saw a quick video suggesting that I use focaccia as the board for a charcuterie board and then piling the charcuterie ingredients on top. Then tear and eat. The focaccia was amazing.

Tuesday, November 14, 2017

Apple cinnamon quinoa bake


Since we went paleo we've been having a lot of eggs for breakfast. Scrambled eggs, sweet potato hash with eggs, mini quiches, etc., so it's always nice to do something that's healthy and a break from eggs.

Wednesday, March 4, 2015

Blueberry cobbler and lemon cheesecake ... sometimes it's a bust!

I know I'm always posting about the yummy food I make and how delicious they turn out to be, but let's be frank here, not all food experiments turn out great. For me, more often than not, it is the baking or dessert dishes that turn out to be rather sad for me. I just don't do them well. I am working on it and trying more experiments and adding more to my repertoire but alas, some things are a bust!

Most recently, I had two things which I made that I was not entirely happy with. I don't think they will be keepers for me.

One of them was a cobbler. A friend of mine posted a lovely picture of a blackberry cobbler which she made with her grandson and it was a delightful family scene with the cobbler in front (looking delicious) and her grandson cute as can be in the background. He wanted "grandma time" and my lovely friend who is a wonderful baker decided they would bake together.


Her cobbler looks amazing. My cobbler looks like little blueberry turds.


I'm not too fussed about the way they looked, as I made them individually in ramekins whereas she made one huge one in a big glass bowl. The problem I had with my cobbler is that it was way too sweet. The recipe called for 1 full cup of sugar and I felt like I was literally just eating pure sugar with that much sugar in the dish. If I were to ever make this again, I will use half the sugar and see how I go with that. Of course, The Boy is also not a fan of cooked blueberries, so I don't know if I will be trying this again soon.


The other more recent disappointment was my lemon cheesecake. We were having company for dinner and I had the idea of a cheesecake for dessert. I searched the interwebs and found a lemon cheesecake recipe that I could make in the Thermomix which the poster claimed was wonderful and easy. However, at the end of the recipe, she put a disclaimer in which said:

Since I posted this recipe, some people have commented that their filling didn't set, although many others have said it worked fine.  I have no answers as to why this might have happened.  Perhaps the correct ingredients or quantities were not used?  Sometimes people substitute 'light' ingredients and expect the same result.  All I can say is I have been making this recipe of my Grandmother's since I was a teenager (over 30 years) and I have never had a problem with it. I hope it works for you.

This, of course, is not promising.

Anyway, turns out, I'm one of those people where the cheesecake didn't set properly for me. In fact, when I cut it, it just turned out to be this gooey mess with the filling spilling out of the sides. She said that I didn't use the correct ingredients or quantities, which is not true. I followed her instructions exactly and I did not substitute "light" ingredients. :-/

On top of that, what she failed to say was that this is only a half sized cheesecake, which I didn't really mind, but her recipe proportions were all wrong. The proportions she had down for the crust was not enough for the crust to reach 5cm up the side of the springform pan (my pan wasn't even that high or large) and I needed to use 1.5x portion of the crust ingredients just to get enough crust for my small 20cm springform pan.

The filling was also under proportioned, since I think I would have had to double the ingredients to get the filling to fill up my small pan. As it was, I only got half a pan of cheesecake filling and there was 2.5cm of crust sticking out the top of the cheesecake.

All that said, the filling and crust were both very tasty and it was a yummy cheesecake. It just didn't set properly and did not present well. Don't let my picture fool you, it looks really pretty in the crust but you can't tell that the filling didn't set from picture, can you? :-p

When I grumbled about the cheesecake recipe on Facebook, a foodie friend of mine made the comment that unfortunately a lot of recipes are posted untested. He and his wife are working with a chef to publish a cookbook right now and he says they test each recipe at least 3 times to make sure that they work before it goes to print. He also mentioned that Julia Childs never tested any of the recipes in her famous cookbook.

This just goes to show that there are so many variabilities when it comes to baking and desserts and these were certainly some of my #bakingfail moments. :-(

It also takes practice, I think, but there are only two of us in the house and practicing on baking and making desserts without many people to eat them would just mean my blood sugar levels will go through the roof. Not a good thing.

Anyway, that's it from me today. Just a little trip the lane where sometimes my food experiments go awry. Back to yummy (and tested) recipes time.

ps. I didn't post the recipes for the cobbler and lemon cheesecake because well, I don't feel good about posting recipes that didn't work for me and I can't say that it turned out great, but if you really want it, message me on Twitter or Facebook and I'll send it to you.


© This work is copyrighted to Invest-Ex and Destiny's Fortunes Pty Ltd

Find me around SOCIAL MEDIA:
Cooking blog: http://dazinthekitchen.blogspot.com.au/
Facebook: http://www.facebook.com/dazinthekitchen
Twitter: @langshipley https://twitter.com/langshipley
Instagram: @langshipley http://instagram.com/langshipley
Pinterest: https://pinterest.com/langshipley/
Youtube channel: http://www.youtube.com/user/langshipley
Makeup and beauty blog: http://langshipley-deannasworld.blogspot.com.au/


Thursday, July 10, 2014

Awesome carrot cake muffins ... in the Thermomix


I came across this recipe for carrot muffins a long time ago and it said it's "awesome" so it must be good, right? :-p

Anyhow, I was in the mood to bake today (my version of baking!!) and decided that carrot muffins were the way to go.

I have converted the recipe to make in the Thermomix because that's pretty much how I do all my baking, but if you don't have a Thermomix, then by all means just use the original recipe. It's very simple to do.

It's also looked like a very simple recipe, which is just the sort of recipe that I need.

Here's the converted recipe:

Ingredients:
  • 1 cup raisins
  • 2 cups warm water
  • 2 cups all purpose flour
  • 1 tablespoon baking powder
  • 2 teaspoons baking soda
  • 1 teaspoon salt
  • 1 teaspoon ground cinnamon
  • 4 eggs
  • 1 cup vegetable oil
  • 3/4 cup brown sugar
  • 3 cups shredded carrots (about 4 small carrots)
  • 1 jar Betty Crocker vanilla cream frosting

Instructions:
  • Combine raisins and water in a small bowl. Let soak for 15 minutes. Drain raisins of water, discard water, set raisins aside.
  • Grate carrots in Thermomix, speed 5 for 7 seconds - you want the carrots to still be quite chunky but small chunks, use your judgement about the size! Remove from Thermomix.
  • Put eggs, oil and brown sugar into the Thermomix. Speed 7 for 5 seconds.
  • Sift flour, baking powder, baking soda, salt and cinnamon into Thermomix. Speed 7 for 5 seconds. Make sure it is mixed well. If not, give it another 3 seconds.
  • Put in carrots and drained raisins. Reverse speed 7 for 15 seconds. Open lid, stir mix things around and make sure all the carrots and raisins are mixed through the batter. Reverse speed 7 for 20 seconds to make sure it is thoroughly mixed through.
  • Preheat oven to 160°C.
  • Spray muffin tray with oil. Pour mixture into muffin tray and bake for 30 minutes or until muffins are ready (they should come out clean when you stick a knife in it).
  • Repeat baking until all batter is gone.
  • Let muffins cool for 30 minutes and then frost the muffins with the vanilla cream frosting.

Let me just say that this recipe is super simple, :-) which fits right into my criteria of being easy to make. If you have been following me for any length of time, you will know that my baking skills are very limited, and so far has been limited to banana bread muffins and zucchini muffins. I'm pleased to have this to add to my very small repertoire.

I didn't have any raisins but had some sultanas in the pantry, so I used those instead.

I might have ended up with 4 cups of carrots instead of 3 because I was not sure of the quantity and used too many carrots.

The apartment smelled absolutely amazing while baking this. I could smell the cinnamon in particular.

I couldn't wait the full 30 minutes because I was so anxious to try it, so I only waited about 3 minutes, but that was for only 1 of the muffins that I just had to try immediately while it was still warm out of the oven. I love trying muffins while they are still warm out of the oven.

And the verdict? Delicious!!! The muffins were so light and fluffy and really tasty. They were great with the frosting too.

Happy eating.


© This work is copyrighted to Invest-Ex and Destiny's Fortunes Pty Ltd

Find me around SOCIAL MEDIA:
Cooking blog: http://dazinthekitchen.blogspot.com.au/
Facebook: http://www.facebook.com/dazinthekitchen
Twitter: @langshipley https://twitter.com/langshipley
Instagram: @langshipley http://instagram.com/langshipley
Pinterest: https://pinterest.com/langshipley/
Keek: http://www.keek.com/langshipley
Youtube channel: http://www.youtube.com/user/langshipley
Makeup and beauty blog: http://langshipley-deannasworld.blogspot.com.au/


Sunday, April 21, 2013

Zucchini bread ... in the Thermomix


I was given a HUGE zucchini by my boss recently and decided that I would make some zucchini bread and zucchini soup out of it. There was so much zucchini that it really was a several recipe thing to get through it all. The zucchini bread, I could take in to work and let the boys have some as well.


I have never made zucchini bread before, so I decided to look up the interwebs for a recipe that was easy to follow and "Deanna proof" meaning "easy for dumb people who can't bake to make". :-)


I found this recipe and thought it looked straightforward enough to follow. And to make it even simpler for myself, I had my friend convert it to a Thermomix recipe for me.

Here is what the RECIPE that I used looked like:


Ingredients:
  • 3 eggs
  • 235 ml vegetable oil
  • 400g white sugar (if you like it sweet)
  • 225g grated zucchini
  • 2 teaspoons vanilla essence
  • 375g plain flour
  • 1 heaped teaspoon ground cinnamon
  • 1 teaspoon baking powder
  • 1 teaspoon salt
  • 1/3rd cup chopped walnuts

Instructions:
  • Preheat oven to 165 degrees . Grease two 20x10cm loaf tins with butter.
  • Chop up walnuts in Thermomix, spped 6, 3 - 5 seconds, remove
  • Chop up zucchini in Thermomix, speed 5, 2 seconds, remove
  • In Thermomix, beat eggs until light and frothy, speed 6, 3 - 5 seconds
  • Mix in oil and sugar. Stir in zucchini and vanilla. Reverse speed 6, 3 - 5 seconds
  • Combine flour, cinnamon, soda, baking powder, salt and nuts. Reverse speed 6, 3 - 5 seconds
  • Make sure everything is mixed properly, if not go again, reverse speed 6, 3 - 5 seconds
  • Divide batter into prepared tins.
  • Bake for 60 to 70 minutes, or until done.

My measurement of the walnuts were a little less accurate and I used 1/2 cup of walnuts instead of 1/3 cup of walnuts. Other than that, I pretty much followed the recipe exactly. (I have learned that with baking, exactness is a virtue!)

I also cooked mine in a muffin tray so that they were individual zucchini bread muffins. I find those easier to store and eat. I cooked them in the oven at 160 degrees C for 40 minutes instead of the recommended 60 - 70 minutes for the loaf.

And the verdict?? OMG!!! The zucchini bread was delicious. I'm definitely making this again, even more often than the banana bread muffins that I make, which we love. The Boy even said that this was better than the banana bread muffins.

© This work is copyrighted to Invest-Ex and Destiny's Fortunes Pty Ltd

Find me around SOCIAL MEDIA:
Facebook: http://www.facebook.com/dazinthekitchen
Twitter: https://twitter.com/langshipley
Instagram: langshipley
Pinterest: https://pinterest.com/langshipley/


Sunday, August 19, 2012

My best banana bread yet ... in the Thermomix


Each weekend, I buy bananas for the following week. I usually eat two bananas each day, one for breakfast and one for morning tea, or if I don't feel like it at morning tea, then I save it for afternoon tea.

This week, in my zeal to buy bananas, I did not count how many I needed and ended up buying too many. 4 too many to be exact.

I like my bananas still slightly green and once it starts to have brown spots on them, they become too ripe for me to eat. This happened this week on Thursday, so by Friday morning, I could not eat my remaining bananas.

Anyway, I have previously posted a banana bread recipe which I thought turned out OK but to be honest, I suck at baking and that was possibly the third or fourth banana bread recipe I had tried and while it was quite good, it wasn't perfect. Problem is, because I suck as baking, I don't actually know how to make the recipe better.

This time I asked a girlfriend if she had a good recipe and she pointed me to this one which she said she had made and turned out well. Now, I take that with a pinch of salt because she's a FANTASTIC baker and makes the most delicious baked goods. In fact, she's even thinking of starting her own bakery - she's THAT good!

After I looked at the recipe, I thought, what if I made this in the Thermomix? So I rang, my other girlfriend, the one who is a wizz with her Thermomix (she's my go to girl whenever I have a Thermomix question) and asked her how to change the recipe into a Thermomix one.

After about 20 minutes on the phone, this is the RECIPE that I ended up with:

Ingredients:
  • 1/2 cup butter softened
  • 1 cup sugar 250g
  • 2 eggs, beaten
  • 4 bananas, broken into small pieces
  • 1 1/2 cups flour
  • 1 teaspoon baking soda
  • 1/2 teaspoon salt
  • 1/2 teaspoon vanilla

Directions:
  • Add sugar and grind on speed 9 for 5 - 10 seconds
  • Cream together butter and sugar and eggs on speed 7 for 8 seconds
  • Add crushed bananas and vanilla
  • Sift together flour, soda and salt and add to bowl
  • Then mix on speed 6 for 10 seconds
  • Pour into greased and floured loaf pan
  • Bake at 160 degrees Celsius for 40 minutes in a greased loaf tin, then check every 10 minutes until cooked
  • *Cook only for 30 minutes if in muffin tray

This is baking, so I'm paranoid and I did not do anything different.


That said, instead of baking everything in a loaf tin, I put the banana bread batter into individual serves in little muffin trays so that I would have single serve banana breads. This recipe made 8 mini banana breads.

This recipe turned out to be by far the best of all my previous attempts. The Boy loved it and his words were "The other ones weren't bad, by this is a lot, lot, lot better". I'm happy when he's happy. :-) I guess this will be the recipe that I am going to be using moving forward.

© This work is copyrighted to Invest-Ex and Destiny's Fortunes Pty Ltd

Monday, February 13, 2012

Blueberry buttermilk breakfast cake


We didn't do anything exciting for breakfast today, just the usual oatmeal, however, we did such a big breakfast yesterday, there's plenty to post on that.

Look at this lovely blueberry cake. It tastes wonderful too - not too sweet and just a little tangy and fruity from the blueberries. It was a hit with the breakfast guests. :-)

I got the recipe from Pinterest and here's a link to it.

Here's the RECIPE if you can't be bothered to look at the link:

Ingredients:
  • ½ cup unsalted butter, room temperature
  • 2 tsp. lemon zest or more — zest from 1 large lemon
  • 7/8 cup* + 1 tablespoon sugar**
  • 1 egg, room temperature
  • 1 tsp. vanilla
  • 2 cups flour
  • 2 tsp. baking powder
  • 1 tsp. kosher salt
  • 2 cups fresh blueberries
  • ½ cup buttermilk

Note:
  • 7/8 cup = 3/4 cup + 2 tablespoons
  • ** This 1 tablespoon is for sprinkling on top

Instructions:
  • Preheat the oven to 350ºF/170ºC. Cream butter with lemon zest and 7/8 cup of the sugar until light and fluffy.
  • Add the egg and vanilla and beat until combined. Meanwhile, toss the blueberries with ¼ cup of flour, then whisk together the remaining flour, baking powder and salt.
  • Add the flour mixture to the batter a little at a time, alternating with the buttermilk. Fold in the blueberries.
  • Grease a 9-inch square baking pan (or something similar) with butter or coat with non-stick spray. Spread batter into pan. Sprinkle batter with remaining tablespoon of sugar. Bake for 35 minutes. Check with a toothpick for doneness. If necessary, return pan to oven for a couple of more minutes. (Note: Baking for as long as 10 minutes more might be necessary.) Let cool at least 15 minutes before serving.

The only thing I did differently is that instead of sugar I used a sugar replacement. I used the Hermesetas Granulated with Fructofibres®. It's great 'cos it is a 1 to 1 measure between it and regular sugar, which makes it a lot easier to measure for baking. I think using this made the cake less sweet.

One other thing I noticed too was the the amount of butter, sugar and lemon zest to cream was too small for my Kitchenaid, so it didn't work very well. I think next time I do this, I will have to do it by hand and then add it into the Kitchenaid when I'm ready to add the flour and buttermilk to for mixing.

Did I mention it was yummy? :-)

© This work is copyrighted to Invest-Ex and Destiny’s Fortunes Pty Ltd

Sunday, February 12, 2012

Breaking out the Kitchenaid


We've got company for breakfast coming over. I've decided to cook up a storm.

Here's what's on the menu:


The Kitchenaid was being used for the Buttermilk-Blueberry Breakfast Cake.

© This work is copyrighted to Invest-Ex and Destiny’s Fortunes Pty Ltd

Thursday, February 9, 2012

Frosting ze carrot cake


This is not terribly exciting. I put vanilla cream frosting on top of the carrot cake because I was told that carrot cake is not carrot cake without frosting. :-)

© This work is copyrighted to Invest-Ex and Destiny’s Fortunes Pty Ltd

Saturday, January 28, 2012

Happy Chocolate Cake Day!!!

In the continuing spirit of rather odd holidays (which I adore and totally works with my sense of humor) today is Chocolate Cake Day.


It is just about one of the most perfect holidays that anyone can conceive, in my mind, especially for the chocolate lover in me.


Here is what the Internet has to say about it:

When : Always January 27th
Chocolate Cake Day is a a chocolate lovers delight, and a day to eat cake. Why this a day to "bake your chocolate cake....and eat it, too!"
On this day, a white or yellow cake will not do. Nor, will part chocolate, part white suffice. It must be chocolate, all chocolate. You can make milk chocolate, dark chocolate, fudge, or any other type of chocolate cake.
The only reference to Chocolate Day on the Internet is from Ecard and calendar websites. This might lead you to conclude that this as a day for(and by) the Ecard companies. But, we know better. This day is for you, and all chocolate lovers.
There are three objectives of Chocolate Cake Day: To bake a chocolate cake. To decorate a chocolate cake. And, to eat a chocolate cake. Of course, if you are to busy to bake or decorate a cake, then just eating a chocolate cake will certainly do!  

And I certainly cannot leave you without a recipe to a lovely chocolate cake just in case you feel inspired to bake on this most appropriate of days. :-)

Here's a RECIPE for a lovely, rich, chocolate cake:

Ingredients (serves 8):
  • 200g good-quality dark chocolate, roughly chopped
  • 250g unsalted butter, softened
  • 1 1/2 cups (330g) caster sugar
  • 1 tsp vanilla extract
  • 4 eggs
  • 2 cups (300g) plain flour
  • 1 tsp baking powder
  • 1/2 tsp bicarbonate of soda
  • 1/2 cup almond meal
  • 1/3 cup good-quality cocoa powder, sifted

Instructions:
  • Preheat the oven to 160°C. Grease and line the base and sides of a 23cm springform cake pan.
  • Place chocolate and 60g of the butter in a heatproof bowl over a pan of gently simmering water (don't let the bowl touch the water). Stir occasionally until melted, then set aside to cool.
  • Place the sugar and remaining butter in an electric mixer and beat until pale and fluffy, then beat in the vanilla extract. Add the eggs one at a time, beating after each addition, until just combined. Beat in the cooled chocolate mixture.
  • In a separate bowl, sift together the flour, baking powder and bicarbonate, then add the almond meal. In a third bowl, combine the cocoa powder and 2/3 cup (160ml) of boiling water. Gradually fold the dry ingredients into the chocolate mixture, alternating with the cocoa mixture, until all the ingredients are combined.
  • Pour mixture into prepared pan and bake in the oven for 1 hour or until a skewer inserted into the centre comes out clean. Remove from the oven, allow to cool slightly, then remove the collar of the pan and cool completely.
  • If you wish to fill the cake, carefully cut it into 3 layers horizontally. Place the bottom layer on a serving plate, then use a spatula to spread with half the whipped chocolate filling. Place the middle layer on top, and spread with remaining filling. Place the top slice onto the cake and carefully pour over the glaze, letting it drip down the sides. Allow half an hour for the glaze to set before cutting.


I never do anything different when it comes to baking because I find it always helps (me) to follow the instructions exactly. The few times I've messed around with the recipe things have not turned out so well.

Yum ... chocolate ....


© This work is copyrighted to Invest-Ex and Destiny’s Fortunes Pty Ltd

Thursday, October 27, 2011

Not cooking, but baking ... Banana Bread

The Boy has been asking for banana bread for a while now and I finally did something about it. The journey to banana bread is a long and windy one. :-)


For starters, bananas are really, really expensive here due to the floods that we had from Cyclone Yasi. The cost of bananas rose to about $15 per kilo. It's back down a bit now but even then, the bananas for the banana bread cost $10.78. To say The Boy was shocked was a surprise.

Then we went away for a month to the US and have been back and forth between The House and The Apartment since.

For those who know me, they will know I do not like baking. All that measuring, all that exactness. Plus, if you've read my other posts, you know I like to improvise and adjust things according to taste. That can't be done with baking. Bah!

Anyhow, being the good little wife that I am (ha ha ha ...) I looked up a recipe for banana bread and made it for the boy.

The first time was a bust because the bananas were not ripe enough. Don't get me wrong, it rose beautifully, smelled wonderful and tasted lovely, but just not banana-ey (is there such a word?) enough. We ate it anyway. It was lovely warmed up with gobs and gobs of butter.

Take two was much better. I had bought the bananas and I carefully nurtured them to the point of extreme mushy ripeness. They were so gross! but very good for baking. :-)

I woke up early this morning and The Boy has gone out for a long walk. I decided to bake and have the banana bread ready for breakfast when he got home from his walk. Ah ... fresh banana bread for breakfast!

Here's the RECIPE I used:

Ingredients:
  • 125 grams Butter chopped and soft
  • 180 grams Dark Brown Sugar
  • 350 grams ripe bananas
  • 2 eggs
  • 1 teaspoon vanilla extract
  • 1 teaspoon ground cinnamon sugar
  • 250 grams plain flour
  • 1 teaspoon baking powder
  • 3/4 teaspoon bicarb soda
  • 3 tablespoon WARM milk

Instructions:
  • Prehead oven to 180dC
  • Grease a bread tin and line it with baking paper
  • Then, cream butter & sugar in a mixer, then scrape down sides
  • Add all other ingredients and mix until well mixed
  • Pour into bread tin and bake for 55 minutes or until a cake skewer comes out clean

The only thing I have done differently is that I checked the banana bread regularly before the 55 minutes was up - once at 30 minutes, then again at 45 minutes because my oven runs hot. At 30 minutes, it was quite brown on top, but split and gooey down the middle. At 45 minutes, it was almost done, so I left it for a few more minutes.

The Apartment smelled wonderful.

Are you a fan of banana bread or even baking in general? What's your favorite baked good that you can never resist when you see it in a store? Are you one to indulge or do you have tons of self control?


© This work is copyrighted to Invest-Ex and Destiny’s Fortunes Pty Ltd